Panasonic PVGS34PKG Digital Video Camera - Page 10
Standard Accessories, Parts Identification And Handling, Before Using, Setup] >>, Demo Mode]
 |
View all Panasonic PVGS34PKG manuals
Add to My Manuals
Save this manual to your list of manuals |
Page 10 highlights
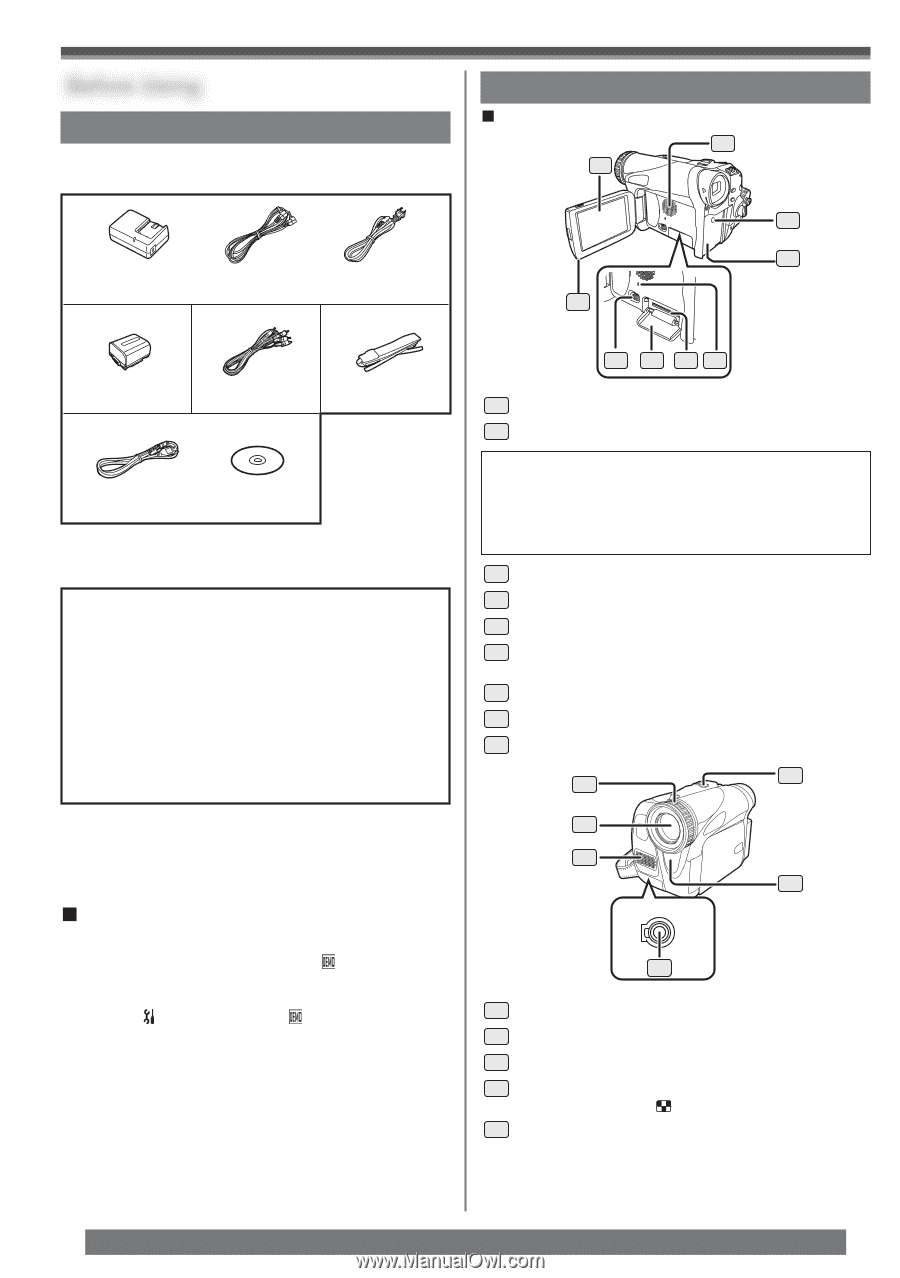
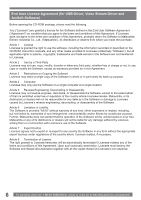
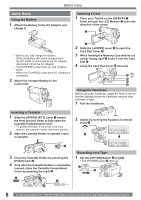
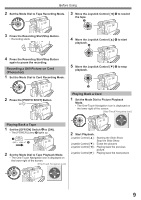
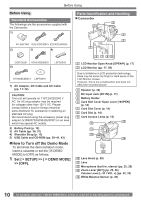
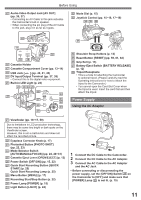
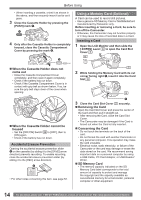
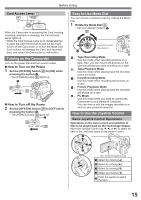
Before Using Before Using Standard Accessories The followings are the accessories supplied with the Camcorder. 1) PV-DAC14D K2GJ2DC00015 K2CA2CA00025 2) 3) 4) Parts Identification and Handling „ Camcorder 3 2 4 5 1 CGR-DU06 5) K2KC4CB00022 LSFC0018 K1HA05CD0013 LSFT0619 1) AC Adaptor, DC Cable and AC Cable (pp. 11~12) CAUTION: This unit will operate on 110/120/220/240 V AC. An AC plug adaptor may be required for voltages other than 120 V AC. Please contact either a local or foreign electrical parts distributor for assistance in selecting an alternate AC plug. We recommend using the accessory power plug adaptor (VJSS0070/KZDB4ZE00001) in an area which has special AC outlets. 2) Battery Pack (p. 12) 3) AV Cable (pp. 36, 37) 4) Shoulder Strap (p. 13) 5) USB Cable and CD-ROM (pp. 39~41, 43) „How to Turn off the Demo Mode To terminate the demonstration mode, insert a cassette or set the [ DEMO MODE] to [OFF] as follows. 1 Set [ SETUP] >> [ DEMO MODE] >> [OFF]. 6 7 89 1 LCD Monitor Open Knob [OPEN▼] (p. 17) 2 LCD Monitor (pp. 17, 59) Due to limitations in LCD production technology, there may be some tiny bright or dark spots on the LCD Monitor screen. However, this is not a malfunction and does not affect the recorded picture. 3 Speaker (p. 32) 4 DC Input Jack [DC IN] (p. 11) 5 Battery Holder 6 Card Slot Cover Open Lever [◄OPEN] (p. 14) 7 Card Slot Cover (p. 14) 8 Card Slot (p. 14) 9 Card Access Lamp (p. 15) 10 13 11 12 14 A/V 15 10 Lens Hood (p. 59) 11 Lens 12 Microphone (built-in, stereo) (pp. 25, 28) 13 Zoom Lever [W/T] (pp. 25, 26) Volume Lever [- / VOL +] (pp. 32, 33) 14 White Balance Sensor (p. 30) 10 For assistance, please call : 1-800-211-PANA(7262) or, contact us via the web at: http://www.panasonic.com/contactinfo
-
 1
1 -
2
-
3
-
4
-
 5
5 -
 6
6 -
 7
7 -
 8
8 -
 9
9 -
 10
10 -
 11
11 -
 12
12 -
 13
13 -
 14
14 -
 15
15 -
16
-
17
-
18
-
19
-
20
-
21
-
22
-
23
-
24
-
25
-
26
-
27
-
28
-
29
-
30
-
31
-
32
-
33
-
34
-
35
-
36
-
37
-
38
-
39
-
40
-
41
-
42
-
43
-
44
-
45
-
46
-
47
-
48
-
49
-
50
-
51
-
52
-
53
-
54
-
55
-
56
-
57
-
58
-
59
-
60
-
61
-
62
-
63
-
64
-
65
-
66
-
67
-
68
-
69
-
70
-
71
-
72
 |
 |