Panasonic PVGS34PKG Digital Video Camera - Page 17
USING THE MENU SCREEN, Closing the LCD Monitor, To Adjust, Adjusting Brightness and Color Level
 |
View all Panasonic PVGS34PKG manuals
Add to My Manuals
Save this manual to your list of manuals |
Page 17 highlights
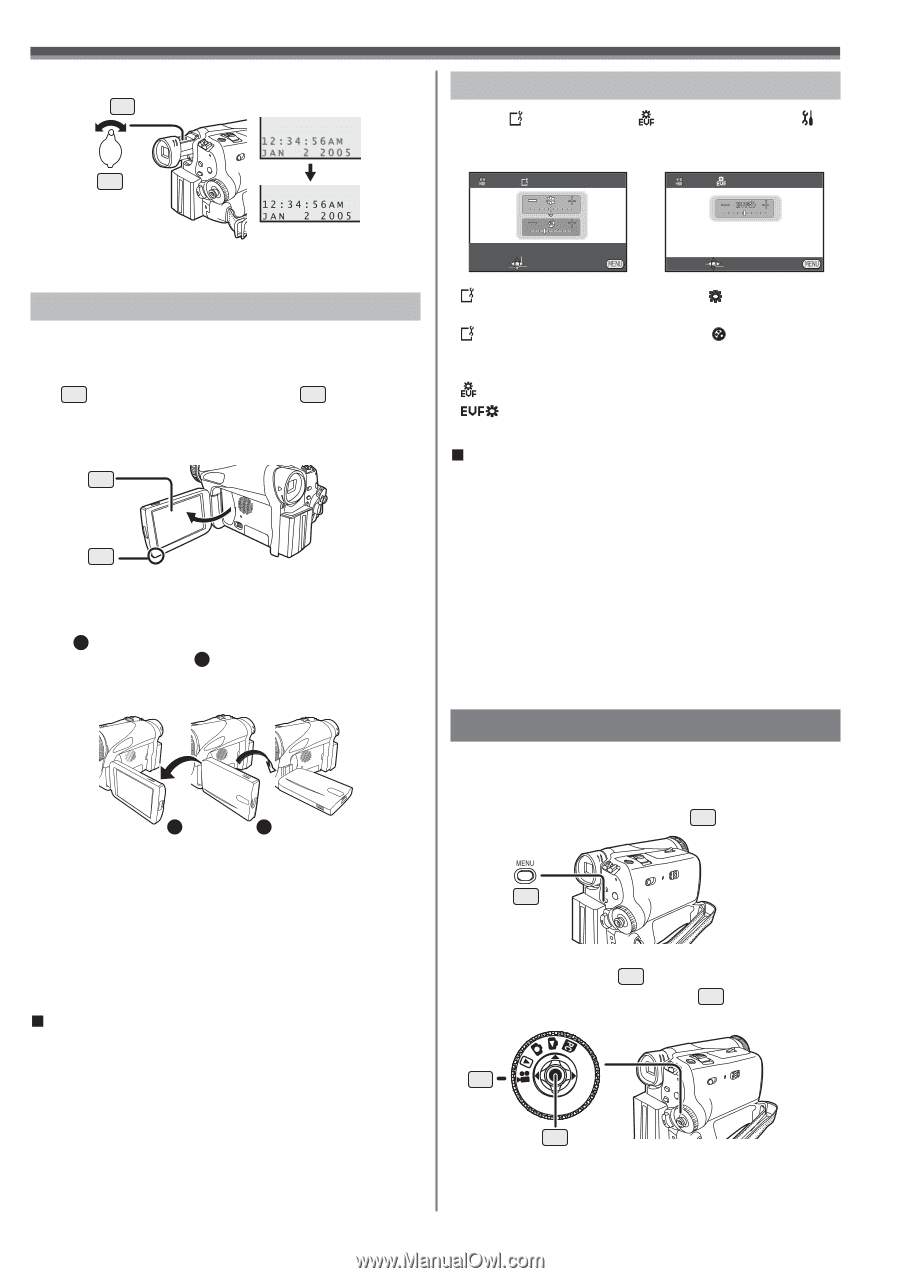
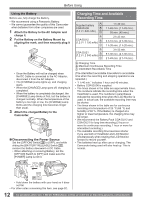
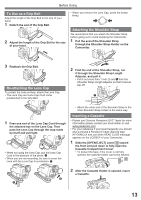
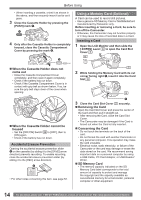
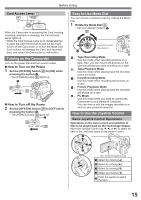
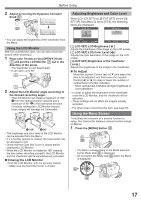
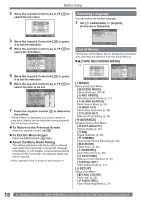
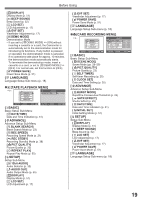
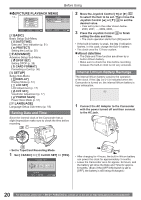
Before Using 2 Adjust by turning the Eyepiece Corrector Knob 22 . 22 Adjusting Brightness and Color Level When [ LCD SET] or [ EVF SET] on the [ SETUP] Sub-Menu is set to [YES], the following items are displayed. LCD SET EVF SET • You can adjust the brightness of the Viewfinder from the Menu. Using the LCD Monitor With the LCD Monitor open, you can also record the picture while watching it. 1 Place your Thumb on the [OPEN▼] Knob 1 and pull the LCD Monitor 2 out in the direction of the arrow. • The Viewfinder is now deactivated. • It can open up to 90°. 2 1 2 Adjust the LCD Monitor angle according to the desired recording angle. • The LCD Monitor can rotate a maximum of 180° 1 from the vertical position upwards and a maximum of 90° 2 to the downward direction. Forcefully rotating the LCD Monitor beyond these ranges will damage the Camcorder. 1 180° 2 90° • The brightness and color level of the LCD Monitor can be adjusted from the Menu. • If it is forcibly opened or rotated, the Camcorder may be damaged or fail. • Check that the Card Slot Cover is closed before closing the LCD Monitor. • When the LCD Monitor is rotated by 180° towards the lens (when recording yourself), the LCD Monitor and the Viewfinder will be simultaneously activated. „ Closing the LCD Monitor Push the LCD Monitor until it is securely locked. • Make sure the Card Slot Cover is closed. SET SETUP ENTER EXIT SET ENTER EXIT [ LCD SET] LCD Brightness [ ] Adjusts the brightness of the image on the LCD screen. [ LCD SET] LCD Color Level [ ] Adjusts the color saturation of the image on the LCD screen. [ EVF SET] Brightness of the Viewfinder [ ] Adjusts the brightness of the image in the Viewfinder. „ To Adjust Move the Joystick Control [▲] or [▼] and select the item to be adjusted, and then move the Joystick Control [◄] or [►] to raise or lower the number of vertical bars in the Bar Indication. • More vertical bars indicates stronger brightness or color saturation. • In order to adjust the brightness of the Viewfinder, close the LCD Monitor, and the Viewfinder will be activated. • These settings will not affect the images actually recorded. • For other notes concerning this item, see page 59. Using the Menu Screen To facilitate the selection of a desired function or setup, this Camcorder displays various function setups on Menus. 1 Press the [MENU] Button 28 . 28 • The Menu corresponding to the Mode selected by the Mode Dial 32 is displayed. • Do not switch the Mode Dial 32 when the Menu is displayed. 32 33 17
-
 1
1 -
2
-
3
-
4
-
5
-
6
-
7
-
8
-
9
-
10
-
11
-
 12
12 -
 13
13 -
 14
14 -
 15
15 -
 16
16 -
 17
17 -
 18
18 -
 19
19 -
 20
20 -
 21
21 -
 22
22 -
23
-
24
-
25
-
26
-
27
-
28
-
29
-
30
-
31
-
32
-
33
-
34
-
35
-
36
-
37
-
38
-
39
-
40
-
41
-
42
-
43
-
44
-
45
-
46
-
47
-
48
-
49
-
50
-
51
-
52
-
53
-
54
-
55
-
56
-
57
-
58
-
59
-
60
-
61
-
62
-
63
-
64
-
65
-
66
-
67
-
68
-
69
-
70
-
71
-
72
 |
 |