Panasonic SDRS150 SDRS150 User Guide - Page 30
ADJUSTING LCD MONITOR, Changing the date and time display style
 |
UPC - 037988254460
View all Panasonic SDRS150 manuals
Add to My Manuals
Save this manual to your list of manuals |
Page 30 highlights
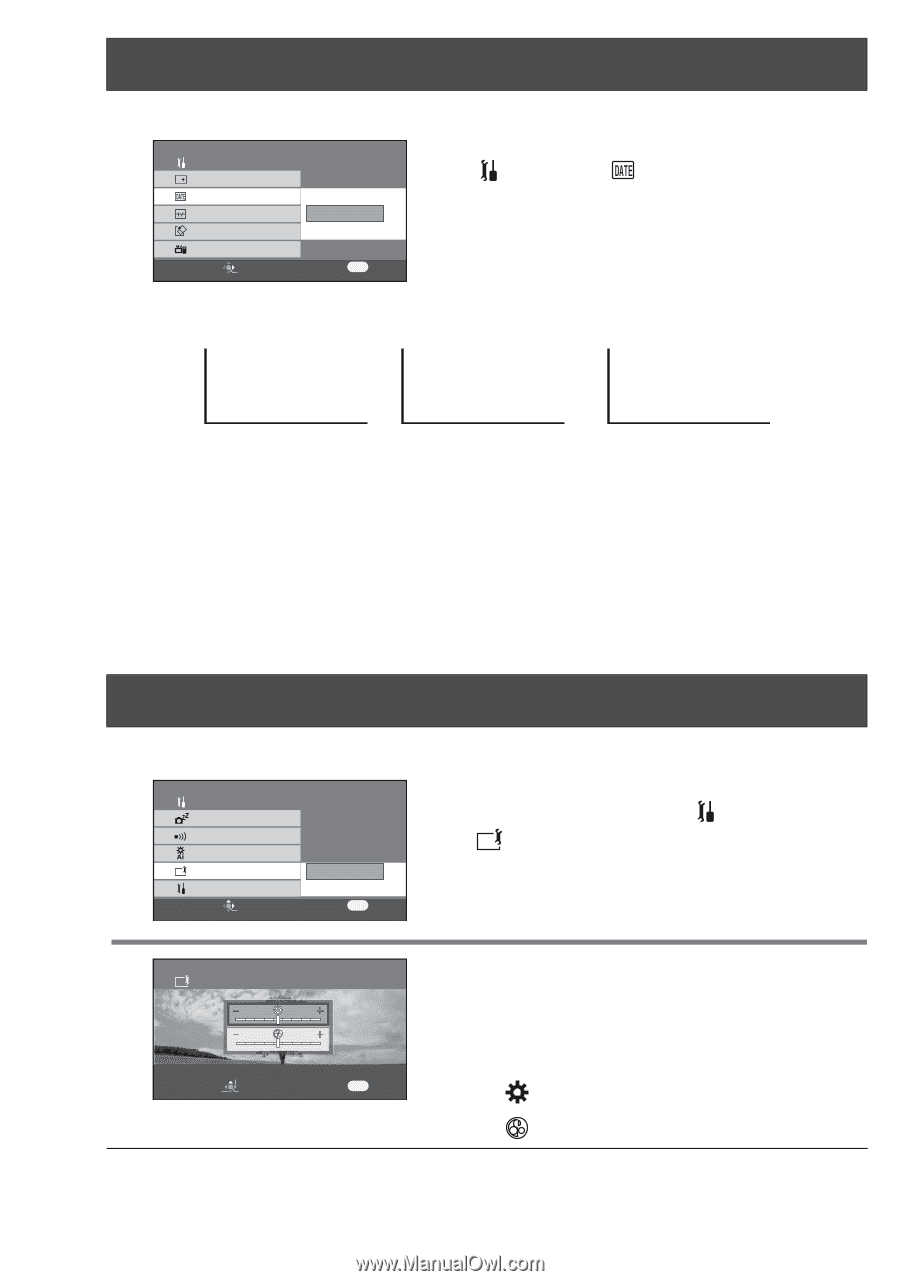
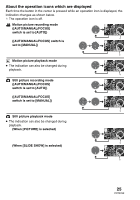
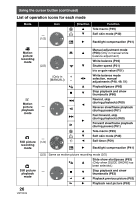
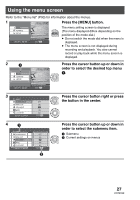
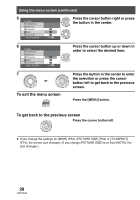
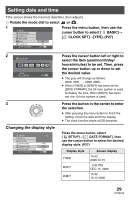
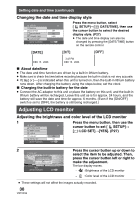
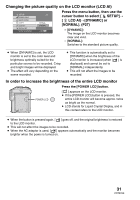
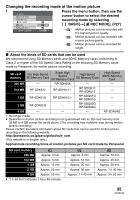
Setting date and time (continued) Changing the date and time display style SETUP DISPLAY DATE/TIME DATE FORMAT FORMAT CARD QUICK START SETUP ENTER 1/3 OFF D/T DATE EXIT MENU Press the menu button, select [ SETUP]#[ DATE/TIME], then use the cursor button to select the desired display style. (P27) ≥ The date and time display can also be changed by pressing the [DATE/TIME] button on the remote control. [DATE] [D/T] [OFF] DEC 15 2006 3:42 PM DEC 15 2006 ∫ About date/time ≥ The date and time function are driven by a built-in lithium battery. ≥ Make sure to check the time before recording because the built-in clock is not very accurate. ≥ If [0] or [- -] is indicated when this unit is turned on, then the built-in lithium battery runs down. After charging the battery using the steps below, set the clock. ∫ Charging the built-in battery for the date ≥ Connect the AC adaptor to this unit or place the battery on this unit, and the built-in lithium battery will be recharged. Leave this unit as is for approx. 24 hours, and the battery will save the date and time for approx. 6 months. (Even if the [ON/OFF] switch is set to [OFF], the battery is still being recharged.) Adjusting LCD monitor Adjusting the brightness and color level of the LCD monitor 1 SETUP 2/3 POWER SAVE BEEP SOUND LCD AI LCD SET YES INITIAL SET NO SETUP ENTER EXIT MENU Press the menu button, then use the cursor button to set [ SETUP]# [ LCD SET]#[YES]. (P27) 2 LCD SET SET SETUP ENTER EXIT MENU Press the cursor button up or down to select the item to be adjusted. Then, press the cursor button left or right to make the adjustment. The bar display moves. - : Brightness of the LCD monitor - : Color level of the LCD monitor ≥ These settings will not affect the images actually recorded. 30 VQT0X39
-
 1
1 -
2
-
3
-
4
-
5
-
6
-
7
-
8
-
9
-
10
-
11
-
12
-
13
-
14
-
15
-
16
-
17
-
18
-
19
-
20
-
21
-
22
-
23
-
24
-
 25
25 -
 26
26 -
 27
27 -
 28
28 -
 29
29 -
 30
30 -
 31
31 -
 32
32 -
 33
33 -
 34
34 -
 35
35 -
36
-
37
-
38
-
39
-
40
-
41
-
42
-
43
-
44
-
45
-
46
-
47
-
48
-
49
-
50
-
51
-
52
-
53
-
54
-
55
-
56
-
57
-
58
-
59
-
60
-
61
-
62
-
63
-
64
-
65
-
66
-
67
-
68
-
69
-
70
-
71
-
72
-
73
-
74
-
75
-
76
-
77
-
78
-
79
-
80
-
81
-
82
-
83
-
84
-
85
-
86
-
87
-
88
-
89
-
90
-
91
-
92
-
93
-
94
-
95
-
96
-
97
-
98
-
99
-
100
-
101
-
102
-
103
-
104
-
105
-
106
-
107
-
108
-
109
-
110
-
111
-
112
-
113
-
114
-
115
-
116
-
117
-
118
-
119
-
120
-
121
-
122
-
123
-
124
 |
 |