Pantech Link Manual - English - Page 24
Camera
 |
View all Pantech Link manuals
Add to My Manuals
Save this manual to your list of manuals |
Page 24 highlights
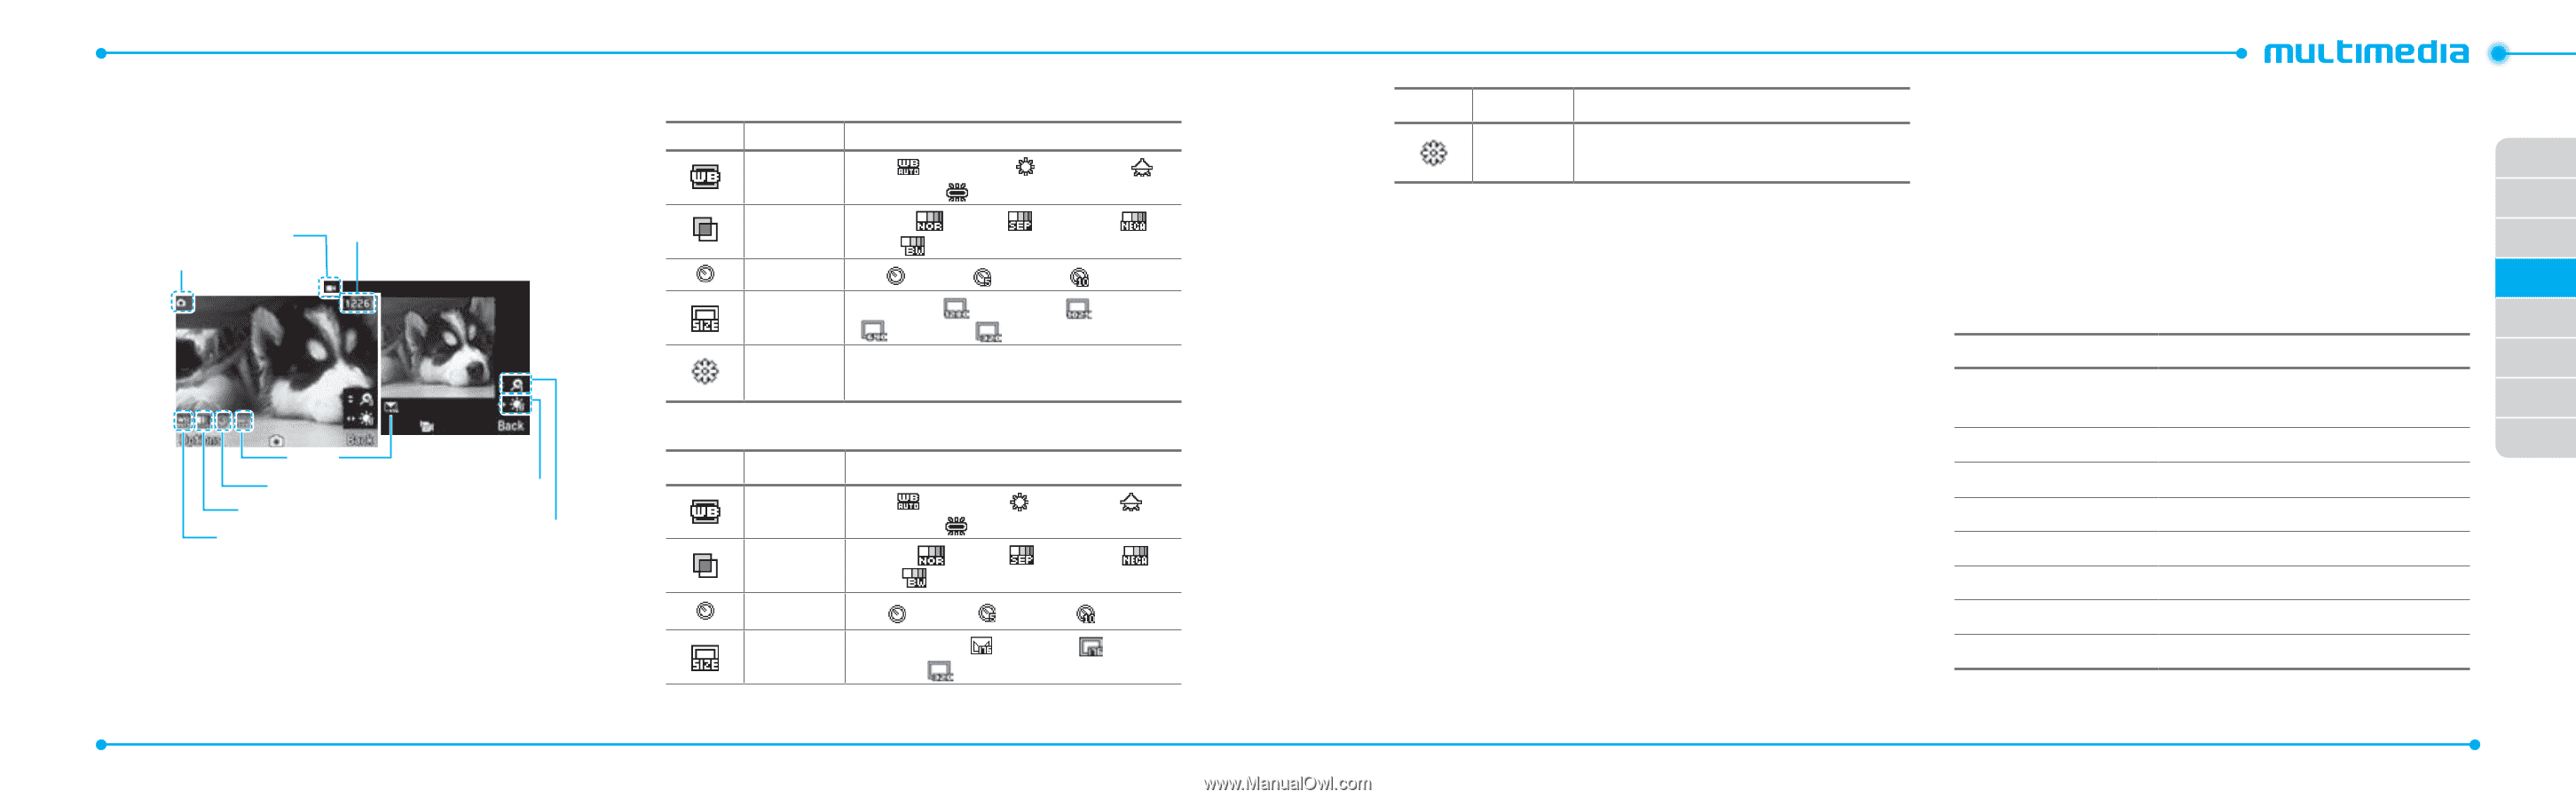
Camera You can take pictures and record movies using the built-in camera. The photos and video clips can be saved and sent via multimedia messages. Video mode Camera mode Pictures Remaining Size Self Timer Effect White Balance Brightness Zoom Setting camera settings 1. Press Menu > My Stuff > Tools. 2. Press Camera. 3. Press Options > Settings to change settings prior to taking a picture. 42 In the options menu for camera Icons Name Description White Auto( ), Day Light ( ), Tungsten ( ), Balance Fluorescent ( ) Effect Normal ( ), Sepia ( ), Negative ( ), B&W ( ) SelfTimer Off ( ), 5 secs ( ), 10 secs ( ) Picture Size 1280x1024 ( ), 1024x768 ( ( ), 320x240 ( ) ), 640x480 Advanced Picture Quality, Save Location, Shutter Sound, Timer Sound, Default File Name In the options menu for video camera Icons Name Description White Balance Effect Auto( ), Day Light( ),Tungsten ( ), Fluorescent ( ) Normal ( ), Sepia ( ), Negative ( ), B&W ( ) SelfTimer Off ( ), 5 secs ( ), 10 secs ( ) Resolution 176x144(MMS)( ), 176x144 ( 320x240 ( ), Video Share ), Icons Name Advanced Description Video Quality, Sound Recording, Save Location, Timer Sound, Default File Name Zoom in and out 1. Press U/D. It ranges from 1x to 4x. Increasing or decreasing the brightness 1. Press L/R. It ranges from -2 to +2. Taking a picture 1. Press Q in standby mode or press Menu > My Stuff > Tools. 2. Press Camera. 3. Focus on the object > O or press Options > Capture. note: Your photo will be saved automatically to My Stuff > Picture > Camera. Changing to video camera mode 1. Press Q in standby mode or press Menu > My Stuff > Tools > Camera. 2. Press Options while camera mode is activated. 3. Press Video Camera Mode. 4. Focus on the object > O or press Options > Record. 5. Record the motion > Stop. note: Your video will be saved automatically to My Stuff > Video. Viewing the taken picture 01 1. Press Q in standby mode or press Menu > My Stuff > 02 Tools > Camera. 2. Press Options > Photo Album. 03 3. Select the picture > View. 04 After taking pictures 05 To Press 06 Send a multimedia Options > Send > as Multimedia message Message 07 Send via mobile share Options > Send > via Mobile Share 08 Send via bluetooth Options > Send > via Bluetooth Set as wallpaper Options > Set as > Wallpaper Set as address book Options > Set as > Caller ID Delete Options > Delete Rename Options > Rename View photo information Options > Properties 43
-
 1
1 -
2
-
3
-
4
-
5
-
6
-
7
-
8
-
9
-
10
-
11
-
12
-
13
-
14
-
15
-
16
-
17
-
18
-
 19
19 -
 20
20 -
 21
21 -
 22
22 -
 23
23 -
 24
24 -
 25
25 -
 26
26 -
 27
27 -
 28
28 -
 29
29 -
30
-
31
-
32
-
33
-
34
-
35
-
36
-
37
-
38
-
39
-
40
-
41
-
42
-
43
-
44
-
45
-
46
-
47
-
48
-
49
-
50
-
51
-
52
-
53
-
54
-
55
-
56
-
57
-
58
-
59
-
60
-
61
-
62
-
63
-
64
-
65
-
66
-
67
-
68
-
69
-
70
-
71
-
72
-
73
-
74
-
75
-
76
-
77
-
78
-
79
-
80
-
81
-
82
-
83
-
84
-
85
-
86
-
87
-
88
-
89
-
90
-
91
-
92
 |
 |