Pfaff Tiptronic 2030 Owner's Manual - Page 102
tree-motion
 |
View all Pfaff Tiptronic 2030 manuals
Add to My Manuals
Save this manual to your list of manuals |
Page 102 highlights
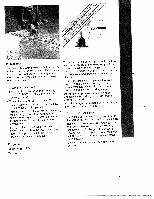
Bias tape binder Free-motion quilt foot TtqTgtuhql(heuo1uihnecunecni/ieieile4dhfltsnfsoittfentnirh.trarnideeigmanesFqger.ictom-ugehcTnmyrihersoeahott(oryenrepou6netodsuour.ieettu3olaisthr-est5lnsmscrtlfsiiyehipebtrqmooecowslfduttihesmis,iultioeloaht)rtiwtnisynn,iheofn,eeuenwobraglfs)slosoio,tmlettrtolsteorwahutoitsefbnihiirteageyttceehe-scpchoumdooictutraaeo-mvomortclueogsntiebqeindrpuso.ui.feaiinrnridFsaTceleatnetqrdrieetqyne.duia-nuoegmmritit-nlsehlmttaotaoiiirsrwntnfnaokiggoditiigit.nnohhgnts - Loosen the knurled screw on the presser foot holder. - - tPGiaqonrsuugetoiiseildtstttehwhfteoheitlhroel hetwgfomoriplet.eihuensTotmtohfhfbueothtemthileooepbnnpofgarsrqeeniftusedoisio-rlemtknirnfeoodofdtfoeoioxottbhntegfehiheqninofugnrtlieedldlyrete.-tfrmhoeaoosttifoanr needle clamp. - - Tighten the knurled screw. Bring the free motion darning position (see quilt foot page 72) into and the lower the Bgraiivnnidcneign.gfFaowbrriittchhisebdiyagoseustanapeesemdisouaontvfhoerlyadneeddasnbyieaamst etaatphpopedeaof about 1" (24 mm) wide. - Remove the presser foot and holder. Attach the bias binder. - Cut the beginning of the bias tape at a diagonal. - - Feed the tape into the scroll of the binder and pull out to the back. Adjust so that mately the the 1/1 binder and/or the needle needle pierces the fabric 6" (1 - 1.5 mm) from the position approxi folded - - edge of the bias tape. Stitch about 1" (2.5 cm) along the bias tape. Itbenhedsetgewrebteintaehduneetorteh.mdeTaghtbeieicaaobslfilatytashpdeteuafrpaeiebndrggwiceislseltoweininbntceogl.otbhsoeeuntshldoet of raw Tip: You can effect by obtain using an additional decorative a zigzag or fancy stitch. Program: optional feed dog (see page 34). Tension: 3 - 5 Tip: Free-motion completed using embroidery can the free-motion also quilt be foot. Program: I Stitch length: 2.5 Tension: 3 - 5 107
-
 1
1 -
2
-
3
-
4
-
5
-
6
-
7
-
8
-
9
-
10
-
11
-
12
-
13
-
14
-
15
-
16
-
17
-
18
-
19
-
20
-
21
-
22
-
23
-
24
-
25
-
26
-
27
-
28
-
29
-
30
-
31
-
32
-
33
-
34
-
35
-
36
-
37
-
38
-
39
-
40
-
41
-
42
-
43
-
44
-
45
-
46
-
47
-
48
-
49
-
50
-
51
-
52
-
53
-
54
-
55
-
56
-
57
-
58
-
59
-
60
-
61
-
62
-
63
-
64
-
65
-
66
-
67
-
68
-
69
-
70
-
71
-
72
-
73
-
74
-
75
-
76
-
77
-
78
-
79
-
80
-
81
-
82
-
83
-
84
-
85
-
86
-
87
-
88
-
89
-
90
-
91
-
92
-
93
-
94
-
95
-
96
-
 97
97 -
 98
98 -
 99
99 -
 100
100 -
 101
101 -
 102
102 -
 103
103 -
 104
104 -
 105
105 -
 106
106 -
 107
107 -
108
-
109
-
110
-
111
-
112
-
113
-
114
-
115
-
116
-
117
-
118
-
119
-
120
-
121
-
122
-
123
-
124
-
125
-
126
-
127
-
128
-
129
-
130
-
131
-
132
-
133
-
134
-
135
-
136
-
137
-
138
 |
 |
