Pfaff creative 2.0 Owner's Manual - Page 26
Settings menu - w embroidery
 |
View all Pfaff creative 2.0 manuals
Add to My Manuals
Save this manual to your list of manuals |
Page 26 highlights
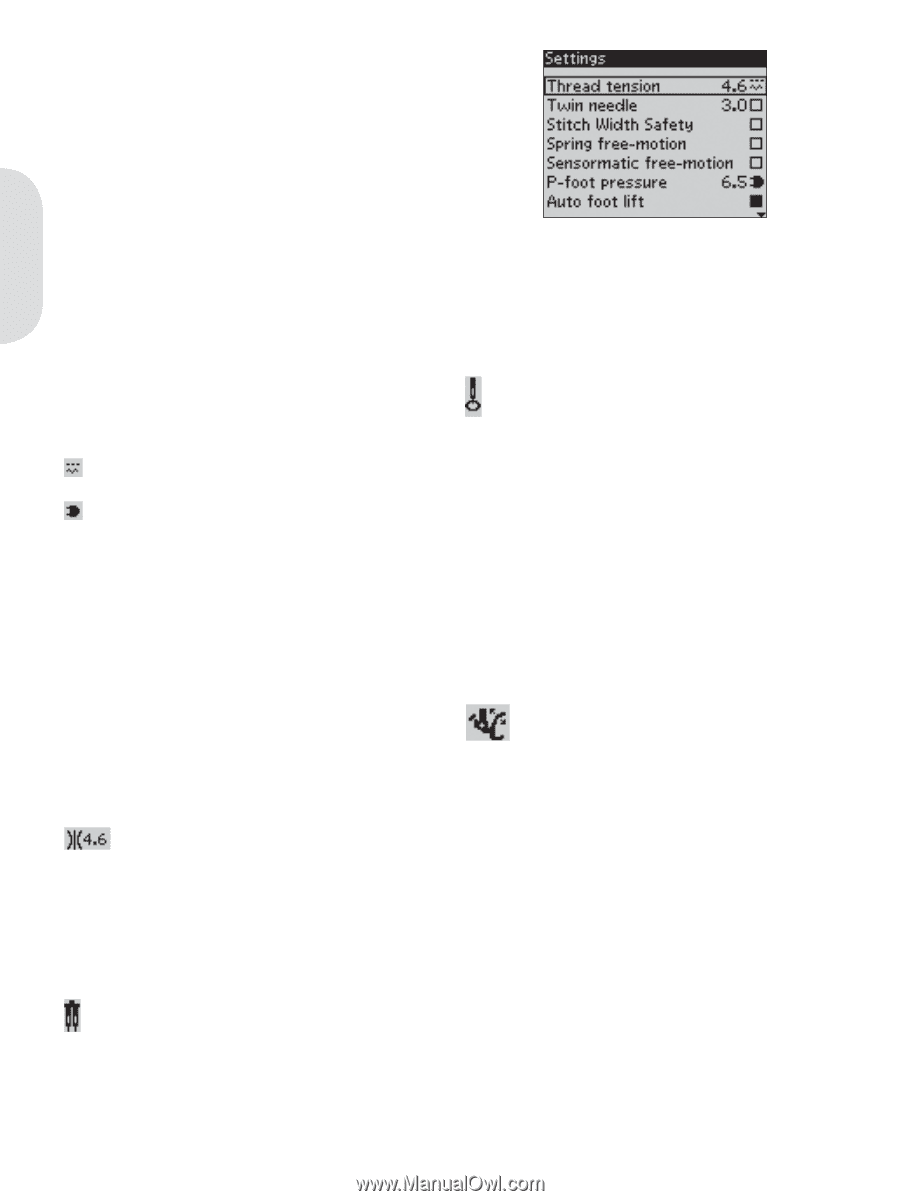
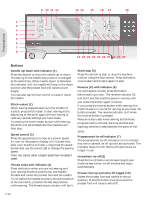
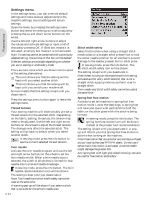
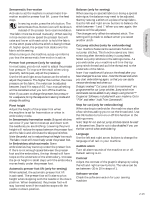
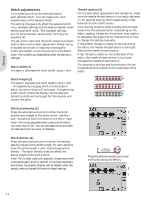
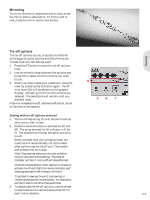
Preparations Settings menu In the settings menu, you can override default settings and make manual adjustments to the machine settings, sound settings and screen settings. Open the menu by pressing the settings menu button and select the setting you wish to adjust by pressing the up and down arrow buttons on the wheel. Use the left and right arrow buttons to adjust the values and activate settings or open a list of choices by pressing OK. A Àlled box means it is activated, an empty box means it is not activated. Note: If a setting cannot be combined with a previously selected setting, the outlines of that box will be dashed. Different settings are available depending on whether you are in sewing or embroidery mode. There are two icons which are shown next to some of the setting alternatives. This icon shows you that the setting will be kept until you select another stitch. This icon shows you that the setting will be kept until you switch your machine off. No icon means that this setting is kept until you deactivate it. Press the settings menu button again to leave the settings menu. Thread tension Your sewing machine will electronically pre-set a thread tension for the selected stitch. Depending on the fabric, batting, thread etc, the tension may need to be adjusted. Use the left and right arrow buttons on the wheel to adjust the thread tension. The changes only affect the selected stitch. The setting will go back to default when you select another stitch. In sewing mode, press the info button to see the current selected thread tension. Twin needle Activate the twin needle program and use the left and right arrow buttons on the wheel to set the twin needle width. When a twin needle size is selected, the width of all stitches is limited for that needle size to prevent needle breakage. In sewing mode, press the info button. The twin needle recommendation icon will be shown. The setting is kept until you deactivate it. Note: Twin needle and stitch width safety cannot be used at the same time. A warning pop-up will be shown if you select a stitch that is too wide for the set twin needle size. 2:14 Stitch width safety Select this function when using a straight stitch needle plate or a straight stitch presser foot to lock the center needle position for all stitches to prevent damage to the needle, presser foot or stitch plate. In sewing mode, press the info button. The stitch width safety icon will be shown. The setting is kept until you deactivate it. Note: When turning on the machine with this setting activated and for every stitch selection that is not a straight stitch, a pop-up informs you that it is set to straight stitch. Twin needle and stitch width safety cannot be used at the same time. Spring foot free-motion Activate to set the machine in spring foot freemotion mode. Lower the feed dogs. A spring foot will raise and lower with each stitch to hold the fabric on the stitch plate while the stitch is being formed. In sewing mode, press the info button. The spring foot free-motion icon will be shown instead of the presser foot recommendation. The setting is kept until you deactivate it. A popup will inform you that spring foot free-motion is active when turning on the machine. Note: Free-motion feet are optional and can be purchased at your local authorized PFAFF® dealer. Do not use if sensormatic free-motion is activated, since the needle might damage the presser foot. Any spring foot with light grey plastic housing, can also be used for free-motion embroidery.
-
 1
1 -
2
-
3
-
4
-
5
-
6
-
7
-
8
-
9
-
10
-
11
-
12
-
13
-
14
-
15
-
16
-
17
-
18
-
19
-
20
-
 21
21 -
 22
22 -
 23
23 -
 24
24 -
 25
25 -
 26
26 -
 27
27 -
 28
28 -
 29
29 -
 30
30 -
 31
31 -
32
-
33
-
34
-
35
-
36
-
37
-
38
-
39
-
40
-
41
-
42
-
43
-
44
-
45
-
46
-
47
-
48
-
49
-
50
-
51
-
52
-
53
-
54
-
55
-
56
-
57
-
58
-
59
-
60
-
61
-
62
-
63
-
64
-
65
-
66
-
67
-
68
 |
 |