Pfaff creative 7560 Owner's Manual - Page 90
embroidered
 |
View all Pfaff creative 7560 manuals
Add to My Manuals
Save this manual to your list of manuals |
Page 90 highlights
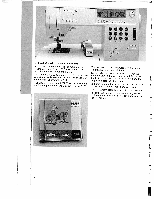
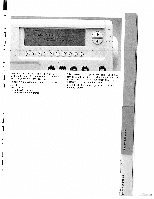
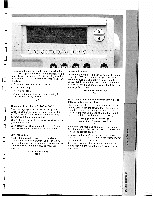
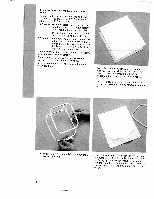
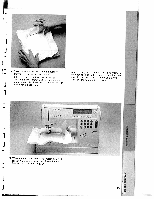
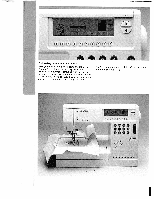
Fitting the (frame) fabric into the embroidery hoop There is unit It is patterns one frame included with the 1 20 frame. The 1 20 up to 1 1 5 x 120 mm. the embroidery frame is for 120 frame: For fabric parts which offer enough area for fitting. For all larger patterns which require the embroidery field. 80 frame: The 80 frame is an optional extra for patterns sized up to 80 x 80 mm. For smaller fabric parts which do not fit into stretch tightly the 1 20 frame. For very fine or materials which must be fitted and, thus, have no slack (e.g. fine knitted fabrics, silk etc.) The machine displays the hoop-frame tically for each selected pattern. size automa Tip: also Every pattern suitable for be embroidered on the 1 the 20 80 frame frame. can Now place the fabric described below. into the specified frame as - 1. hThirdioooneoograpy,pc-iwhfsnrtigeaaebmvriiteeleitc.zoboegemrtetumtehnr-eedqnreudwranlipeitthlayatcthrhienetsghufelattebsfarairwbcrahiowcennaatyonedemthmebbroroide After the pattern has embroidery stabilizer it off. been embroidered, can be removed by the tearing .7- . 2. Loosen the tightening can now be removed. screw (9). The inner frame 't 3. Place the embroidery stabilizer and the fabric on the outer frame. The right side of the fabric must be facing upwards. When inserting the fabric into the hoop-frame, make sure that screw (9) is facing forwards and the guide tracks (8) are on the right 14
-
 1
1 -
2
-
3
-
4
-
5
-
6
-
7
-
8
-
9
-
10
-
11
-
12
-
13
-
14
-
15
-
16
-
17
-
18
-
19
-
20
-
21
-
22
-
23
-
24
-
25
-
26
-
27
-
28
-
29
-
30
-
31
-
32
-
33
-
34
-
35
-
36
-
37
-
38
-
39
-
40
-
41
-
42
-
43
-
44
-
45
-
46
-
47
-
48
-
49
-
50
-
51
-
52
-
53
-
54
-
55
-
56
-
57
-
58
-
59
-
60
-
61
-
62
-
63
-
64
-
65
-
66
-
67
-
68
-
69
-
70
-
71
-
72
-
73
-
74
-
75
-
76
-
77
-
78
-
79
-
80
-
81
-
82
-
83
-
84
-
 85
85 -
 86
86 -
 87
87 -
 88
88 -
 89
89 -
 90
90 -
 91
91 -
 92
92 -
 93
93 -
 94
94 -
 95
95 -
96
-
97
-
98
-
99
-
100
-
101
-
102
-
103
-
104
-
105
-
106
-
107
-
108
-
109
-
110
-
111
-
112
-
113
-
114
-
115
-
116
-
117
-
118
-
119
-
120
-
121
-
122
-
123
-
124
-
125
-
126
-
127
-
128
-
129
-
130
-
131
-
132
-
133
-
134
-
135
-
136
-
137
-
138
-
139
-
140
-
141
-
142
-
143
-
144
-
145
-
146
-
147
-
148
-
149
-
150
-
151
-
152
-
153
-
154
-
155
 |
 |
