Pfaff creative vision 5.5 Owner's Manual - Page 66
Sewing in zippers, Rolled hem
 |
View all Pfaff creative vision 5.5 manuals
Add to My Manuals
Save this manual to your list of manuals |
Page 66 highlights
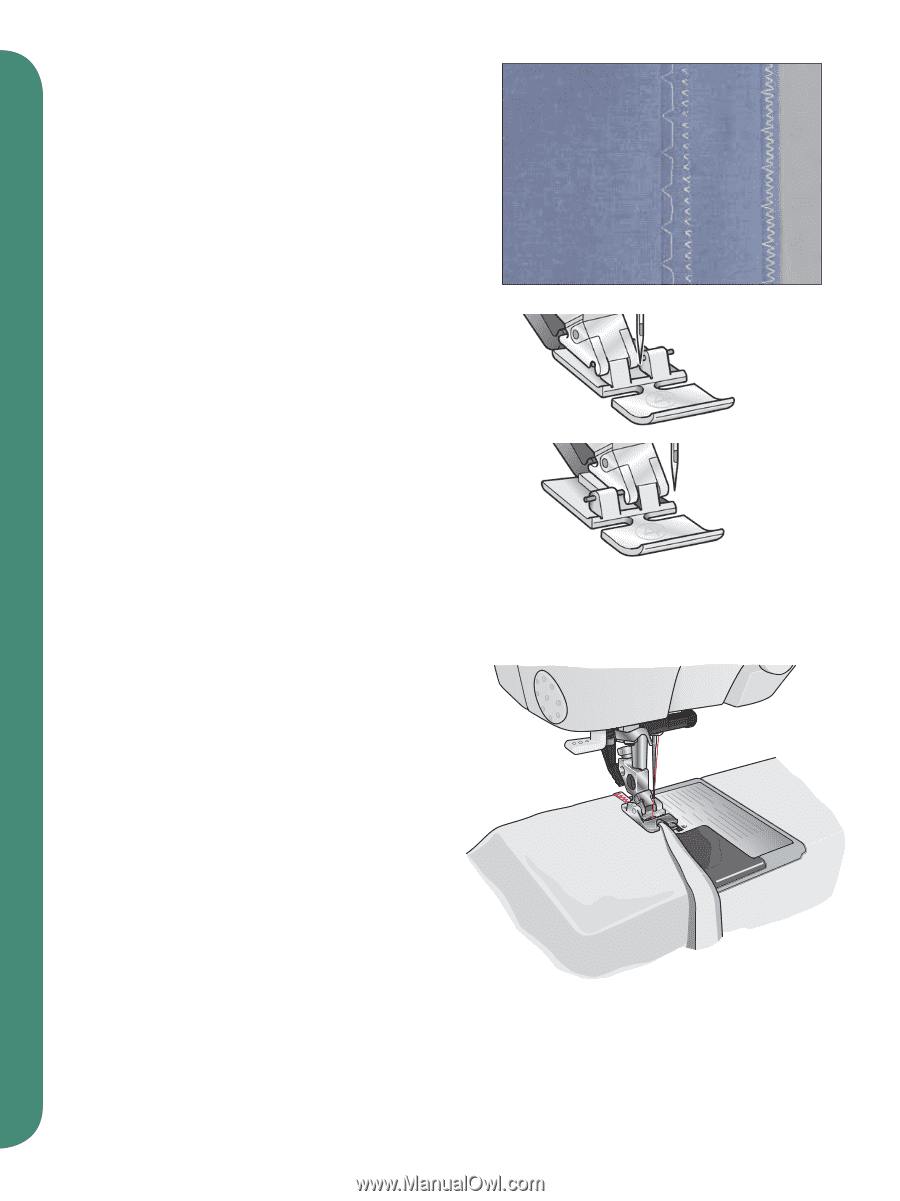
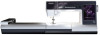
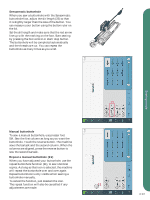
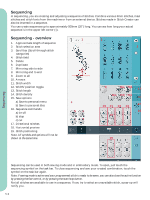
Sewing mode Elastic blindhem stitch The elastic blind stitch number 1.1.17 is especially suitable for stretchy fabrics, because the zigzag in the stitch lets the stitch stretch. The hem is Ànished and sewn at the same time. There is no need to Ànish the raw edge Àrst on most knits. Sewing in zippers There are different ways to sew in zippers. Follow the directions included with your pattern for best results. For all types of zippers it is important to sew close to the teeth of the zipper. The zipper foot 4 can be snapped to the presser foot bar on the left or right, depending on how you will insert your zipper. Then set the stitch position so that it enters close to the edge of the zipper teeth by using one of the 37 needle positions available for the straight stitch. If the presser foot is attached on the right side, the needle must only be moved to the right. If the foot is attached on the left, the needle must only be moved to the left. Rolled hem Use the rolled hem foot 7 to Ànish the edges of blouses, scarves, or rufÁes without having to iron the edges beforehand. Hemming prevents the edges from fraying and produces a neat and durable edge Ànish. • Double-fold the fabric edge (about 1/8" - 2 mm - per fold). • Place the folded fabric edge under the rolled hem foot and sew a few stitches to secure. • Turn the handwheel towards you until the needle is at its lowest point. Raise the presser foot and slide the fabric into the scroll of the foot. • Lower the presser foot and while sewing, guide the fabric edge evenly into the foot. When roll-hemming, make sure the raw edge of the fabric butts against the left edge of the rolled hem foot opening. Ensure the fabric does not run underneath the right side of the presser foot. Note: A narrow zigzag stitch also makes a nice rolled hem on lighter stretch fabrics such as lingerie nylon. 4:16
-
 1
1 -
2
-
3
-
4
-
5
-
6
-
7
-
8
-
9
-
10
-
11
-
12
-
13
-
14
-
15
-
16
-
17
-
18
-
19
-
20
-
21
-
22
-
23
-
24
-
25
-
26
-
27
-
28
-
29
-
30
-
31
-
32
-
33
-
34
-
35
-
36
-
37
-
38
-
39
-
40
-
41
-
42
-
43
-
44
-
45
-
46
-
47
-
48
-
49
-
50
-
51
-
52
-
53
-
54
-
55
-
56
-
57
-
58
-
59
-
60
-
 61
61 -
 62
62 -
 63
63 -
 64
64 -
 65
65 -
 66
66 -
 67
67 -
 68
68 -
 69
69 -
 70
70 -
 71
71 -
72
-
73
-
74
-
75
-
76
-
77
-
78
-
79
-
80
-
81
-
82
-
83
-
84
-
85
-
86
-
87
-
88
-
89
-
90
-
91
-
92
-
93
-
94
-
95
-
96
-
97
-
98
-
99
-
100
-
101
-
102
-
103
-
104
-
105
-
106
-
107
-
108
-
109
-
110
-
111
-
112
-
113
-
114
-
115
-
116
-
117
-
118
-
119
-
120
-
121
-
122
-
123
-
124
-
125
-
126
-
127
-
128
-
129
-
130
-
131
-
132
-
133
-
134
-
135
-
136
-
137
-
138
-
139
-
140
-
141
-
142
 |
 |