Pfaff expression 2044 Owner's Manual - Page 109
stitch-in-the-ditch
 |
View all Pfaff expression 2044 manuals
Add to My Manuals
Save this manual to your list of manuals |
Page 109 highlights
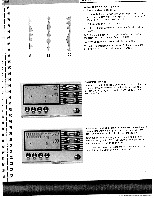
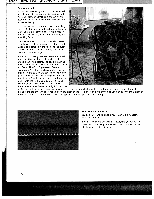
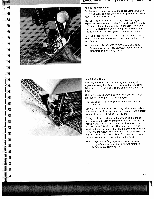
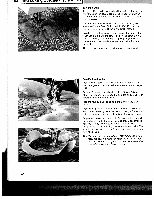
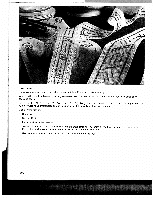
I I ii •I I - - •4 I4 I4 I s 4 I - I -1 I I ! L LJZL1JI aiv vvit ii _%_I II '•'-1'--•' And this is what you do Cut the pieces necessary for your quilt top using templates you have bought or made yourself. making sure to include a seam allowance of ¼' (6 mm). Your Expression is perfect for piecing quilts. Set up your Expression with a straight stitch (1), stitch length 2.5, needle position 4 to the right and your IDT is engaged. The fabric pieces should just follow under the right of presser foot 0. Moving the needle position gives you a scant '4" seam. Sew the pieces together as required by the block chosen. These squares will then be sewn together and will form the top of the quilt. Tip: Use the ¼" foot (93.036 927-91) as an easy guide for your quilting. Set your 2034'2044 for center needle straight stitch and engage the IDT Stitch-in-the-Ditch One way to hold the quilt top, batting and backing all together is using the stitch-in-the-ditch method of quilting. Stitching in the Ditch means following the seams in the quilt blocks. Set your Expression with a straight stitch (1), stitch length 2.5, center needle position, IDT engaged. Tip: Use stitch 11 to make your stitch-in-the-ditch look Begin by pin basting your quilt through all layers - starting from the middle of your quilt and working out. Place a safety pin about every 6-8 inches (15-20 cm). To begin quilting, start sewing from the middle of the quilt and continue out. Starting from the middle and sewing out will help keep layers in place. Plan which seams you will actually follow. This stitching will not only hold the quilt together, it will also create the pattern on the quilt back. You do not need to follow every seam in the quilt, sew every 3 - ' 4 inches to keep the quilt in place. Of course, you can sew more to create a decorative pattern for the back. Tip: Change to a quilting or jeans needle when sewing through thick quilts. Test sew to ensure balanced stitching before starting to quilt. 105
-
 1
1 -
2
-
3
-
4
-
5
-
6
-
7
-
8
-
9
-
10
-
11
-
12
-
13
-
14
-
15
-
16
-
17
-
18
-
19
-
20
-
21
-
22
-
23
-
24
-
25
-
26
-
27
-
28
-
29
-
30
-
31
-
32
-
33
-
34
-
35
-
36
-
37
-
38
-
39
-
40
-
41
-
42
-
43
-
44
-
45
-
46
-
47
-
48
-
49
-
50
-
51
-
52
-
53
-
54
-
55
-
56
-
57
-
58
-
59
-
60
-
61
-
62
-
63
-
64
-
65
-
66
-
67
-
68
-
69
-
70
-
71
-
72
-
73
-
74
-
75
-
76
-
77
-
78
-
79
-
80
-
81
-
82
-
83
-
84
-
85
-
86
-
87
-
88
-
89
-
90
-
91
-
92
-
93
-
94
-
95
-
96
-
97
-
98
-
99
-
100
-
101
-
102
-
103
-
 104
104 -
 105
105 -
 106
106 -
 107
107 -
 108
108 -
 109
109 -
 110
110 -
 111
111 -
 112
112 -
 113
113 -
 114
114 -
115
-
116
-
117
-
118
-
119
-
120
-
121
 |
 |
