Philips 50PF9631D User manual - Page 24
Source, Digital Audio, Clock, Auto clock mode
 |
UPC - 609585113824
View all Philips 50PF9631D manuals
Add to My Manuals
Save this manual to your list of manuals |
Page 24 highlights
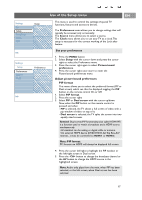
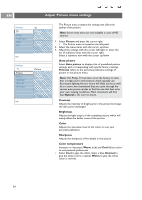
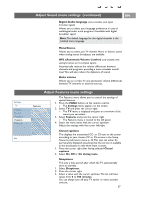
EN Use of the Setup menu (continued) Settings Setup Preferences Source Clock Info Source AV1 AV2 AV3 HDMI 1 HDMI 2 Side Digital Audio In Select your source This menu allows you to identify the accessory devices you have connected to the external inputs/outputs. 1. Select Source in the Setup menu. 2. Press the cursor right to enter the list of types of external inputs. 3. Select the appropriate input with the cursor up/down. > When you select AV1, AV2, AV3, HDMI 1, HDMI 2 or Side, a list appears allowing you to identify which type of accessory device is attached to this input. 4. Press the cursor right again to enter the list of types of devices connected to the selected input. 5. Select the accessory device with the cursor up/down. Digital Audio If an accessory device has a digital audio output, you can connect this with a single cable to the TV's Digital Audio in jack. In the Source menu, assign the Digital Audio in to the corresponding exernal input to which your accessory device is connected The TV can output Digital audio via the DIGITAL AUDIO OUT connector to an external amplifier or receiver. If your amplifier or receiver has a matching connector for Digital Audio In, you can connect it with a single cable to the TV's DIGITAL AUDIO OUT. See To make Video and Audio connections, Digital Surround receiver, p. 49. Settings Setup Preferences Source Clock Info Clock Auto clock mode Auto clock channel Time Day Time zone Daylight saving Set your clock This allows you to use your TV as a clock. Note: Adjusting the clock is necessary for the correct working of Lock after (See TV settings, Channels, p. 30) features. Auto clock mode 1. Select Clock in the Setup menu. 2. Press the cursor right to select the Auto clock mode. 3. Press the cursor right to instruct the TV to get the time automatically or manually. Note: Most of the TV channels are not transmitting clock information.There are few cable channels but they are at the end of the channel ring.There is no clock transmission in antenna channels. In such cases either clock extraction is taking a long time or there is no clock. 22
-
 1
1 -
2
-
3
-
4
-
5
-
6
-
7
-
8
-
9
-
10
-
11
-
12
-
13
-
14
-
15
-
16
-
17
-
18
-
 19
19 -
 20
20 -
 21
21 -
 22
22 -
 23
23 -
 24
24 -
 25
25 -
 26
26 -
 27
27 -
 28
28 -
 29
29 -
30
-
31
-
32
-
33
-
34
-
35
-
36
-
37
-
38
-
39
-
40
-
41
-
42
-
43
-
44
-
45
-
46
-
47
-
48
-
49
-
50
-
51
-
52
-
53
-
54
-
55
-
56
-
57
-
58
-
59
-
60
-
61
-
62
-
63
-
64
 |
 |
