Pioneer AVH-P5100DVD Owner's Manual - Page 76
Using balance adjustment, Adjusting source levels, Using the dynamic range control
 |
UPC - 012562944401
View all Pioneer AVH-P5100DVD manuals
Add to My Manuals
Save this manual to your list of manuals |
Page 76 highlights
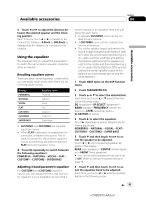
Section 04 Available accessories Note When you make adjustments to the listening position, the speaker outputs are automatically set for appropriate levels. You can tailor the levels more precisely referring to Adjusting the speaker output levels using a test tone or Adjusting the speaker output levels. Using balance adjustment You can change the fader/balance setting so that it can provide the ideal listening environment in all occupied seats. 1 Touch FADER/BALANCE on the DSP function menu. 2 Touch a or b to adjust front/rear speaker balance. Each time you touch a or b it moves the front/rear speaker balance towards the front or the rear. FRONT:25 to REAR:25 is displayed as the front/rear speaker balance moves from front to rear. # FR: 0 is the proper setting when only two speakers are used. 3 Touch c or d to adjust left/right speaker balance. Each time you touch c or d it moves the left/ right speaker balance towards the left or the right. LEFT:25 to RIGHT:25 is displayed as the left/ right speaker balance moves from left to right. Adjusting source levels SLA (source level adjustment) lets you adjust the volume level of each source to prevent radical changes in volume when switching between sources. ! Settings are based on the FM volume level, which remains unchanged. 1 Compare the FM volume level with the level of the source you wish to adjust. 2 Touch SLA on the DSP function menu. 3 Touch c or d to adjust the source volume. Each time you touch c or d it increases or decreases the source volume. +4 to -4 is displayed as the source volume is increased or decreased. Notes ! The AM volume level can also be adjusted with source level adjustments. ! Video CD, CD, compressed audio and DivX are set to the same source level adjustment volume automatically. ! DVD and the optional DVD player are set to the same source level adjustment volume automatically. ! External unit 1 and external unit 2 are set to the same source level adjustment volume automatically. ! AUX (auxiliary input) and AV (AV input) are set to the same source level adjustment volume automatically. Using the dynamic range control The dynamic range refers to the difference between the largest and softest sounds. The dynamic range control compresses this difference so that you can clearly hear sounds even at low volume levels. ! The dynamic range control is effective only on Dolby Digital sounds. ! When playing other than the DVD disc, you cannot switch to DYNAMIC RANGE CONTROL. 1 Touch DYNAMIC RANGE CONTROL on the DSP function menu. 2 Touch d to turn the dynamic range control on. # To turn dynamic range control off, touch c. 76 En 76
-
 1
1 -
2
-
3
-
4
-
5
-
6
-
7
-
8
-
9
-
10
-
11
-
12
-
13
-
14
-
15
-
16
-
17
-
18
-
19
-
20
-
21
-
22
-
23
-
24
-
25
-
26
-
27
-
28
-
29
-
30
-
31
-
32
-
33
-
34
-
35
-
36
-
37
-
38
-
39
-
40
-
41
-
42
-
43
-
44
-
45
-
46
-
47
-
48
-
49
-
50
-
51
-
52
-
53
-
54
-
55
-
56
-
57
-
58
-
59
-
60
-
61
-
62
-
63
-
64
-
65
-
66
-
67
-
68
-
69
-
70
-
 71
71 -
 72
72 -
 73
73 -
 74
74 -
 75
75 -
 76
76 -
 77
77 -
 78
78 -
 79
79 -
 80
80 -
 81
81 -
82
-
83
-
84
-
85
-
86
-
87
-
88
-
89
-
90
-
91
-
92
-
93
-
94
-
95
-
96
-
97
-
98
-
99
-
100
-
101
-
102
-
103
-
104
 |
 |
