Pioneer AVH-X1800S Owner s Manual - Page 39
AUX source, AV input
 |
View all Pioneer AVH-X1800S manuals
Add to My Manuals
Save this manual to your list of manuals |
Page 39 highlights
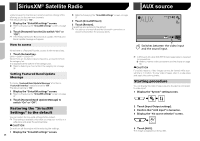
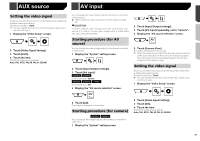
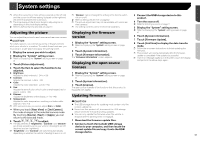
AUX source AV input Setting the video signal When you connect this product to an AUX equipment, select the suitable video signal setting. The default setting is "Auto". p You can operate this function only for the video signal input into the AUX input. 1 Display the "Video Setup" screen. 2 Touch [Video Signal Setting]. 3 Touch [AUX]. 4 Touch the item. The following items are available: Auto, PAL, NTSC, PAL-M, PAL-N, SECAM. You can display the video image output by the device connected to this product. Refer to External video component and the display on page 56 CAUTION For safety reasons, video images cannot be viewed while your vehicle is in motion. To view video images, stop in a safe place and apply the parking brake. Starting procedure (for AV source) You can display the video image output by the device connected to video input. 1 Display the "System" setting screen. 2 Touch [Input/Output settings]. 3 Touch [AV Input]. X5800BHS X3800BHS Set the setting to "Source". X4800BS X2800BS X1800S Set the setting to "On". 4 Display the "AV source selection" screen. 2 Touch [Input/Output settings]. 3 Touch [AV Input] repeatedly, set to "Camera". 4 Display the "AV source selection" screen. 5 Touch [Camera View]. The image is displayed on the screen. p When the camera view of both the rear view camera and 2nd camera are available, the key to switch the display appears. Touch this key to switch the display between the rear view image and 2nd camera image. Setting the video signal When you connect this product to an AV equipment, select the suitable video signal setting. The default setting is "Auto". p You can operate this function only for the video signal input into the AV input. 1 Display the "Video Setup" screen. 5 Touch [AV]. The image is displayed on the screen. Starting procedure (for camera) X5800BHS X3800BHS You can display the image output by the camera connected to video input. 1 Display the "System" setting screen. 2 Touch [Video Signal Setting]. 3 Touch [AV]. 4 Touch the item. The following items are available: Auto, PAL, NTSC, PAL-M, PAL-N, SECAM. 39
-
 1
1 -
2
-
3
-
4
-
5
-
6
-
7
-
8
-
9
-
10
-
11
-
12
-
13
-
14
-
15
-
16
-
17
-
18
-
19
-
20
-
21
-
22
-
23
-
24
-
25
-
26
-
27
-
28
-
29
-
30
-
31
-
32
-
33
-
 34
34 -
 35
35 -
 36
36 -
 37
37 -
 38
38 -
 39
39 -
 40
40 -
 41
41 -
 42
42 -
 43
43 -
 44
44 -
45
-
46
-
47
-
48
-
49
-
50
-
51
-
52
-
53
-
54
-
55
-
56
-
57
-
58
-
59
-
60
-
61
-
62
-
63
-
64
-
65
-
66
-
67
-
68
-
69
-
70
-
71
-
72
-
73
-
74
-
75
-
76
-
77
-
78
-
79
-
80
-
81
-
82
-
83
-
84
-
85
-
86
-
87
-
88
-
89
-
90
-
91
-
92
-
93
-
94
-
95
-
96
-
97
-
98
-
99
-
100
-
101
-
102
-
103
-
104
-
105
-
106
-
107
-
108
-
109
-
110
-
111
-
112
-
113
-
114
-
115
-
116
-
117
-
118
-
119
-
120
-
121
-
122
-
123
-
124
-
125
-
126
-
127
-
128
-
129
-
130
-
131
-
132
-
133
-
134
-
135
-
136
-
137
-
138
-
139
-
140
-
141
-
142
-
143
-
144
-
145
-
146
-
147
-
148
-
149
-
150
-
151
-
152
-
153
-
154
-
155
-
156
-
157
-
158
-
159
-
160
-
161
-
162
-
163
-
164
-
165
-
166
-
167
-
168
-
169
-
170
-
171
-
172
-
173
-
174
-
175
-
176
-
177
-
178
-
179
-
180
-
181
-
182
-
183
-
184
-
185
-
186
-
187
-
188
-
189
-
190
-
191
-
192
-
193
-
194
-
195
-
196
-
197
-
198
-
199
-
200
-
201
-
202
-
203
-
204
-
205
-
206
-
207
-
208
-
209
-
210
-
211
-
212
-
213
-
214
-
215
-
216
 |
 |
