Pioneer AVH-X1800S Owner s Manual - Page 43
Displaying the firmware, Updating firmware
 |
View all Pioneer AVH-X1800S manuals
Add to My Manuals
Save this manual to your list of manuals |
Page 43 highlights
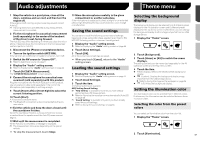
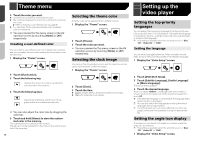
System settings p When the cursor for on time setting is placed on the left end and the cursor for off time setting is placed on the right end, the dimmer available time is 24 hours. p The time display of the dimmer duration adjusting bar is depending on the clock display setting. Refer to Setting the time and date on page 51 Adjusting the picture You can adjust the picture for each source and rear view camera. CAUTION For safety reasons, you cannot use some of these functions while your vehicle is in motion. To enable these functions, you must stop in a safe place and apply the parking brake. 1 Display the screen you wish to adjust. 2 Display the "System" setting screen. Refer to Displaying the "System" setting screen on page 41 3 Touch [Picture Adjustment]. 4 Touch the item to select the function to be adjusted. Brightness: Adjusts the black intensity. (-24 to +24) Contrast: Adjusts the contrast. (-24 to +24) Color: Adjusts the color saturation. (-24 to +24) Hue: Adjusts the tone of color (which color is emphasized, red or green). (-24 to +24) Dimmer: Adjusts the brightness of the display. (+1 to +48) Temperature: Adjusts the color temperature, resulting in a better white balance. (-3 to +3) p With some pictures, you cannot adjust Hue and Color. When you touch [Rear View] or [2nd Camera], the mode changes to the selected camera mode. By touching [Source], [Navi] or [Apps], you can return to the selected mode. 5 Touch , , , to adjust. p The adjustments of "Brightness", "Contrast" and "Dimmer" are stored separately when your vehicle's headlights are off (daytime) and on (nighttime). p "Brightness" and "Contrast" are switched automatically depending on whether the vehicle's headlights are on or off. p "Dimmer" can be changed the setting or the time to switch it to on or off. Refer to Setting the dimmer on page 42 p The picture adjustment may not be available with some rear view cameras. p The setting contents can be memorized separately. Displaying the firmware version 1 Display the "System" setting screen. Refer to Displaying the "System" setting screen on page 41 2 Touch [System Information]. 3 Touch [Firmware Information]. The "Firmware Information" screen appears. Displaying the open source licenses 1 Display the "System" setting screen. Refer to Displaying the "System" setting screen on page 41 2 Touch [System Information]. 3 Touch [License]. The open source licenses of the functions that this product is equipped with appear. Updating firmware CAUTION The USB storage device for updating must contain only the correct update file. Never turn this product off, disconnect the USB storage device while the firmware is being updated. You can only update the firmware when the vehicle is stopped and the parking brake is engaged. 1 Download the firmware update files. 2 Connect a blank (formatted) USB storage device to your computer, and then locate the correct update file and copy it onto the USB storage device. 3 Connect the USB storage device to this product. 4 Turn the source off. Refer to Selecting a source on page 11 5 Display the "System" setting screen. Refer to Displaying the "System" setting screen on page 41 6 Touch [System Information]. 7 Touch [Firmware Update]. 8 Touch [Continue] to display the data transfer mode. p Follow the on-screen instructions to finish updating the firmware. p This product will reset automatically after the firmware update is completed if the update is successful. p If an error message appears on the screen, touch the display and perform the above steps again. 43
-
 1
1 -
2
-
3
-
4
-
5
-
6
-
7
-
8
-
9
-
10
-
11
-
12
-
13
-
14
-
15
-
16
-
17
-
18
-
19
-
20
-
21
-
22
-
23
-
24
-
25
-
26
-
27
-
28
-
29
-
30
-
31
-
32
-
33
-
34
-
35
-
36
-
37
-
 38
38 -
 39
39 -
 40
40 -
 41
41 -
 42
42 -
 43
43 -
 44
44 -
 45
45 -
 46
46 -
 47
47 -
 48
48 -
49
-
50
-
51
-
52
-
53
-
54
-
55
-
56
-
57
-
58
-
59
-
60
-
61
-
62
-
63
-
64
-
65
-
66
-
67
-
68
-
69
-
70
-
71
-
72
-
73
-
74
-
75
-
76
-
77
-
78
-
79
-
80
-
81
-
82
-
83
-
84
-
85
-
86
-
87
-
88
-
89
-
90
-
91
-
92
-
93
-
94
-
95
-
96
-
97
-
98
-
99
-
100
-
101
-
102
-
103
-
104
-
105
-
106
-
107
-
108
-
109
-
110
-
111
-
112
-
113
-
114
-
115
-
116
-
117
-
118
-
119
-
120
-
121
-
122
-
123
-
124
-
125
-
126
-
127
-
128
-
129
-
130
-
131
-
132
-
133
-
134
-
135
-
136
-
137
-
138
-
139
-
140
-
141
-
142
-
143
-
144
-
145
-
146
-
147
-
148
-
149
-
150
-
151
-
152
-
153
-
154
-
155
-
156
-
157
-
158
-
159
-
160
-
161
-
162
-
163
-
164
-
165
-
166
-
167
-
168
-
169
-
170
-
171
-
172
-
173
-
174
-
175
-
176
-
177
-
178
-
179
-
180
-
181
-
182
-
183
-
184
-
185
-
186
-
187
-
188
-
189
-
190
-
191
-
192
-
193
-
194
-
195
-
196
-
197
-
198
-
199
-
200
-
201
-
202
-
203
-
204
-
205
-
206
-
207
-
208
-
209
-
210
-
211
-
212
-
213
-
214
-
215
-
216
 |
 |
