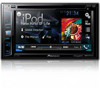
Pioneer AVH-X2700BS Owner's Manual - Page 49
Setting up the video player
 |
View all Pioneer AVH-X2700BS manuals
Add to My Manuals
Save this manual to your list of manuals |
Page 49 highlights
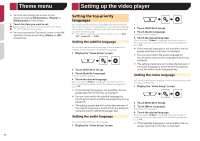
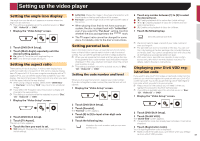
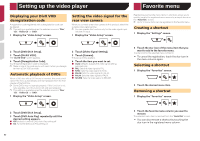
Setting up the video player Setting the angle icon display The angle icon can be set so it appears on scenes where the angle can be switched. p This setting is available when the selected source is "Disc", "CD", "Video CD" or "DVD". 1 Display the "Video Setup" screen. 2 Touch [DVD/DivX Setup]. 3 Touch [Multi Angle] repeatedly until the desired setting appears. ● On (default): Turns the multi-angle setting on. ● Off: Turns the multi-angle setting off. Setting the aspect ratio There are two kinds of displays. A wide screen display has a width-to-height ratio (TV aspect) of 16:9, while a regular display has a TV aspect of 4:3. If you use a regular rear display with a TV aspect of 4:3, you can set the aspect ratio suitable for your rear display. (We recommend use of this function only when you want to fit the aspect ratio to the rear display.) p When using a regular display, select either "Letter Box" or "Pan Scan". Selecting "16:9" may result in an unnatural image. p If you select the TV aspect ratio, this product's display will change to the same setting. p This setting is available when the selected source is "Disc", "CD", "Video CD" or "DVD". 1 Display the "Video Setup" screen. 2 Touch [DVD/DivX Setup]. 3 Touch [TV Aspect]. The pop-up menu appears. 4 Touch the item you want to set. ● 16:9 (default): Displays the wide screen image (16:9) as it is (initial setting). ● Letter Box: Makes the image in the shape of a letterbox with black bands on the top and bottom of the screen. ● Pan Scan: Cuts the image short on the right and left sides of the screen. When playing discs that do not have a panscan system, the disc is played back with "Letter Box" even if you select the "Pan Scan" setting. Confirm whether the disc package bears the mark. The TV aspect ratio cannot be changed for some discs. For details, refer to the disc's instructions. Setting parental lock Some DVD-Video discs let you use parental lock to set restrictions so that children cannot watch violent or adult-oriented scenes. You can set the parental lock level in steps as desired. p When you set a parental lock level and then play a disc fea- turing parental lock, code number input indications may be displayed. In this case, playback will begin when the correct code number is input. p This setting is available when the selected source is "Disc", "CD", "Video CD" or "DVD". Setting the code number and level When you first use this function, register your code number. If you do not register a code number, the parental lock will not operate. 1 Display the "Video Setup" screen. 2 Touch [DVD/DivX Setup]. 3 Touch [Parental]. The "Parental" screen appears. 4 Touch [0] to [9] to input a four-digit code number. 5 Touch the following key. Registers the code number, and you can now set the level. 6 Touch any number between [1] to [8] to select the desired level. ● [8]: Enables playback of the entire disc (initial setting). ● [7] to [2]: Enables playback of discs for children and non- adult oriented discs. ● [1]: Enables only playback of discs for children. 7 Touch the following key. Sets the parental lock level. p We recommend to keep a record of your code number in case you forget it. p The parental lock level is recorded on the disc. You can confirm it by looking at the disc package, the included literature or the disc itself. You cannot use parental lock with discs that do not feature a recorded parental lock level. p With some discs, parental lock operates to skip certain scenes only, after which normal playback resumes. For details, refer to the disc's instructions. Displaying your DivX VOD registration code If you want to play DivX® VOD (video on demand) content on this product, you must first register this product with your DivX VOD content provider. You do this by generating a DivX VOD registration code, which you submit to your provider. p Keep a record of the code as you will need it when you register this product to the DivX VOD provider. p This setting is available when the selected source is "Disc", "CD", "Video CD" or "DVD". 1 Display the "Video Setup" screen. 2 Touch [DVD/DivX Setup]. 3 Touch [DivX® VOD]. The "DivX® VOD" screen appears. p If a registration code has already been activated, it cannot be displayed. 4 Touch [Registration Code]. Your 10-digit registration code is displayed. p Make a note of the code as you will need it when you deregis- ter from a DivX VOD provider. 49
-
 1
1 -
2
-
3
-
4
-
5
-
6
-
7
-
8
-
9
-
10
-
11
-
12
-
13
-
14
-
15
-
16
-
17
-
18
-
19
-
20
-
21
-
22
-
23
-
24
-
25
-
26
-
27
-
28
-
29
-
30
-
31
-
32
-
33
-
34
-
35
-
36
-
37
-
38
-
39
-
40
-
41
-
42
-
43
-
 44
44 -
 45
45 -
 46
46 -
 47
47 -
 48
48 -
 49
49 -
 50
50 -
 51
51 -
 52
52 -
 53
53 -
 54
54 -
55
-
56
-
57
-
58
-
59
-
60
-
61
-
62
-
63
-
64
-
65
-
66
-
67
-
68
-
69
-
70
-
71
-
72
-
73
-
74
-
75
-
76
-
77
-
78
-
79
-
80
-
81
-
82
-
83
-
84
-
85
-
86
-
87
-
88
-
89
-
90
-
91
-
92
-
93
-
94
-
95
-
96
-
97
-
98
-
99
-
100
-
101
-
102
-
103
-
104
-
105
-
106
-
107
-
108
-
109
-
110
-
111
-
112
-
113
-
114
-
115
-
116
-
117
-
118
-
119
-
120
-
121
-
122
-
123
-
124
-
125
-
126
-
127
-
128
-
129
-
130
-
131
-
132
-
133
-
134
-
135
-
136
-
137
-
138
-
139
-
140
-
141
-
142
-
143
-
144
-
145
-
146
-
147
-
148
-
149
-
150
-
151
-
152
-
153
-
154
-
155
-
156
-
157
-
158
-
159
-
160
-
161
-
162
-
163
-
164
-
165
-
166
-
167
-
168
-
169
-
170
-
171
-
172
-
173
-
174
-
175
-
176
-
177
-
178
-
179
-
180
-
181
-
182
-
183
-
184
-
185
-
186
-
187
-
188
-
189
-
190
-
191
-
192
-
193
-
194
-
195
-
196
-
197
-
198
-
199
-
200
-
201
-
202
-
203
-
204
-
205
-
206
-
207
-
208
-
209
-
210
-
211
-
212
-
213
-
214
-
215
-
216
 |
 |
