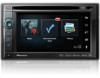
Pioneer AVIC-X940BT Owner's Manual - Page 2
for buying this Pioneer product. - usb
 |
View all Pioneer AVIC-X940BT manuals
Add to My Manuals
Save this manual to your list of manuals |
Page 2 highlights
Contents Thank you for buying this Pioneer product. Please read through these instructions so you will know how to operate your model properly. After you have finished reading the instructions, keep this document in a safe place for future reference. Important The screens shown in the examples may differ from actual screens. Actual screens may be changed without notice for performance and function improvements. Introduction Manual overview 10 - How to use this manual 10 - Conventions used in this manual 10 - Terms used in this manual 10 Notice regarding video viewing 11 Notice regarding DVD-Video viewing 11 Notice regarding MP3 file usage 11 iPod compatibility 11 Map coverage 11 Protecting the LCD panel and screen 12 Notes on internal memory 12 - Before removing the vehicle battery 12 - Data subject to erasure 12 Basic operation Checking part names and functions 14 Protecting your product from theft 16 - Removing the detachable faceplate 16 - Attaching the detachable faceplate 16 Adjusting the LCD panel angle 17 Inserting and ejecting a disc 17 - Inserting a disc (for AVIC-Z140BH) 17 - Ejecting a disc (for AVIC-Z140BH) 18 - Inserting a disc (for AVIC-X940BT) 18 - Ejecting a disc (for AVIC-X940BT) 18 Inserting and ejecting an SD memory card 18 - Inserting an SD memory card (for AVIC- Z140BH) 19 2 En - Ejecting an SD memory card (for AVICZ140BH) 19 - Inserting an SD memory card (for AVICX940BT) 20 - Ejecting an SD memory card (for AVICX940BT) 20 Plugging and unplugging a USB storage device 21 - Plugging in a USB storage device 22 - Unplugging a USB storage device 22 Connecting and disconnecting an iPod 22 - Connecting your iPod 22 - Disconnecting your iPod 22 Startup and termination 23 On first-time startup 23 Regular startup 23 - A message about the map database 24 Demonstration images 24 How to use the navigation menu screens Screen switching overview 26 What you can do on each menu 27 Shortcut Menu 27 - Selecting the shortcut 27 - Removing a shortcut 28 Operating list screens (e.g. POI list) 28 Operating the on-screen keyboard 28 How to use the map How to read the map screen 29 - Enlarged map of the intersection 30 - Display during freeway driving 31 Types of the road stored in the map database 31 Operating the map screen 31 - Changing the scale of the map 31 - Switching the map orientation 32 - Scrolling the map to the position you want to see 32
-
 1
1 -
 2
2 -
 3
3 -
 4
4 -
 5
5 -
 6
6 -
 7
7 -
 8
8 -
9
-
10
-
11
-
12
-
13
-
14
-
15
-
16
-
17
-
18
-
19
-
20
-
21
-
22
-
23
-
24
-
25
-
26
-
27
-
28
-
29
-
30
-
31
-
32
-
33
-
34
-
35
-
36
-
37
-
38
-
39
-
40
-
41
-
42
-
43
-
44
-
45
-
46
-
47
-
48
-
49
-
50
-
51
-
52
-
53
-
54
-
55
-
56
-
57
-
58
-
59
-
60
-
61
-
62
-
63
-
64
-
65
-
66
-
67
-
68
-
69
-
70
-
71
-
72
-
73
-
74
-
75
-
76
-
77
-
78
-
79
-
80
-
81
-
82
-
83
-
84
-
85
-
86
-
87
-
88
-
89
-
90
-
91
-
92
-
93
-
94
-
95
-
96
-
97
-
98
-
99
-
100
-
101
-
102
-
103
-
104
-
105
-
106
-
107
-
108
-
109
-
110
-
111
-
112
-
113
-
114
-
115
-
116
-
117
-
118
-
119
-
120
-
121
-
122
-
123
-
124
-
125
-
126
-
127
-
128
-
129
-
130
-
131
-
132
-
133
-
134
-
135
-
136
-
137
-
138
-
139
-
140
-
141
-
142
-
143
-
144
-
145
-
146
-
147
-
148
-
149
-
150
-
151
-
152
-
153
-
154
-
155
-
156
-
157
-
158
-
159
-
160
-
161
-
162
-
163
-
164
-
165
-
166
-
167
-
168
-
169
-
170
-
171
-
172
-
173
-
174
-
175
-
176
-
177
-
178
-
179
-
180
-
181
-
182
-
183
-
184
-
185
-
186
-
187
-
188
-
189
-
190
-
191
-
192
-
193
-
194
-
195
-
196
-
197
-
198
-
199
-
200
-
201
-
202
-
203
-
204
-
205
-
206
-
207
-
208
-
209
-
210
-
211
-
212
-
213
-
214
-
215
-
216
-
217
-
218
-
219
-
220
-
221
-
222
-
223
-
224
-
225
-
226
-
227
-
228
-
229
-
230
-
231
-
232
-
233
-
234
-
235
-
236
-
237
-
238
-
239
-
240
 |
 |
