Pioneer AVIC-X950BH Operation Manual - Page 161
Setting for rear view camera, Setting guidelines on the rear, view image
 |
View all Pioneer AVIC-X950BH manuals
Add to My Manuals
Save this manual to your list of manuals |
Page 161 highlights
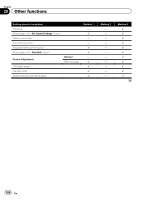
Customizing preferences Chapter 27 Customizing preferences Setting for rear view camera CAUTION Pioneer recommends the use of a camera which outputs mirror reversed images, otherwise the screen image may appear reversed. p Immediately verify whether the display changes to a rear view camera image when the shift lever is moved to REVERSE (R) from another position. p When the screen changes to full-screen rear view camera image during normal driving, switch to the opposite setting in "Polarity". Setting the rear view camera activation 1 Display the "System Settings" screen. = For details, refer to Displaying the screen for system settings on page 144. 2 Touch [Back Camera Settings]. The "Back Camera Settings" screen appears. 3 Touch [Camera]. This changes the setting to "On". p You can only switch to "Rear View" if this setting is "On". = For details of the operation, refer to Switching the view mode on page 33. When the polarity of the connected lead is positive while the shift lever is in the REVERSE (R) position. ! GND: When the polarity of the connected lead is negative while the shift lever is in the REVERSE (R) position. When the shift lever is moved to the REVERSE (R) position after setting the rear view camera, the rear view image appears. Displaying the parking assist guidelines 1 Display the "System Settings" screen. = For details, refer to Displaying the screen for system settings on page 144. 2 Touch [Back Camera Settings]. The "Back Camera Settings" screen appears. 3 Touch [Parking Assist Line]. 4 Touch [On] or [Off]. ! Off (default): The guideline disappears. ! On: The guideline appears. When the shift lever is moved to the REVERSE (R) position after setting the rear view camera, the rear view image appears. Setting the polarity of the rear view camera 1 Display the "System Settings" screen. = For details, refer to Displaying the screen for system settings on page 144. 2 Touch [Back Camera Settings]. The "Back Camera Settings" screen appears. 3 Touch [Polarity]. 4 Touch [GND] or [Battery] to select an appropriate setting for polarity. ! Battery (default): Setting guidelines on the rear view image CAUTION ! When adjusting the guidelines, be sure to park the vehicle in a safe place and apply the parking brake. En 161
-
 1
1 -
2
-
3
-
4
-
5
-
6
-
7
-
8
-
9
-
10
-
11
-
12
-
13
-
14
-
15
-
16
-
17
-
18
-
19
-
20
-
21
-
22
-
23
-
24
-
25
-
26
-
27
-
28
-
29
-
30
-
31
-
32
-
33
-
34
-
35
-
36
-
37
-
38
-
39
-
40
-
41
-
42
-
43
-
44
-
45
-
46
-
47
-
48
-
49
-
50
-
51
-
52
-
53
-
54
-
55
-
56
-
57
-
58
-
59
-
60
-
61
-
62
-
63
-
64
-
65
-
66
-
67
-
68
-
69
-
70
-
71
-
72
-
73
-
74
-
75
-
76
-
77
-
78
-
79
-
80
-
81
-
82
-
83
-
84
-
85
-
86
-
87
-
88
-
89
-
90
-
91
-
92
-
93
-
94
-
95
-
96
-
97
-
98
-
99
-
100
-
101
-
102
-
103
-
104
-
105
-
106
-
107
-
108
-
109
-
110
-
111
-
112
-
113
-
114
-
115
-
116
-
117
-
118
-
119
-
120
-
121
-
122
-
123
-
124
-
125
-
126
-
127
-
128
-
129
-
130
-
131
-
132
-
133
-
134
-
135
-
136
-
137
-
138
-
139
-
140
-
141
-
142
-
143
-
144
-
145
-
146
-
147
-
148
-
149
-
150
-
151
-
152
-
153
-
154
-
155
-
 156
156 -
 157
157 -
 158
158 -
 159
159 -
 160
160 -
 161
161 -
 162
162 -
 163
163 -
 164
164 -
 165
165 -
 166
166 -
167
-
168
-
169
-
170
-
171
-
172
-
173
-
174
-
175
-
176
-
177
-
178
-
179
-
180
-
181
-
182
-
183
-
184
-
185
-
186
-
187
-
188
-
189
-
190
-
191
-
192
-
193
-
194
-
195
-
196
-
197
-
198
-
199
-
200
-
201
-
202
-
203
-
204
 |
 |
