Pioneer DJM 3000 Owner's Manual - Page 18
Bpm Counting
 |
UPC - 012562585734
View all Pioneer DJM 3000 manuals
Add to My Manuals
Save this manual to your list of manuals |
Page 18 highlights
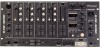
BPM COUNTING Using the Auto Mode to Count BPM This mode counts and displays the BPM of the channel selected with the H.P CUE switch and (when Effect selector switch is set to AUTO BPM, the CH-1 to CH-4 H.P CUE switch becomes the AUTO BPM COUNTER's channel select switch) the channel selected with the Effect CH. SELECT switch, thus making it easy to synchronize two tracks with different speeds (count range 70.0-180.0 BPM). Example: Display of BPM for CH-1 selected with H.P CUE switch and CH-2(2) selected with Effect CH. SELECT switch: BPM display Effect selector switch Effect CH. SELECT switch Effect PARAMETER 1 control (TIME) CH-1 H.P CUE switch Effect parameter/ BPM display TAP switch 1 Set the Effect selector switch to AUTO BPM. 2 Press the BPM counter range selector switch to choose the desired BPM count range. ÷ Select from one of the three ranges: 70-139, 91-180, or 70-180. The 70-180 range is selected with both LEDs (70-139 BPM and 91-180 BPM) light. 3 Set the Effect CH. SELECT switch to 2. ÷ The Effect parameter/BPM display LED "2" will light. ÷ The BPM of the music input to CH-2 will appear on the Effect parameter/BPM display's counter. * If the BPM cannot be counted for 2 seconds or more, the counter will flash. * Some tracks cannot be counted in AUTO BPM mode. In this event, set to manual mode to count the BPM (see page 19). 4 Press CH-1 H.P CUE switch. ÷ The BPM display LED "1" will light. ÷ The BPM of the music input to CH-1 will appear on the AUTO BPM COUNTER. * To measure BPM accurately, select only one channel (CH-1 to CH-4 H.P CUE switch) for the AUTO BPM COUNTER. ÷ Display when the BPM of CH-1 and CH-2 (126) match. BPM display LED Counter Effect parameter/ BPM display BPM counter range selector switch LED Counter 18
-
 1
1 -
2
-
3
-
4
-
5
-
6
-
7
-
8
-
9
-
10
-
11
-
12
-
 13
13 -
 14
14 -
 15
15 -
 16
16 -
 17
17 -
 18
18 -
 19
19 -
 20
20 -
 21
21 -
 22
22 -
 23
23 -
24
-
25
-
26
-
27
-
28
 |
 |
