Pioneer DJM-S9 Operating Instructions - Page 15
Importing tracks, Loading tracks and playing them, Playing tracks and outputting the sound
 |
View all Pioneer DJM-S9 manuals
Add to My Manuals
Save this manual to your list of manuals |
Page 15 highlights
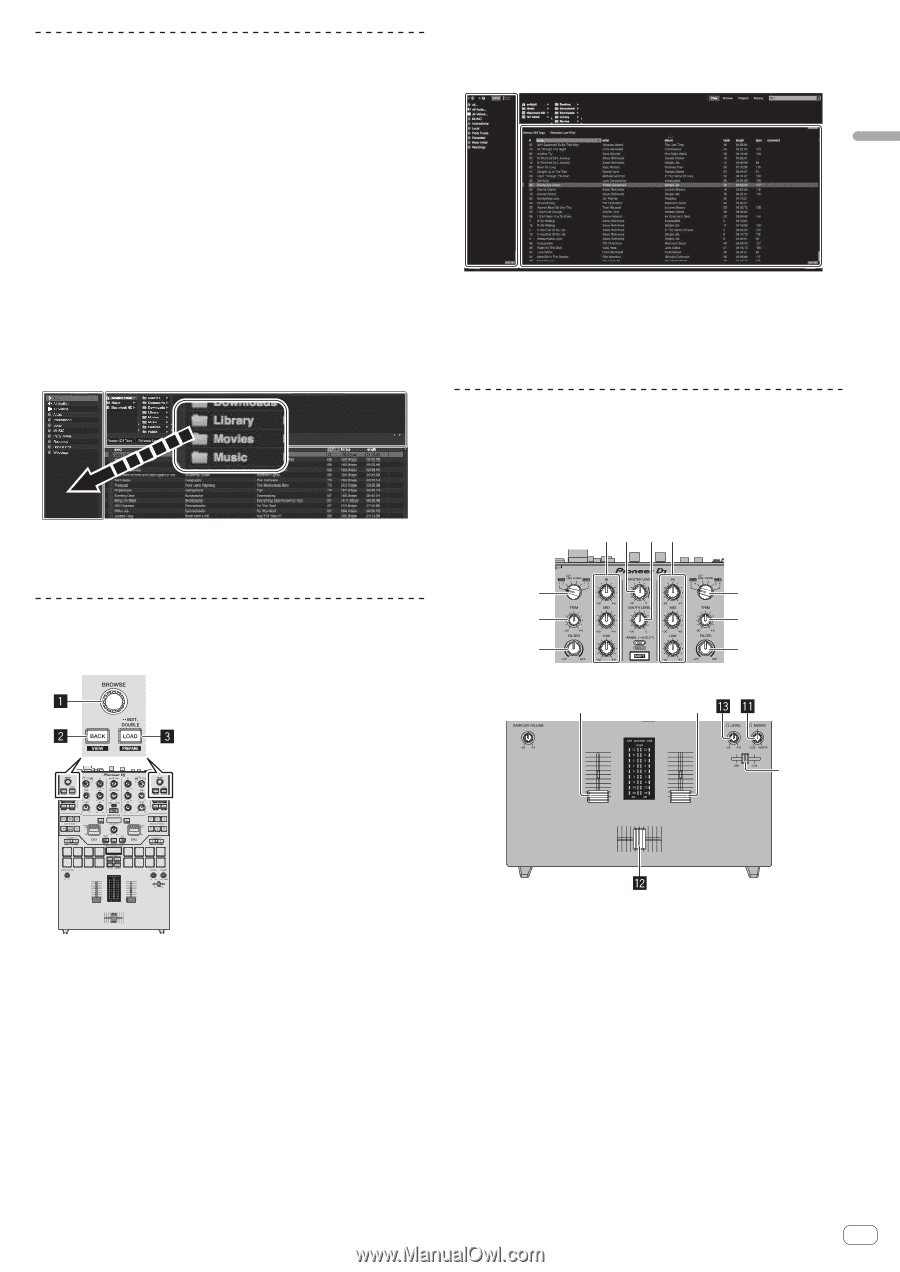
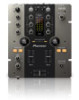
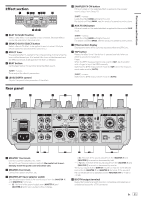
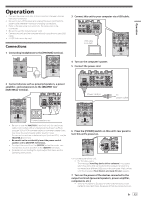
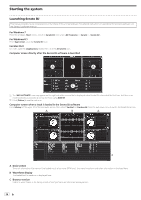
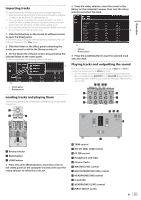
Operation Importing tracks The following describes the typical procedure for importing tracks. ! There are various ways to import tracks with the Serato DJ software. For details, see the Serato DJ software manual. ! If you are already using Serato DJ software (Scratch Live, ITCH or Serato DJ Intro) and have already created track libraries, the track libraries you have previously created can be used as such. ! If you are using Serato DJ Intro and have already created track libraries, you may have to reanalyze the tracks. 1 Click the [Files] key on the Serato DJ software screen to open the [Files] panel. The contents of your computer or the peripheral connected to the computer are displayed in the [Files] panel. 2 Click the folder on the [Files] panel containing the tracks you want to add to the library to select it. 3 On the Serato DJ software screen, drag and drop the selected folder to the crates panel. A crate is created and the tracks are added to the library. a b a [Files] panel b Crates panel Loading tracks and playing them The following describes the procedure for loading tracks into deck [1] as an example. 2 Press the rotary selector, move the cursor to the library on the computer's screen, then turn the rotary selector and select the track. a b a Library b Crates panel 3 Press the [LOAD] button to load the selected track onto the deck. Playing tracks and outputting the sound This section describes how to output the sound of DECK1 via CH1 by connecting a computer to the USB-A terminal. ! Set the volume of the devices (power amplifier, powered speakers, etc.) connected to the [MASTER 1] and [MASTER 2] terminals to an appropriate level. Note that loud sound will be output if the volume is set too high. 5 9 a5 e e 4 4 6 6 8 8 7 1 Rotary selector 2 BACK button 3 LOAD button 1 Press this unit's [BACK] button, move the cursor to the crates panel on the computer's screen, then turn the rotary selector to select the crate, etc. 4 TRIM control 5 ISO (HI, MID, LOW) control 6 FILTER control 7 Headphone CUE fader 8 Channel fader 9 MASTER LEVEL control a BOOTH MONITOR LEVEL control b HEADPHONES MIX control c Crossfader d HEADPHONES LEVEL control e INPUT SELECT switch En 15
-
 1
1 -
2
-
3
-
4
-
5
-
6
-
7
-
8
-
9
-
 10
10 -
 11
11 -
 12
12 -
 13
13 -
 14
14 -
 15
15 -
 16
16 -
 17
17 -
 18
18 -
 19
19 -
 20
20
 |
 |