Pioneer DMH-WT8600NEX Owners Manual
Pioneer DMH-WT8600NEX Manual
 |
View all Pioneer DMH-WT8600NEX manuals
Add to My Manuals
Save this manual to your list of manuals |
Pioneer DMH-WT8600NEX manual content summary:
- Pioneer DMH-WT8600NEX | Owners Manual - Page 1
English DMH-WT8600NEX DMH-WT7600NEX DMH-WC6600NEX DMH-W4660NEX DMH-W4600NEX RDS AV RECEIVER ® Operation Manual Important (Serial number) The serial number is located on the bottom of this unit. For your own security and convenience, be sure to record this number on the enclosed warranty card. - Pioneer DMH-WT8600NEX | Owners Manual - Page 2
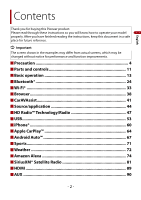
English Contents Thank you for buying this Pioneer product. Please read through these instructions so you will know how to operate your model properly. After you have finished reading the instructions, keep this document in a safe place for future reference. Important The screen shown in the - Pioneer DMH-WT8600NEX | Owners Manual - Page 3
English ■External component 92 ■iDatalink 93 ■Metra Axxess 98 ■Settings 101 Displaying the setting screen ...101 System settings ...101 Theme settings...110 Audio settings ...112 Video settings ...116 Communication settings ...117 ■Favorite menu 119 ■Other functions 120 ■Appendix 122 - 3 - - Pioneer DMH-WT8600NEX | Owners Manual - Page 4
installation. This equipment generates, uses and can radiate radio frequency energy and, if not installed and used in accordance with the instructions DMH-WT8600NEX, DMH-WT7600NEX, DMH-WC6600NEX, DMH-W4660NEX, DMHW4600NEX Responsible Party Name: PIONEER ELECTRONICS (USA), INC. SERVICE SUPPORT - Pioneer DMH-WT8600NEX | Owners Manual - Page 5
• Do not attempt to install or service this product by yourself. Installation or servicing of this product by persons switch off (ACC OFF) immediately and consult your dealer or the nearest authorized Pioneer Service Station. Do not use this product in this condition because doing so may result - Pioneer DMH-WT8600NEX | Owners Manual - Page 6
shock. Be sure to consult your dealer or the nearest authorized Pioneer Service Station for internal inspection, adjustments or repairs. • Do not brake is applied. • Keep this manual handy as a reference for operating procedures and safety information. • Do not install this product where it may (i) - Pioneer DMH-WT8600NEX | Owners Manual - Page 7
use the Pioneer receiver unless it is connected to and displays the same view as the factory backup camera. Connection to the factory backup camera will require an adaptor, sold separately. Not all vehicles may be able to connect. Please check with a qualified professional installer for installation - Pioneer DMH-WT8600NEX | Owners Manual - Page 8
for repair without making advance contact. -USA&CANADA Pioneer Electronics (USA) Inc. CUSTOMER SUPPORT DIVISION P.O. Box 1760 Long Beach, CA 90801-1760 or authorized Pioneer Service Station, make sure to bring both the unit and LCD display.* * DMH-WT8600NEX, DMH-WT7600NEX, DMH-WC6600NEX Visit our - Pioneer DMH-WT8600NEX | Owners Manual - Page 9
-WT8600NEX, DMH-WT7600NEX, DMH-WC6600NEX Notes on internal memory • The information will be erased by disconnecting the yellow lead from the battery (or removing the battery itself ). • Some of the settings and recorded contents will not be reset. About this manual • This manual uses diagrams of - Pioneer DMH-WT8600NEX | Owners Manual - Page 10
English This indicates to touch and hold the appropriate soft key on the touch screen. This indicates to swipe in the direction of the arrow on the touch screen. This indicates to drag in the direction of the arrow on the touch screen. - 10 - - Pioneer DMH-WT8600NEX | Owners Manual - Page 11
Parts and controls Main unit 8600NEX 7600NEX 6600NEX English 4660NEX 4600NEX / LCD screen Touch to display the home menu screen. Touch and hold to power off. To power back on, touch any button. Touch to activate the voice recognition mode such as Siri® when the iPhone is connected to the unit - Pioneer DMH-WT8600NEX | Owners Manual - Page 12
English / VOLUME MODE SRC/OFF TOP MENU MENU ENTER MUTE AUDIO SUBTITLE ANGLE BAND/ESC RETURN or or or Volume Press to switch between the Application screen and the AV operation screen. Press and hold to turn off the display. Press to cycle through all the available sources. Press and hold to turn - Pioneer DMH-WT8600NEX | Owners Manual - Page 13
to replace the battery Insert the CR2025 (3 V) battery with the plus (+) and minus (-) poles orientated properly. WARNING Batteries (battery pack or batteries installed) must not be exposed to excessive heat such as sunshine, fire or the like. CAUTION • Remove the battery if the remote control is - Pioneer DMH-WT8600NEX | Owners Manual - Page 14
English Important • Do not store the remote control in high temperatures or direct sunlight. • Do not let the remote control fall onto the floor, where it may become jammed under the brake or gas pedal. Starting up the unit 1 Start the engine to boot up the system. The [Select Program Language] - Pioneer DMH-WT8600NEX | Owners Manual - Page 15
English Using the touch panel You can operate this product by touching the keys on the screen directly with your fingers. NOTE To protect the LCD screen from damage, be sure to touch the screen only with your finger gently. Common touch panel keys : Returns to the previous screen. : Close the - Pioneer DMH-WT8600NEX | Owners Manual - Page 16
English Operating the time bar You can change the playback point by dragging the key. The playback time corresponding to the position of the key is displayed while dragging the key. Operating the on-screen keyboard Displays the characters that are entered. Enters the characters in the text box. - Pioneer DMH-WT8600NEX | Owners Manual - Page 17
English Home menu screen Widget (page 22) Touch to see the selected source/application. Customizing the widget (page 22) When you finish customizing, touch . Favorite source/application area Touch to see the selected source/application. Customizing the home menu screen (page 18) The following items - Pioneer DMH-WT8600NEX | Owners Manual - Page 18
English Customizing the home menu screen NOTES • The layout of the widgets and favorite icons on the home menu screen is saved for each mobile device connected via Bluetooth. The layout changes depending on the mobile device that is connected to this unit. • This function is available only when you - Pioneer DMH-WT8600NEX | Owners Manual - Page 19
English Favorite radio stations screen Favorite radio stations Touch to make changes to the selected radio station. List of favorite radio stations Touch to select the favorite radio station from the list screen (page 19). Updates the favorite radio stations. The next 3 stations on the favorites - Pioneer DMH-WT8600NEX | Owners Manual - Page 20
English Suggested radio stations This unit suggests radio stations to you according to your frequently listened music and radio stations. Important To use the suggested radio stations function, you may need to connect this unit to the Internet via a WiFi network and set [Suggestions] (page 101) to - Pioneer DMH-WT8600NEX | Owners Manual - Page 21
sports notification function, make sure that the GPS antenna is installed properly and this unit is connected to the Internet via a Wi-Fi network (page 33). For details on GPS antenna installation, refer to the Installation Manual. Displaying the notification screen 1 Touch then swipe right on - Pioneer DMH-WT8600NEX | Owners Manual - Page 22
English Notification screen Received notifications Touch to display the details of the notification. Widget Widgets enable you to see your favorite sources and application information on the home menu screen and access shortcuts to them. Customizing the widget NOTE This function is available only - Pioneer DMH-WT8600NEX | Owners Manual - Page 23
English Widget area To rearrange the widgets, drag them to the desired locations. To remove a widget, drag the widget to . Available source/application lists for the widgets Flick left/right to switch between widget lists. Adjusts the size of the widgets Touch a corner of the selected widget and - Pioneer DMH-WT8600NEX | Owners Manual - Page 24
. Delete a paired device first (page 25). • If your device supports SSP (Secure Simple Pairing), a six-digit number appears on the display 25). For details on Bluetooth device operations, refer to the operating instructions supplied with the Bluetooth device. • Two cellular phones can be connected - Pioneer DMH-WT8600NEX | Owners Manual - Page 25
English CAUTION Never turn this product off and disconnect the device while the Bluetooth setting operation is being processed. Menu Item [Auto Connect] [On] [Off] Description Select [On] to connect the last connected Bluetooth device automatically when using the hands-free phone function. [ - Pioneer DMH-WT8600NEX | Owners Manual - Page 26
English Hands-free phoning To use this function, you need to connect your cellular phone to this product via Bluetooth in advance (page 24). CAUTION For your safety, avoid talking on the phone as much as possible while driving. Making a phone call 1 Touch then swipe left on the screen. 2 Touch - Pioneer DMH-WT8600NEX | Owners Manual - Page 27
list then select the phone number. TIPS • The contacts on your phone will be automatically transferred to this product. • Update the phone book manually. NOTES • [Visibility] of the [Bluetooth] screen should be on (page 25). • If two cellular phones are automatically connected to this product with - Pioneer DMH-WT8600NEX | Owners Manual - Page 28
English Using the preset dial lists ▶Registering a phone number You can easily store up to six phone numbers per device as presets. 1 Touch then swipe left on the screen. 2 Touch [Phone]. 3 Touch or . On the [Phone Book] screen, touch the desired name to display the contact's phone number - Pioneer DMH-WT8600NEX | Owners Manual - Page 29
English NOTE When two phones are connected at the same time, if an incoming call is received on the second phone while you are talking on the first phone, the dial confirmation screen for the second phone will be displayed. Voice recognition function (for iPhone) By connecting your iPhone to this - Pioneer DMH-WT8600NEX | Owners Manual - Page 30
Registration and connection • Cellular phone operations vary depending on the type of cellular phone. Refer to the instruction manual that came with your cellular phone for detailed instructions. • When phone book transfer does not work, disconnect your phone and then perform pairing again from your - Pioneer DMH-WT8600NEX | Owners Manual - Page 31
on the Bluetooth device connected to this product, the available operations with this product may be limited or differ from the descriptions in this manual. • While you are listening to songs on your Bluetooth device, refrain from operating the phone function as much as possible. If you try - Pioneer DMH-WT8600NEX | Owners Manual - Page 32
English 6 Touch [Bluetooth Audio]. The Bluetooth audio playback screen appears. Basic operation Bluetooth audio playback screen Track number indicator Switches between playback and pause. Skips files forward or backward. Sets a repeat play range. Switches between random and normal file playback - Pioneer DMH-WT8600NEX | Owners Manual - Page 33
When you connect this unit to the Internet via Wi-Fi for the first time, the Internet Communication Service the Terms of Use and Privacy Policy is displayed. To use the Internet service, you need to accept the policy. Otherwise, most of the applications that use the Internet are not available - Pioneer DMH-WT8600NEX | Owners Manual - Page 34
screen Available network SSIDs Touch to connect selected network. Automatic connection status Touch to switch between the network automatically or manually. Network connection priority Drag the network upward to prioritize the connection by touching . Searches for existing networks. Touch to go - Pioneer DMH-WT8600NEX | Owners Manual - Page 35
Connects Wi-Fi network. Touch to select desired network then enter the password if required. TIP If you want to connect to a network that is not listed on the screen, touch [Other (Add network)] and enter the required information. Searches again for existing networks. English WPS Wi-Fi connection - Pioneer DMH-WT8600NEX | Owners Manual - Page 36
NOTE This setting is available only when you stop your vehicle in a safe place and apply the parking brake. The menu items vary according to the source/application. Menu Item [Wi-Fi] [On] [Off] [Hotspot setting] [Easy setup] [MAC Address] [IP Address] Description Switch Wi-Fi connection on or off - Pioneer DMH-WT8600NEX | Owners Manual - Page 37
English The Wi-Fi audio playback screen appears. NOTES • [Wi-Fi Audio] is displayed as [Android Auto] when the Android Auto is in use. • [Wi-Fi Audio] is displayed as [Apple CarPlay] when the Apple CarPlay is in use. Basic operation Wi-Fi audio screen (Example: Apple CarPlay) Wi-Fi audio with Apple - Pioneer DMH-WT8600NEX | Owners Manual - Page 38
install software or programs that Pioneer is not involved with. If you install such software or programs, mechanical trouble , you need to accept the Internet Communication Service the Terms of Use and Privacy Policy ( PDF. • The browser does not support some functions such as downloading files. - Pioneer DMH-WT8600NEX | Owners Manual - Page 39
English Web browser screen Available website thumbnails Touch to go to the selected website. TIP Swipe left/right to switch between registered webpage list. Website screen Browser toolbar To display the toolbar, swipe down from the top of the screen. Returns to the web browser screen. Displays the - Pioneer DMH-WT8600NEX | Owners Manual - Page 40
English NOTE When using the browser while Apple CarPlay or Android Auto is in operation, the browser is displayed on the connected rear monitor only when the browser is displayed on the main monitor. Otherwise, a black screen is displayed on the connected rear monitor. - 40 - - Pioneer DMH-WT8600NEX | Owners Manual - Page 41
can download CarAVAssist on the App Store®. For smartphone (Android) users This function is compatible with devices that have Android OS 6.0 or later installed. You can download CarAVAssist on the Google Play Store. What kind of functions does the application have? Promoting the use of the unit The - Pioneer DMH-WT8600NEX | Owners Manual - Page 42
latest firmware For details, refer to "Help" in the CarAVAssist application. Transferring the data 1 Connect your iPhone or smartphone with CarAVAssist installed on it to this product via Bluetooth (page 24). 2 Open CarAVAssist on the connected iPhone or smartphone then touch the connection button - Pioneer DMH-WT8600NEX | Owners Manual - Page 43
English 6 Touch [Firmware Update]. 7 Touch [CarAVAssist]. Follow the on-screen instructions to finish updating the firmware. NOTES • This product will reset automatically after the firmware update is completed if the update is successful. • If an error - Pioneer DMH-WT8600NEX | Owners Manual - Page 44
English Source/application Supported source and application You can play or use the following sources or application with this product. • HD Radio™ Technology/Radio (page 47) • USB (page 53) - Pioneer DMH-WT8600NEX | Owners Manual - Page 45
English Source list Touch to see the selected source. TIP Selecting [Power OFF] will turn off most of the functions on this unit. The [Power OFF] mode is released in the following cases: • Footage from the rear view camera is input when the vehicle is in reverse. • A button on this unit is touched. - Pioneer DMH-WT8600NEX | Owners Manual - Page 46
English Displays the source/application list. Settings (page 101) and Favorite menu (page 119) Selects or customizes the equalizer curve (page 114). Hands-free phoning (page 26) Selecting a source/an application NOTE [Source OFF] is only available for AV sources. Source/application selection - Pioneer DMH-WT8600NEX | Owners Manual - Page 47
Radio stations are brought to you by your local FM or AM stations. HD Radio stations feature the following: • High quality audio • FM multicasting • Data service AM band Analog AM Analog AM Digital AM FM band Analog FM Analog FM Analog FM : Main channel : Sub channel Digital FM Digital FM-1ch - Pioneer DMH-WT8600NEX | Owners Manual - Page 48
AM sounds like today's FM and FM sounds like a CD. Program Service Data: Contributes to the superior user experience of HD Radio Technology. Presents song name, artist, station IDs, HD2/HD3 Channel Guide, and other relevant data streams. Adjacent to traditional main stations are - Pioneer DMH-WT8600NEX | Owners Manual - Page 49
the list ([1] to [6]) to switch to the preset channel. Selects the FM1, FM2, FM3 or AM band. Performs BSM (best stations memory) function (page 50). Displays area radio stations list (page 50). Manual tuning Seek tuning or non stop seek tuning Releasing the key in a few seconds skips to the nearest - Pioneer DMH-WT8600NEX | Owners Manual - Page 50
English * DMH-WT8600NEX, DMH-WT7600NEX, DMH-WC6600NEX, DMH-W4660NEX Storing the strongest broadcast frequencies (BSM) The BSM (best stations memory) function automatically stores the six strongest of the Internet, you may not be able to receive the area radio stations list service. - 50 - - Pioneer DMH-WT8600NEX | Owners Manual - Page 51
Area radio stations list screen English Available radio stations Touch to tune in to the selected radio station. Radio settings 1 Touch then swipe left on the screen. 2 Touch then . The system setting screen appears. 3 Touch [AV Source Settings]. 4 Touch [Radio settings]. The menu items - Pioneer DMH-WT8600NEX | Owners Manual - Page 52
] for AM are available only with the stations with the strongest signals. • This setting is available only when [HD Radio] is selected as the source. * DMH-WT8600NEX, DMH-WT7600NEX, DMH-WC6600NEX, DMH-W4660NEX English - 52 - - Pioneer DMH-WT8600NEX | Owners Manual - Page 53
English USB Plugging/unplugging a USB storage device You can play audio, video, or still image files stored in a USB storage device. Plugging a USB storage device 1 Plug a USB Type-C® storage device into the USB Type-C cable. TIP When you use a USB Type-A storage device, use a USB Type-C to USB - Pioneer DMH-WT8600NEX | Owners Manual - Page 54
English Starting procedure 1 Touch then swipe left on the screen. 2 Plug the USB Type-C storage device into the USB Type-C cable (page 53). 3 Touch [USB]. Playback is performed in order of folder numbers. Folders are skipped if they contain no playable files. Basic operation TIP You can set - Pioneer DMH-WT8600NEX | Owners Manual - Page 55
English Sets a repeat play range for all files/the current folder/the current file. Switches between random and normal file playback order. Displays the hidden function bar. TIP You can also display the hidden function bar by flicking the bar from the right to the left. Switches the following media - Pioneer DMH-WT8600NEX | Owners Manual - Page 56
English Constructs the database for using the Music Browse mode (page 56). Switches the current music information display. ▶Selecting a file using Music Browse mode You can select files to play back using the category list if the files contain tag information. NOTES • This function is available - Pioneer DMH-WT8600NEX | Owners Manual - Page 57
English Video source screen Hides the touch panel keys. To display the keys again, touch anywhere on the screen. Switches between playback and pause. Performs fast reverse or fast forward. Touch again to change the playback speed. Stops playback. Touch again to start from the beginning next time. - Pioneer DMH-WT8600NEX | Owners Manual - Page 58
English Skips files forward or backward. Still image source TIP Image files are not displayed in the rear display. Still image screen Hides the touch panel keys. To display the keys again, touch anywhere on the screen. Switches between playback and pause. Skips files forward or backward. Selects - Pioneer DMH-WT8600NEX | Owners Manual - Page 59
English Sets a repeat play range for all files/the current folder. Plays all files in the current repeat play range or does not play them in random order. Switches the following media file types. [Music]: Audio files [Video]: Video files [Photo]: Image files Selects a file from the list. Touch a - Pioneer DMH-WT8600NEX | Owners Manual - Page 60
NOTE iPhone may be referred to as iPod in this manual. Connecting your iPhone When connecting an iPhone to this the screen. 3 Touch [iPod]. NOTES • For USB connection, refer to the Installation Manual. • For Bluetooth connection, see page 24. Basic operation Audio source Audio source screen - 60 - Pioneer DMH-WT8600NEX | Owners Manual - Page 61
English Displays the link search screen. Select a song from the list related to the song currently playing. TIP If you touch the artwork, the list of songs in the album is displayed. NOTE This function is not available while playing Apple Music® Radio. Switches between playback and pause. Skips - Pioneer DMH-WT8600NEX | Owners Manual - Page 62
English iPhone application screen Switches between playback and pause. Skips files forward or backward. Apple Music Radio source Important Apple Music Radio may not be available in your country or region. For details about Apple Music Radio, visit the following site: https://www.apple.com/music/ - Pioneer DMH-WT8600NEX | Owners Manual - Page 63
English Displays the pop-up menu for Apple Music Radio. • Touch [Play More Like This] to play back songs similar to the current song. • Touch [Play Less Like This] to set it not to play back the current song again. • Touch [Add to iTunes Wish List] to add the current song to the iTunes® wish list. - Pioneer DMH-WT8600NEX | Owners Manual - Page 64
www.apple.com/ios/carplay • The content and functionality of the supported applications are the responsibility of the App providers. • In Apple properly connected and installed, and the unit angle is properly set. For details on the installation, refer to the Installation Manual. Setting the driving - Pioneer DMH-WT8600NEX | Owners Manual - Page 65
English 2 Touch then . The communication setting screen appears. 3 Touch [Driving Position]. 4 Select the item. [Left] Select for a left-hand drive vehicle. [Right] Select for a right-hand drive vehicle. Starting procedure Wired connection 1 Connect an Apple CarPlay compatible device to - Pioneer DMH-WT8600NEX | Owners Manual - Page 66
TIP You can use Siri function by touching button once Apple CarPlay is activated. NOTES • For details on USB connection, refer to the Installation Manual. • If an Apple CarPlay compatible device has been connected and another screen is displayed, touch Apple CarPlay icon on the source/application - Pioneer DMH-WT8600NEX | Owners Manual - Page 67
details about compatibility of Android models, refer to the following website. https://support.google.com/androidauto NOTES • [USB MTP] is set to [Off properly connected and installed, and the unit angle is properly set. For details on the installation, refer to the Installation Manual. Setting the - Pioneer DMH-WT8600NEX | Owners Manual - Page 68
English 1 Touch then swipe left on the screen. 2 Touch then . The communication setting screen appears. 3 Touch [Driving Position]. 4 Select the item. [Left] Select for a left-hand drive vehicle. [Right] Select for a right-hand drive vehicle. Starting procedure Wired connection 1 - Pioneer DMH-WT8600NEX | Owners Manual - Page 69
TIP You can use voice recognition function by touching button once Android Auto is activated. NOTES • For details on USB connection, refer to the Installation Manual. • When the device for Android Auto is connected to this unit, the device is also connected via Bluetooth at the same time. If five - Pioneer DMH-WT8600NEX | Owners Manual - Page 70
1 Touch then swipe left on the screen. 2 Touch then . 3 Touch [Android Auto Auto-launch] to switch [On] or [Off]. English - 70 - - Pioneer DMH-WT8600NEX | Owners Manual - Page 71
the Internet Communication Service the Terms of Use and Privacy Policy (page 110). • Before connecting this unit to the Internet, make sure that the GPS antenna is installed properly to obtain correct time and date. For details on GPS antenna installation, refer to the Installation Manual. Starting - Pioneer DMH-WT8600NEX | Owners Manual - Page 72
properly so that your correct location and time can be used for the weather service and location service. For details on GPS antenna installation, refer to the Installation Manual. Starting procedure 1 Touch then swipe left on the screen. 2 Touch [Weather]. Weather screen Current temperature - Pioneer DMH-WT8600NEX | Owners Manual - Page 73
English NOTE If a data item is unknown or missing, "-" is displayed. - 73 - - Pioneer DMH-WT8600NEX | Owners Manual - Page 74
this unit to the Internet via a Wi-Fi network. • This function is available in the following languages* and countries: * All of the languages supported by Amazon Alexa are currently not available, but will be available soon. Languages* - English (US), (CA), (UK), (AU), (IN) - French - Spanish (ES - Pioneer DMH-WT8600NEX | Owners Manual - Page 75
English 2 Touch then . 3 Touch [Amazon Alexa setting]. 4 Touch [Setup]. The introduction screen appears. 5 Touch [Get started]. 6 Use your mobile device to go to the displayed URL or scan the QR code. 7 Enter your Amazon account Email address and password. 8 Enter the code that is shown in - Pioneer DMH-WT8600NEX | Owners Manual - Page 76
"Alexa", such as "Echo", "Amazon", or "Computer", are not supported. Entertainment You can play content through Amazon Music, Kindle books text-to- To use the entertainment function, you need to subscribe to the Amazon service. Starting procedure ▶Touch operation 1 Touch then swipe left on the - Pioneer DMH-WT8600NEX | Owners Manual - Page 77
call using your contacts, you need to allow Alexa to access the contact information on your mobile device. • To use this function, you need to install the Amazon Alexa app on your mobile device that is paired with this unit, and sign in to the same Amazon account as the one - Pioneer DMH-WT8600NEX | Owners Manual - Page 78
English NOTE Support for the Alexa Calling service will be available soon. Before using phone call control Before using this function, connect your mobile device to this unit via Bluetooth. 1 Touch then swipe - Pioneer DMH-WT8600NEX | Owners Manual - Page 79
English Starting procedure ▶Touch operation 1 Touch then swipe left on the screen. 2 Touch [Alexa]. 3 Talk to Amazon Alexa to perform the desired hands-free phone operation. ▶Voice operation 1 Talk to Amazon Alexa to perform the desired hands-free phone operation by using "Alexa" as the wake - Pioneer DMH-WT8600NEX | Owners Manual - Page 80
information, such as weather, traffic information, etc. [Start of request sound] [End of request sound] [Language] NOTE You need to enable the location services for the Amazon Alexa app on your mobile device in order to search for nearby places. Switches whether or not Amazon Alexa plays a sound - Pioneer DMH-WT8600NEX | Owners Manual - Page 81
channels, including commercial-free music plus the best sports, news, talk, comedy, and entertainment 1, ensure that your SiriusXM Connect Vehicle Tuner is installed correctly. 3 Switch to Channel 0 and check the letters I, O, S, or F. 4 Activate the service either online or by phone. TIP In the - Pioneer DMH-WT8600NEX | Owners Manual - Page 82
English Listening to SiriusXM 1 Touch then swipe left on the screen. 2 Touch [SiriusXM]. Basic operation TIPS • On the Featured Favorites Band, the current broadcast frequency cannot be stored to a key (page 86). • If fewer than two music channels are stored as presets, you cannot use the - Pioneer DMH-WT8600NEX | Owners Manual - Page 83
English tune Switches TuneMix™ to on or off. mix You can use TuneMix™ from each of the music channels stored as presets on the current band. NOTES • When fewer than two music channels are stored as presets, you cannot use TuneMix™. • Locked channels will not be used by TuneMix™ until the - Pioneer DMH-WT8600NEX | Owners Manual - Page 84
English Selects a channel from the list. Select the category name or the list of all channels then touch the desired channel. To switch the display list, touch . TIPS • The displayed list switches in the following order. Channel Name-Artist Name-Song Title-Content Info • If you touch Scan , you can - Pioneer DMH-WT8600NEX | Owners Manual - Page 85
NOTES • When fewer than two music channels are stored as presets, you cannot use TuneScan™. • TuneScan™ may take a few minutes to become available after the product is turned on or the preset band is changed. 1 Touch tune scan to display the following display. English Continues playing the - Pioneer DMH-WT8600NEX | Owners Manual - Page 86
English Using Featured Favorites Band Featured Favorites are groups of channels that are created by the SiriusXM Programming department allowing you to discover new channels. Featured Favorite channels are dynamic and can change often, allowing you to discover new channels. For details, see [ - Pioneer DMH-WT8600NEX | Owners Manual - Page 87
English Menu Item [Parental Control] [Featured Favorites] [On] [Off] [Featured Band Update Message] [On] [Off] [SportsFlash] [On] [Off] [SportsFlash List] [City List] Description Enter the current passcode then touch to set this function (the default passcode is 0000). • To edit the passcode, - Pioneer DMH-WT8600NEX | Owners Manual - Page 88
Menu Item [SiriusXM Reset] Description Set to restore to the default SiriusXM settings by touching [Restore]. CAUTION Do not turn off the engine while restoring the settings. NOTE The source is turned off before the process starts. English - 88 - - Pioneer DMH-WT8600NEX | Owners Manual - Page 89
a safe place and apply the parking brake. NOTE A micro HDMI® cable (sold separately) is required for connection. For details, refer to the Installation Manual. Starting procedure 1 Connect an HDMI device to this unit via a micro HDMI cable (sold separately) then turn on the device. 2 Touch then - Pioneer DMH-WT8600NEX | Owners Manual - Page 90
and apply the parking brake. NOTE A Mini-jack AV cable (sold separately) is required for connection. For details, refer to the Installation Manual. Starting procedure 1 Touch then swipe left on the screen. 2 Touch then . 3 Touch [Input/Output settings]. 4 Confirm that [AUX Input] is turned - Pioneer DMH-WT8600NEX | Owners Manual - Page 91
English Hides the touch panel keys. To display the keys again, touch anywhere on the screen. TIP You can set the screen size for the video image (page 120). Switches between the video input and audio input. - 91 - - Pioneer DMH-WT8600NEX | Owners Manual - Page 92
connected to the back camera input or 2nd camera input.* For details, refer to the Installation Manual. * The 2nd camera input is available only for DMH-WT8600NEX/DMH-WT7600NEX/DMH-WC6600NEX/ DMH-W4660NEX. Starting procedure 1 Touch then swipe left on the screen. 2 Touch [Camera View]. Video - Pioneer DMH-WT8600NEX | Owners Manual - Page 93
support Important • For details about vehicle models that are compatible with the iDatalink adaptor, refer to the information on our website. • After installing • For troubleshooting information about iDatalink functions, visit the following website: http://maestro.idatalink.com/support Limitations • - Pioneer DMH-WT8600NEX | Owners Manual - Page 94
the firmware, refer to iDatalink Maestro website. • For details on connecting this product to iDatalink Maestro, refer to the Installation Manual. • You can also check the device number on the [Firmware Information] screen of this product (page 107). Starting procedure 1 Connect the iDatalink - Pioneer DMH-WT8600NEX | Owners Manual - Page 95
English Using the functions on [Car Features] You can check and use the following screens after selecting [Car Features] in the starting procedure. Touch one of the icons on the left side of the screen to change a feature. Displays the Gauge screen. Displays the Vehicle Information screen. Displays - Pioneer DMH-WT8600NEX | Owners Manual - Page 96
English Vehicle Information screen Climate screen Parking Assist screen - 96 - - Pioneer DMH-WT8600NEX | Owners Manual - Page 97
Speed Radar Detector screen English Displaying obstacle detection information CAUTION This function is intended solely to assist the driver's vision. It does not detect all dangers and obstacles and is not a substitute for your attentiveness, judgement, and care while parking your vehicle. NOTE - Pioneer DMH-WT8600NEX | Owners Manual - Page 98
them on this product by replacing the Metra parts kit with interface conversion. NOTE Since the type of information on our website. • For troubleshooting information about the Metra interface conversion this product. For details, refer to the Installation manual. 2 Touch then swipe left on the - Pioneer DMH-WT8600NEX | Owners Manual - Page 99
English Displays the Vehicle Information screen. Displays the Climate screen. Displays the Radio ID screen. Vehicle information screen Climate screen - 99 - - Pioneer DMH-WT8600NEX | Owners Manual - Page 100
English Radio ID screen - 100 - - Pioneer DMH-WT8600NEX | Owners Manual - Page 101
English Settings You can adjust various settings in the main menu. Displaying the setting screen 1 Touch then swipe left on the screen. 2 Touch . 3 Touch one of the following categories, then select the options. System settings (page 101) Theme settings (page 110) Audio settings (page 112) - Pioneer DMH-WT8600NEX | Owners Manual - Page 102
AUX source (page 90). * DMH-WT8600NEX, DMH-WT7600NEX, DMH-WC6600NEX, DMH-W4660NEX [Camera settings] A separately -screen image of the rear view camera installed on your vehicle when the shift lever how to adjust the guidelines, see [Parking Assist Guide Adjust] (page 104). ▶Camera for Camera View - Pioneer DMH-WT8600NEX | Owners Manual - Page 103
English CAUTION Pioneer recommends the use of a camera which outputs mirror reversed images, otherwise the screen image may appear reversed. • Immediately verify whether the display changes to the - Pioneer DMH-WT8600NEX | Owners Manual - Page 104
English Menu Item [Parking Assist Guide Adjust] Description Adjusting the guidelines by dragging or touching / / / / / on the screen. Touch [Default] to reset the settings. CAUTION • When adjusting the guidelines, park the - Pioneer DMH-WT8600NEX | Owners Manual - Page 105
English [System Language] Menu Item [System Language] [Restore Settings] Menu Item [All Settings] [Clock Settings] Menu Item [Clock Settings] Description Select the system language. NOTES • If the embedded language and the selected language setting are not the same, the text information may not - Pioneer DMH-WT8600NEX | Owners Manual - Page 106
vehicle's headlight turning on or off. Switches the dimmer to on or off manually. Switches the dimmer to on or off at the time you adjusted. day or night. You can use this function when [Dimmer Trigger] is set to [Manual]. [Day] [Night] Turns the dimmer function to off. Turns the dimmer function - Pioneer DMH-WT8600NEX | Owners Manual - Page 107
English To adjust following menu, touch , , , to adjust. Menu Item [Brightness] [-24] to [+24] [Contrast] [-24] to [+24] [Color]* [-24] to [+24] [Hue]* [-24] to [+24] [Dimmer] [+1] to [+48] [Temperature] [-3] to [+3] Description Adjust the black intensity. Adjust the contrast. Adjust the color - Pioneer DMH-WT8600NEX | Owners Manual - Page 108
the [System] setting screen (page 101). 6 Touch [System Information]. 7 Touch [Firmware Update]. 8 Touch [USB]. 9 Touch [Continue]. Follow the on-screen instructions to finish updating the firmware. NOTES • This product will reset automatically after the firmware update is completed if the update is - Pioneer DMH-WT8600NEX | Owners Manual - Page 109
learned results stored in the sensor, follow the below instructions. 1 Touch [Distance] or [Speed Pulse], and then touch [Yes]. 2 Touch [Learning status] and then touch [Reset All]. TIP Touch [Reset All] to reset the sensor after changing the installation position or angle. NOTE If you touch [Reset - Pioneer DMH-WT8600NEX | Owners Manual - Page 110
Alexa (page 79). [Terms of Use / Privacy] Menu Item [Terms of Use / Privacy] Description Select to accept or withdraw from the Internet Communication Service the Terms of Use and Privacy Policy. NOTES • The following functions are not activated unless you agree to the Internet Communication - Pioneer DMH-WT8600NEX | Owners Manual - Page 111
English Menu Item [Background] Preset Display (custom)*1 (off ) [Illumination]*2 Colored Keys (custom) (rainbow) [Theme]*2 [Clock] Preset Images (off ) Description Select the wall paper from the preset items in this product or original pictures via the external device. The wall paper can be set - Pioneer DMH-WT8600NEX | Owners Manual - Page 112
English Menu Item [Home Custom Setting] Description Customize the home menu screen of the following items. • Switch the favorite source/application area • Customize the displayed favorite source/application and widget • Rearrange the displayed favorite source/application and widget • Adjust the - Pioneer DMH-WT8600NEX | Owners Manual - Page 113
English Menu Item [Source Level Adjuster] [-4] to [+4] [Master Sound Reviver] [Off] [Mode1] [Mode2] [Speaker Level] Listening Position*1*2 [Off] [Front Left] [Front Right] [Front] [All] Standard Mode*3 [Front Left] [Front Right] [Rear Left] [Rear Right] [Subwoofer] Network Mode*3 [High Left] [High - Pioneer DMH-WT8600NEX | Owners Manual - Page 114
English Menu Item [Balance] [Time Alignment] [On] [Off] Listening Position*1*2 [Off] [Front Left] [Front Right] [Front] [All] Standard Mode*3*4 [Front Left] [Front Right] [Rear Left] [Rear Right] [Subwoofer] Network Mode*3*4 [High Left] [High Right] [Mid Left] [Mid Right] [Subwoofer] Distance [0] - Pioneer DMH-WT8600NEX | Owners Manual - Page 115
English Menu Item [Rear Speaker Output] [Rear] [Subwoofer] [Mute Level] [ATT] [Mute] [Off] [Subwoofer Settings]*5 [Save Settings] Description Select the rear speaker output. NOTE This function is available when [Standard Mode] is selected as the speaker mode. If an interruption caused by an audio - Pioneer DMH-WT8600NEX | Owners Manual - Page 116
. Video settings The menu items vary according to the source. [Time Per Photo Slide] Menu Item [Time Per Photo Slide] [5sec] [10sec] [15sec] [Manual] Description Select the interval of image file slideshows on this product. [Video Signal Setting] Menu Item [AUX] [Auto] [PAL] [NTSC] [PALM] [PAL - Pioneer DMH-WT8600NEX | Owners Manual - Page 117
, DMH-WT7600NEX, DMH-WC6600NEX, DMH-W4660NEX Communication settings English [Connection] Menu Item [Connection] Description Displaying a list of mobile devices that have been connected via Bluetooth or USB. Connect, disconnect, or delete registered mobile device manually. Touch to delete - Pioneer DMH-WT8600NEX | Owners Manual - Page 118
English [Wireless Settings: Smartphone] Setting the infrastructure mode network (page 36). [Driving Position] Menu Item [Driving Position] [Right] [Left] Description Setting the driving position. • Apple CarPlay™ (page 64) • Android Auto™ (page 67) [Android Auto Auto-launch] Menu Item [Android - Pioneer DMH-WT8600NEX | Owners Manual - Page 119
English Favorite menu Registering your favorite menu items in shortcuts allows you to quickly jump to the registered menu screen by a simple touch on the [Favorites] screen. NOTE Up to 12 menu items can be registered in the favorite menu. Creating a shortcut 1 Touch then swipe left on the - Pioneer DMH-WT8600NEX | Owners Manual - Page 120
English Other functions Setting the clock display You can set the time format, time zone, daylight saving, and the date format. However, the time and date are automatically adjusted by the GPS antenna and cannot be adjusted by the user. 1 Touch the current time on the screen. 2 Set the following - Pioneer DMH-WT8600NEX | Owners Manual - Page 121
English 2 Touch the desired mode. [Full] Displays images across the entire screen. [Zoom] [Normal] [Trimming] NOTE Some images may not be displayed across the entire screen. Displays the images enlarging them vertically. Displays images without changing the ratio. An image is displayed across - Pioneer DMH-WT8600NEX | Owners Manual - Page 122
English Troubleshooting If you have problems operating this product, refer to this section. The most common problems are listed below, along with likely causes and solutions. If a solution to your problem cannot be found here, contact your dealer or the nearest authorized Pioneer service facility - Pioneer DMH-WT8600NEX | Owners Manual - Page 123
(Refer to the installation manual.) → The reverse - Review System Settings section of this manual for Problems with the phone screen Dialing is impossible because the touch panel keys for dialing are inactive. → Your phone is out of range for service. - Retry after re-entering the range for service - Pioneer DMH-WT8600NEX | Owners Manual - Page 124
appears on the display. Refer to the table below to identify the problem, then take the suggested corrective action. If the error persists, record the error message and contact your dealer or your nearest Pioneer service center. Common AMP Error → This product fails to operate or the speaker - Pioneer DMH-WT8600NEX | Owners Manual - Page 125
English disappear even after the engine is switched off/on, contact your dealer or the nearest authorized Pioneer service center for assistance. No Signal → The SiriusXM Connect Vehicle Tuner is having difficulty receiving the SiriusXM satellite signal. - Verify that your vehicle is outdoors with a - Pioneer DMH-WT8600NEX | Owners Manual - Page 126
USB storage device is enabled. - Follow the USB storage device instructions to disable security. Skipped → The connected USB storage device Format not supported → This type of file is not supported on this product. - Select a file that can be played. iPhone There was a problem communicating with - Pioneer DMH-WT8600NEX | Owners Manual - Page 127
connection and installation, refer to the Installation Manual. If the error message is still displayed after performing the above action, please contact your dealer or an authorized Pioneer Service Station. . - Park your vehicle in a safe place, and follow the instructions displayed on - 127 - - Pioneer DMH-WT8600NEX | Owners Manual - Page 128
English the screen. If the error message is still displayed after performing on-screen instructions, please reconnect the device. Detailed information for playable media Compatibility Common notes about the USB storage device • Do not leave the USB storage device in - Pioneer DMH-WT8600NEX | Owners Manual - Page 129
English USB storage device CODEC FORMAT MP3, WMA, WAV, AAC, FLAC, DSD, AVI, MPEG-PS, MPEG-TS, MP4, 3GP, MKV, MOV, ASF, FLV, M4V MP3 compatibility • Ver. 2.x of ID3 tag is prioritized when both Ver. 1.x and Ver. 2.x exist. • This product is not compatible with the following: MP3i (MP3 interactive - Pioneer DMH-WT8600NEX | Owners Manual - Page 130
English display them with a reduced font size. However, the maximum number of the characters that you can display varies according to the width of each character, and of the display area. • Folder selection sequence or other operations may be altered, depending on the order in which files are saved - Pioneer DMH-WT8600NEX | Owners Manual - Page 131
English Bluetooth The Bluetooth® word mark and logos are registered trademarks owned by Bluetooth SIG, Inc. and any use of such marks by PIONEER CORPORATION is under license. Other trademarks and trade names are those of their respective owners. USB Type-C USB Type-C® and USB-C® are registered - Pioneer DMH-WT8600NEX | Owners Manual - Page 132
LIABLE FOR ANY DIRECT, INDIRECT, INCIDENTAL, SPECIAL, EXEMPLARY, OR CONSEQUENTIAL DAMAGES (INCLUDING, BUT NOT LIMITED TO, PROCUREMENT OF SUBSTITUTE GOODS OR SERVICES; LOSS OF USE, DATA, OR PROFITS; OR BUSINESS INTERRUPTION) HOWEVER CAUSED AND ON ANY THEORY OF LIABILITY, WHETHER IN CONTRACT, STRICT - Pioneer DMH-WT8600NEX | Owners Manual - Page 133
trademark of Google LLC. Detailed information regarding connected iPhone devices • Pioneer accepts no responsibility for data lost from an iPhone, even if under the brake or gas pedal. • For details, refer to the iPhone manuals. iPhone and Lightning® Use of the Made for Apple badge means that an - Pioneer DMH-WT8600NEX | Owners Manual - Page 134
English App Store App Store is a service mark of Apple Inc. iOS iOS is a trademark on which Cisco holds the trademark right in the US and certain other countries. iTunes iTunes is a - Pioneer DMH-WT8600NEX | Owners Manual - Page 135
or discontinuation of the connected Content application(s) or service by its provider. • Pioneer is not liable for any issues that may arise from incorrect or flawed appbased content. • The content and functionality of the supported applications - Pioneer DMH-WT8600NEX | Owners Manual - Page 136
lifetime, the screen will become dimmer and the image will no longer be visible. In that case, please consult your dealer or the nearest authorized Pioneer Service Station. - 136 - - Pioneer DMH-WT8600NEX | Owners Manual - Page 137
) Grounding system: Negative type Maximum current consumption: 10.0 A Dimensions (W × H × D): (DMH-WT8600NEX) Chassis (D): 178 mm × 50 mm × 165 mm .) (DMH-WC6600NEX) 9.0 inch wide/16:9 (effective display area: 198.72 mm × 111.78 mm) (7-3/4 in. × 43/8 in.) (DMH-W4660NEX/DMH-W4600NEX) 6.78 inch wide/16 - Pioneer DMH-WT8600NEX | Owners Manual - Page 138
: -6 dB/oct, -12 dB/oct, -18 dB/oct, -24 dB/oct, -30 dB/oct, -36 dB/oct Phase (Subwoofer): Normal/Reverse Time alignment: 0 to 210 inch (0.6 inch/step) Speaker level: +10 dB to -24 dB (1 dB/step) USB USB standard spec: USB 1.1, USB 2.0 full speed, USB 2.0 high speed Max current supply: 3.0 A - 138 - Pioneer DMH-WT8600NEX | Owners Manual - Page 139
TS 07.10) 1.2 FM tuner Frequency range: 87.9 MHz to 107.9 MHz Usable sensitivity: 12 dBf (1.1 μV/75 Ω, mono, S/N: 30 dB) Signal-to-noise ratio: (DMH-WT8600NEX/DMH-WT7600NEX/ DMH-WC6600NEX/DMH-W4660NEX) 65 dB (digital broadcasting) (IHF-A network) 65 dB (analog broadcasting) (IHF-A network) - 139 - - Pioneer DMH-WT8600NEX | Owners Manual - Page 140
(DMH-WT8600NEX/DMH-WT7600NEX/ DMH-WC6600NEX/DMH-W4660NEX) 60 dB (digital broadcasting) (IHF-A network) 60 dB (analog broadcasting) (IHF-A network) (DMH- strip flat antenna/right-handed helical polarization Antenna cable: 3.55 m (11ft. 7in.) Dimensions (W × H × D): 33 mm × 14.7 mm × 36 mm (1-1/4 in - Pioneer DMH-WT8600NEX | Owners Manual - Page 141
© 2020 PIONEER CORPORATION. All rights reserved. UC
-
 1
1 -
 2
2 -
 3
3 -
 4
4 -
 5
5 -
 6
6 -
 7
7 -
8
-
9
-
10
-
11
-
12
-
13
-
14
-
15
-
16
-
17
-
18
-
19
-
20
-
21
-
22
-
23
-
24
-
25
-
26
-
27
-
28
-
29
-
30
-
31
-
32
-
33
-
34
-
35
-
36
-
37
-
38
-
39
-
40
-
41
-
42
-
43
-
44
-
45
-
46
-
47
-
48
-
49
-
50
-
51
-
52
-
53
-
54
-
55
-
56
-
57
-
58
-
59
-
60
-
61
-
62
-
63
-
64
-
65
-
66
-
67
-
68
-
69
-
70
-
71
-
72
-
73
-
74
-
75
-
76
-
77
-
78
-
79
-
80
-
81
-
82
-
83
-
84
-
85
-
86
-
87
-
88
-
89
-
90
-
91
-
92
-
93
-
94
-
95
-
96
-
97
-
98
-
99
-
100
-
101
-
102
-
103
-
104
-
105
-
106
-
107
-
108
-
109
-
110
-
111
-
112
-
113
-
114
-
115
-
116
-
117
-
118
-
119
-
120
-
121
-
122
-
123
-
124
-
125
-
126
-
127
-
128
-
129
-
130
-
131
-
132
-
133
-
134
-
135
-
136
-
137
-
138
-
139
-
140
-
141
 |
 |
®
English
DMH-WT8600NEX
DMH-WT7600NEX
DMH-WC6600NEX
DMH-W4660NEX
DMH-W4600NEX
RDS AV RECEIVER
Important (Serial number)
The serial number is located on the bottom of this unit. For your own security and convenience, be
sure to record this number on the enclosed warranty card.
Operation Manual