Pioneer PRO110FD Owner's Manual - Page 21
screw in the lower screw temporarily. - speakers
 |
UPC - 012562864976
View all Pioneer PRO110FD manuals
Add to My Manuals
Save this manual to your list of manuals |
Page 21 highlights
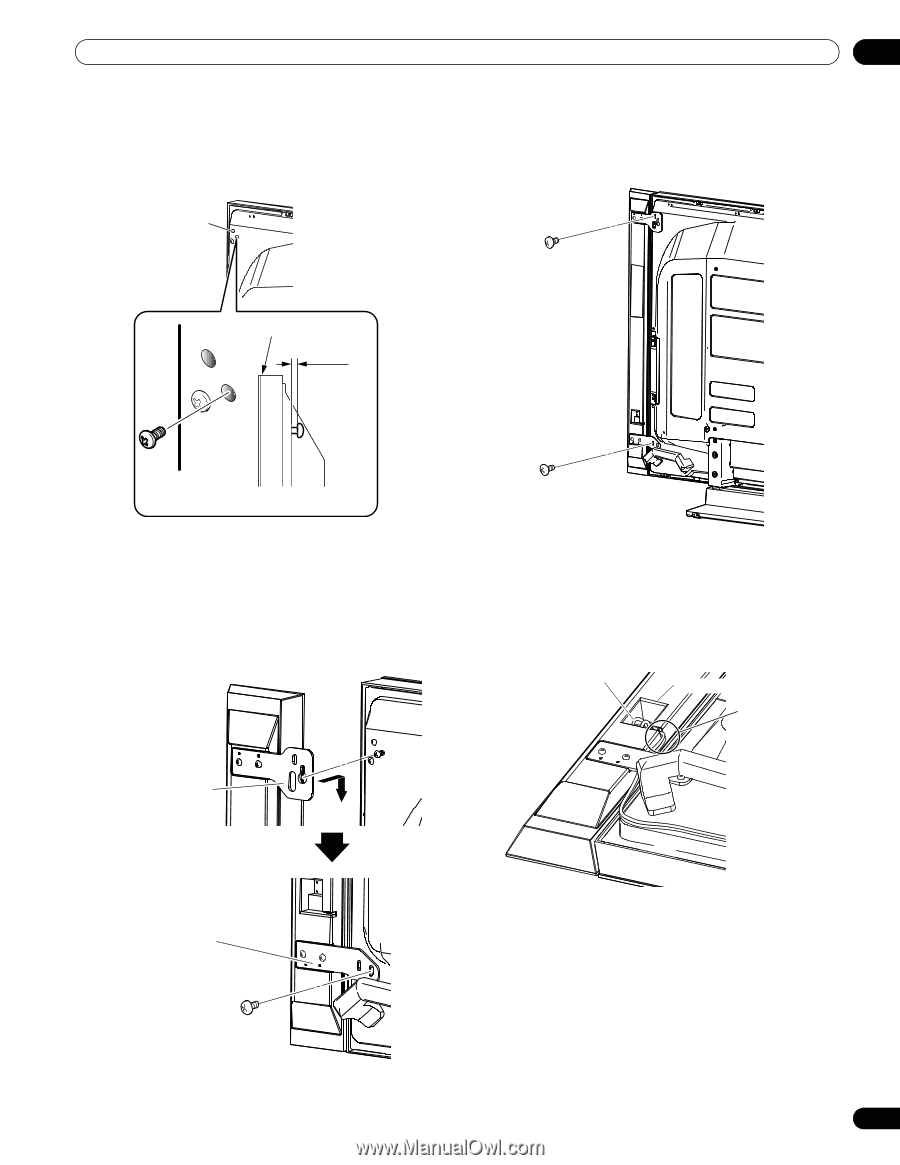
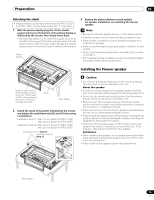
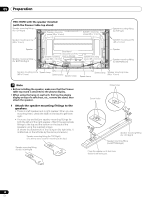
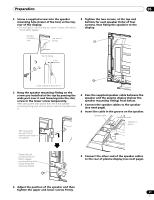
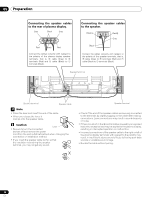
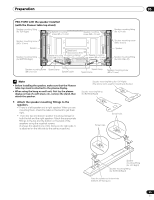
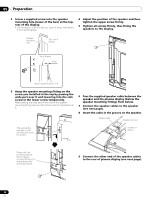
Preparation 05 2 Screw a supplied screw into the speaker mounting hole (lower of the two) at the top, rear of the display. • Do not tighten it all the way yet. Leave it loose, with about 5 mm left to tighten. Speaker mounting hole Top, rear of display 5 Tighten the two screws, at the top and bottom for each speaker (total of four screws), thus fixing the speakers to the display. Top of display 5 mm Leave a space of about 5 mm 3 Hang the speaker mounting fitting on the screw you installed at the top by passing the wide part over it and lowering into the slot; screw in the lower screw temporarily. After passing the wide part of the hole of the speaker mounting fitting (top) over the screw, lower the speaker onto it. 6 Pass the supplied speaker cable between the speaker and the plasma display (below the speaker mounting fitting) from below. 7 Connect the speaker cables to the speaker (see next page). 8 Insert the cable in the groove on the speaker. Speaker cable Speaker terminal Insertion in groove After passing the wide part of hole over the screw, lower the speaker. Tighten with the provided screw the bottom speaker mounting fitting to the display temporarily (one place bottom). 9 Connect the other end of the speaker cables to the rear of plasma display (see next page). 4 Adjust the position of the speaker and then tighten the upper and lower screws firmly. 21 En
-
 1
1 -
2
-
3
-
4
-
5
-
6
-
7
-
8
-
9
-
10
-
11
-
12
-
13
-
14
-
15
-
 16
16 -
 17
17 -
 18
18 -
 19
19 -
 20
20 -
 21
21 -
 22
22 -
 23
23 -
 24
24 -
 25
25 -
 26
26 -
27
-
28
-
29
-
30
-
31
-
32
-
33
-
34
-
35
-
36
-
37
-
38
-
39
-
40
-
41
-
42
-
43
-
44
-
45
-
46
-
47
-
48
-
49
-
50
-
51
-
52
-
53
-
54
-
55
-
56
-
57
-
58
-
59
-
60
-
61
-
62
-
63
-
64
-
65
-
66
-
67
-
68
-
69
-
70
-
71
-
72
-
73
-
74
-
75
-
76
-
77
-
78
-
79
-
80
-
81
-
82
-
83
-
84
-
85
-
86
-
87
-
88
-
89
-
90
-
91
-
92
-
93
-
94
-
95
-
96
-
97
-
98
-
99
-
100
-
101
-
102
-
103
-
104
-
105
-
106
-
107
-
108
-
109
-
110
-
111
-
112
-
113
-
114
-
115
-
116
-
117
-
118
-
119
-
120
-
121
-
122
-
123
-
124
-
125
-
126
 |
 |