Pioneer VSX-30 Owner's Manual - Page 68
Control with HDMI function, HDMI Setup
 |
UPC - 884938109246
View all Pioneer VSX-30 manuals
Add to My Manuals
Save this manual to your list of manuals |
Page 68 highlights
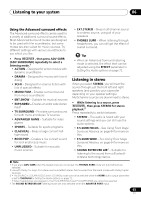
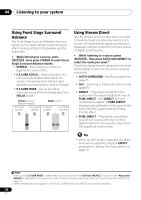
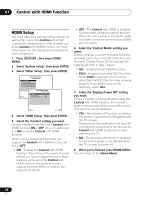
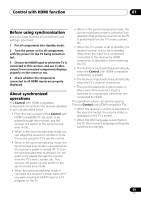
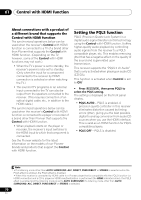
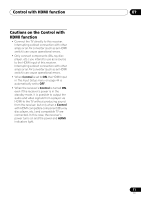
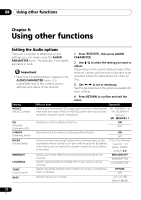
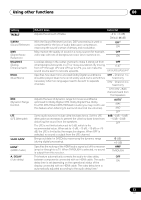
07 Control with HDMI function HDMI Setup You must adjust the settings of this receiver as well as the connected Control with HDMIcompatible components in order to make use of the Control with HDMI function. For more information see the operating instructions for each component. 1 Press RECEIVER , then press HOME MENU. 2 Select 'System Setup', then press ENTER. 3 Select 'Other Setup', then press ENTER. 4e.Other Setup A/V RECEIVER 1. HDMI Setup 2. Volume Setup 3. Remote Control Mode Setup 4. Flicker Reduction Setup 5. Pairing Bluetooth Device 4e1.HDMI Setup A/V RECEIVER Exit Control : Control mode : Display Power Off : ON ALL YERSeturn Exit Finish 4 Select 'HDMI Setup', then press ENTER. 5 Select the 'Control' setting you want. Choose whether to set this unit's Control with HDMI function ON or OFF. You will need to set it to ON to use the Control with HDMI function. When using a component that does not support the Control with HDMI function, set this to OFF. • ON - Enables the Control with HDMI function. When this unit's power is turned off and you have a supported source begin playback while using the Control with HDMI function, the audio and video outputs from the HDMI connection are output from the TV. • OFF - The Control with HDMI is disabled. Synchronized operations cannot be used. When this unit's power is turned off, audio and video of sources connected via HDMI are not output. 6 Select the 'Control Mode' setting you want. Choose whether you want to enable HDMI for all linked functions or the PQLS function only. However, Display Power Off will activate the settings set forth in step 7 below. • ALL - Enabled for all linked functions. • PQLS - Enabled only for the PQLS function. When PQLS is selected, link functions other than the PQLS function may not work properly. If you wish to use all link functions, select ALL. 7 Select the 'Display Power Off' setting you want. If the TV's power is turned off while using the Control with HDMI function, the receiver's power is also turned off (all power off function). This function can be disabled. • YES - The all power off function is enabled. The receiver's power turns off together with the TV's power. This function only works when the input for a component connected to the receiver by Control with HDMI is selected or when watching the TV. • NO - The all power off function is disabled. The receiver's power is not affected when the TV's power is turned off. 8 When you're finished, press HOME MENU. You will return to the Home Menu. 68 En
-
 1
1 -
2
-
3
-
4
-
5
-
6
-
7
-
8
-
9
-
10
-
11
-
12
-
13
-
14
-
15
-
16
-
17
-
18
-
19
-
20
-
21
-
22
-
23
-
24
-
25
-
26
-
27
-
28
-
29
-
30
-
31
-
32
-
33
-
34
-
35
-
36
-
37
-
38
-
39
-
40
-
41
-
42
-
43
-
44
-
45
-
46
-
47
-
48
-
49
-
50
-
51
-
52
-
53
-
54
-
55
-
56
-
57
-
58
-
59
-
60
-
61
-
62
-
 63
63 -
 64
64 -
 65
65 -
 66
66 -
 67
67 -
 68
68 -
 69
69 -
 70
70 -
 71
71 -
 72
72 -
 73
73 -
74
-
75
-
76
-
77
-
78
-
79
-
80
-
81
-
82
-
83
-
84
-
85
-
86
-
87
-
88
-
89
-
90
-
91
-
92
-
93
-
94
-
95
-
96
-
97
-
98
-
99
-
100
-
101
-
102
-
103
-
104
-
105
-
106
-
107
-
108
-
109
-
110
-
111
-
112
-
113
-
114
-
115
-
116
-
117
-
118
-
119
-
120
-
121
-
122
-
123
-
124
-
125
-
126
-
127
-
128
-
129
-
130
-
131
-
132
-
133
-
134
-
135
-
136
 |
 |