ProForm Xp Whirlwind 280 Bike Canadian English Manual - Page 10
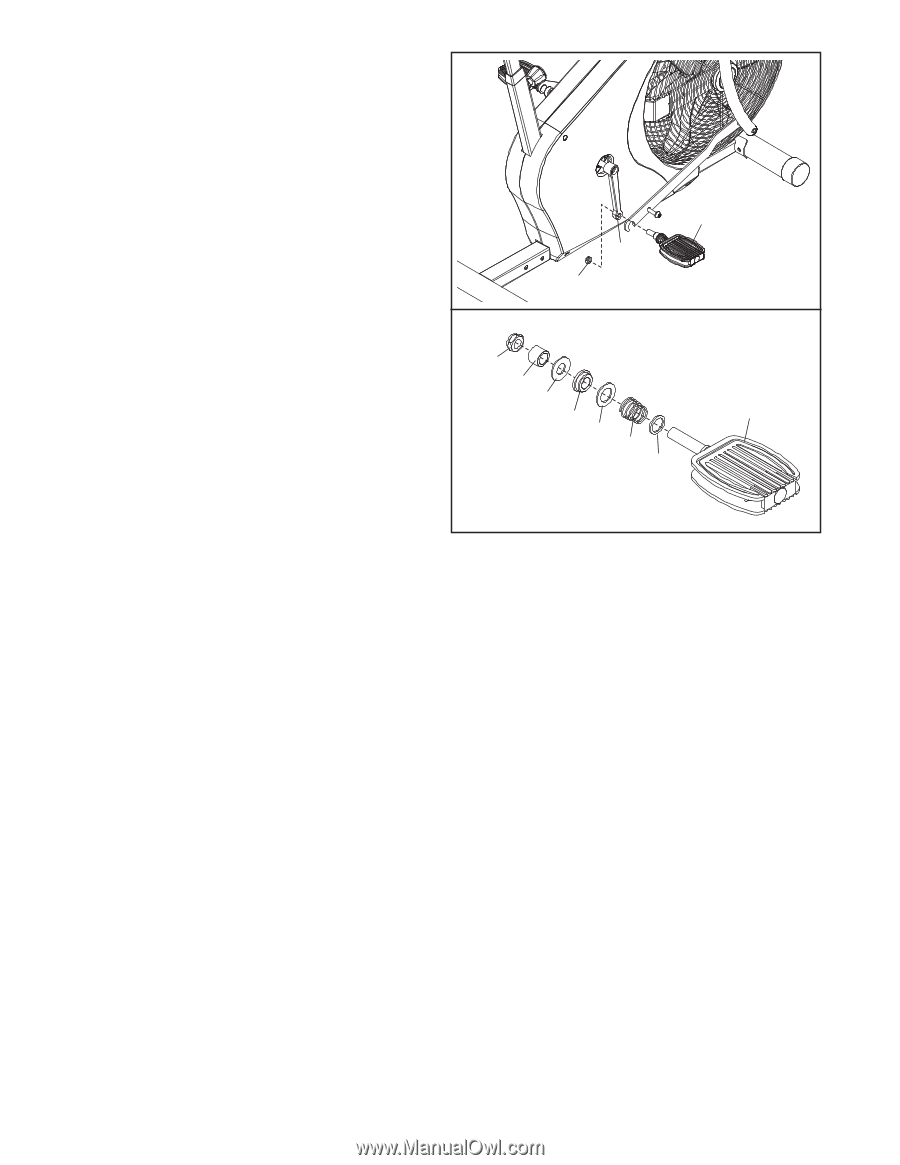
a Pedal Spring 42, a Blue Washer 71,
 |
View all ProForm Xp Whirlwind 280 Bike manuals
Add to My Manuals
Save this manual to your list of manuals |
Page 10 highlights
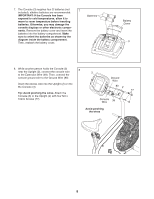
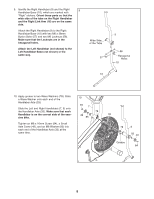
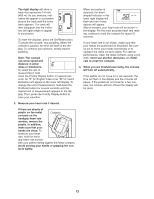
11. Remove the 1/2" Pedal Nut (68) from the shaft of one of the Pedals (23). See the lower drawing. Make sure that there is a Custom Washer (86), a Pedal Spring (42), a Blue Washer (71), a Pedal Bushing (43), a Black Pedal Washer (79), and a Pedal Spacer (44) on the shaft of the Pedal. In addition, make sure that the Pedal Bushing is oriented as shown. Firmly tighten the shaft of the Pedal (23) clockwise into the right Crank Arm (26). Then, tighten the 1/2" Pedal Nut (68) onto the shaft. Attach the other Pedal (not shown) in the same way. Firmly tighten the Pedal counterclockwise into the left Crank Arm (not shown). 11 23 26 68 68 44 79 43 23 71 42 86 12. Make sure that all parts are properly tightened before you use the exercise bike. Note: After assembly is completed, some extra parts may be left over. Place a mat beneath the exercise bike to protect the floor. 10
-
 1
1 -
2
-
3
-
4
-
 5
5 -
 6
6 -
 7
7 -
 8
8 -
 9
9 -
 10
10 -
 11
11 -
 12
12 -
 13
13 -
 14
14 -
 15
15 -
16
-
17
-
18
-
19
-
20
 |
 |