ProForm Xp Whirlwind 280 Bike Canadian English Manual - Page 7
Tip: Do not pinch the Reed Switch Wire 31
 |
View all ProForm Xp Whirlwind 280 Bike manuals
Add to My Manuals
Save this manual to your list of manuals |
Page 7 highlights
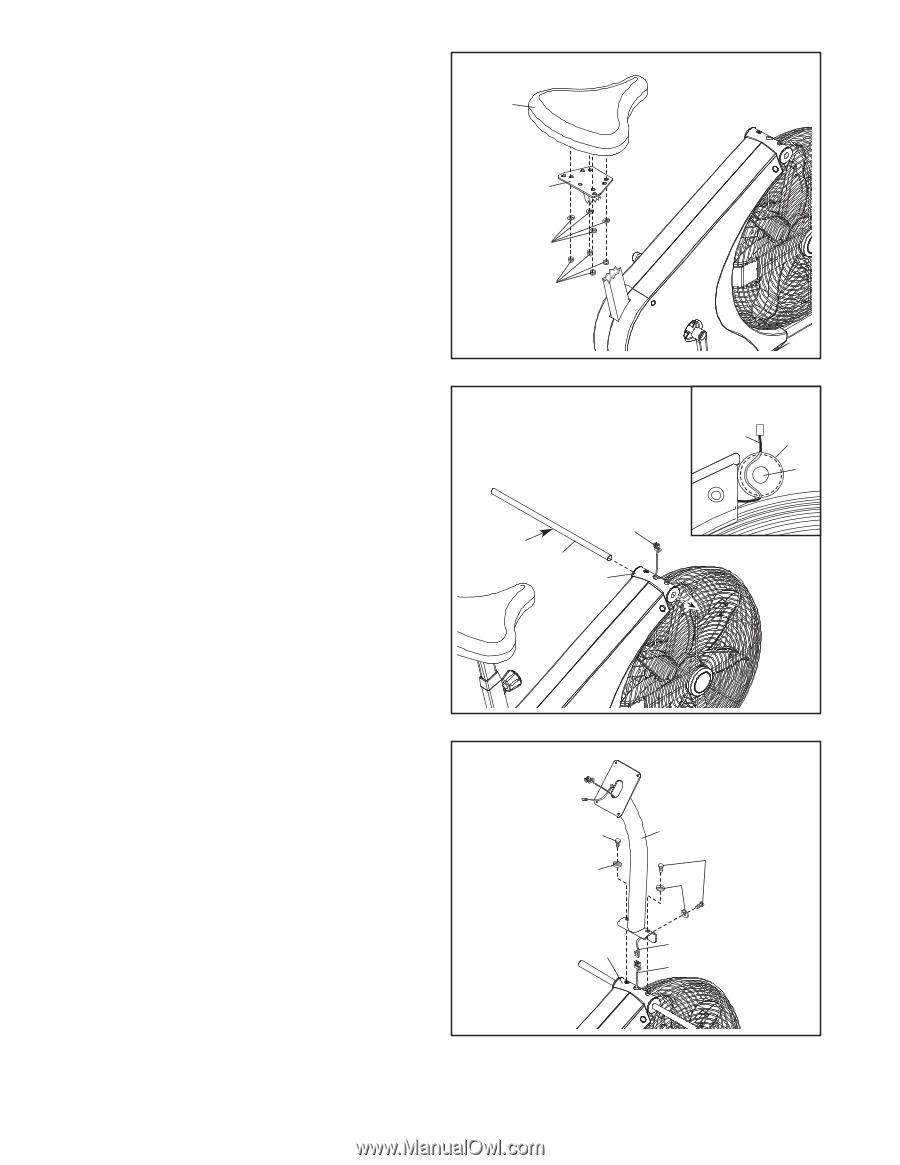
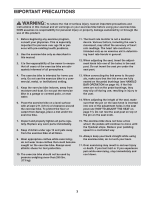
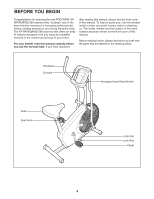
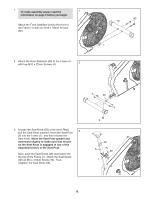
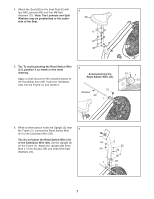
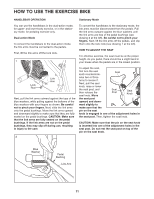
4. Attach the Seat (20) to the Seat Post (6) with four M8 Locknuts (66) and four M8 Split Washers (72). Note: The Locknuts and Split Washers may be preattached to the underside of the Seat. 4 20 6 72 66 5. Tip: To avoid pinching the Reed Switch Wire (31), position it as shown in the inset drawing. Apply a small amount of the included grease to the Handlebar Axle (33). Insert the Handlebar Axle into the Frame (1) and center it. 5 Avoid pinching the Reed Switch Wire (31) Grease 33 31 1 31 1 33 6. While another person holds the Upright (2) near 6 the Frame (1), connect the Reed Switch Wire (31) to the Extension Wire (39). Tip: Do not pinch the Reed Switch Wire (31) or the Extension Wire (39). Set the Upright (2) on the Frame (1). Attach the Upright with three M10 x 17mm Screws (55) and three M10 Split Washers (54). 55 2 55 54 54 1 39 31 7
-
 1
1 -
 2
2 -
 3
3 -
 4
4 -
 5
5 -
 6
6 -
 7
7 -
 8
8 -
 9
9 -
 10
10 -
 11
11 -
 12
12 -
13
-
14
-
15
-
16
-
17
-
18
-
19
-
20
 |
 |