ProForm Xp Whirlwind 280 Bike Canadian English Manual - Page 6
Attach the Rear Stabilizer 60 to the Frame 1
 |
View all ProForm Xp Whirlwind 280 Bike manuals
Add to My Manuals
Save this manual to your list of manuals |
Page 6 highlights
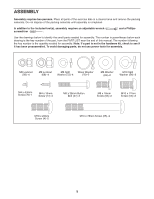
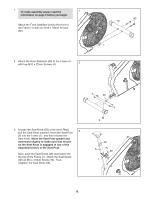
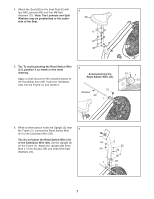
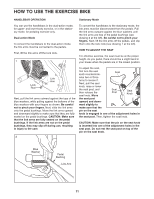
1. To make assembly easier, read the 1 information on page 5 before you begin. Attach the Front Stabilizer (19) to the front of the Frame (1) with two M10 x 78mm Screws (65). 2. Attach the Rear Stabilizer (60) to the Frame (1) with five M10 x 22mm Screws (4). 2 65 19 1 3. Loosen the Seat Knob (29) a few turns. Next, pull the Seat Knob outward, insert the Seat Post 3 (6) into the Frame (1), and then release the Seat Knob. Move the Seat Post upward and downward slightly to make sure that the pin on the Seat Knob is engaged in one of the adjustment holes in the Seat Post. Next, push the Seat Guide (46) downward into the top of the Frame (1). Attach the Seat Guide with an M4 x 4.5mm Screw (70). Then, retighten the Seat Knob (29). 1 4 60 4 4 46 6 70 29 1 6
-
 1
1 -
 2
2 -
 3
3 -
 4
4 -
 5
5 -
 6
6 -
 7
7 -
 8
8 -
 9
9 -
 10
10 -
 11
11 -
 12
12 -
13
-
14
-
15
-
16
-
17
-
18
-
19
-
20
 |
 |
