ProForm Xp Whirlwind 280 Bike Canadian English Manual - Page 9
Identify the Right Handlebar 9 and the Right
 |
View all ProForm Xp Whirlwind 280 Bike manuals
Add to My Manuals
Save this manual to your list of manuals |
Page 9 highlights
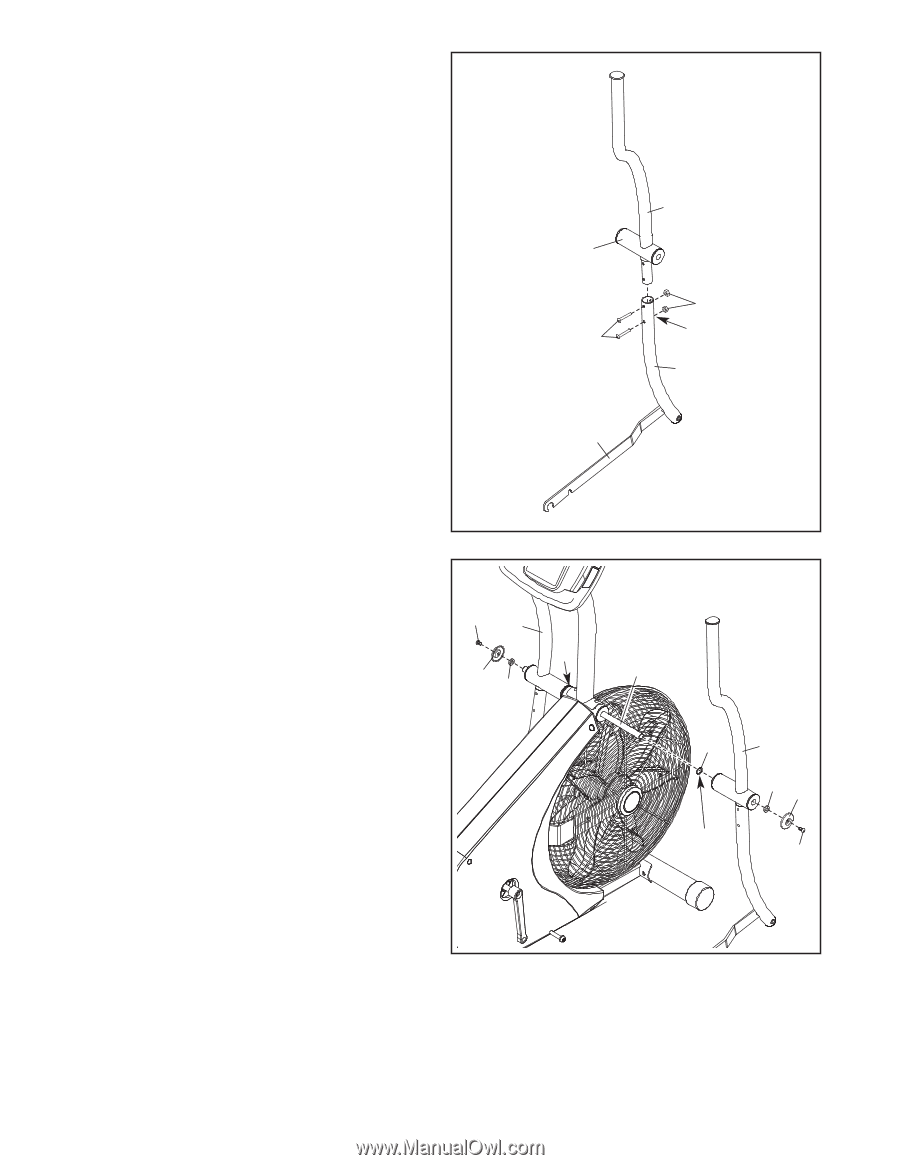
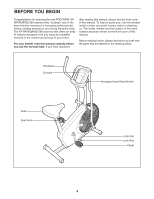
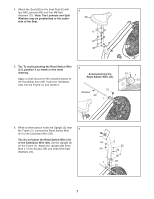
9. Identify the Right Handlebar (9) and the Right 9 Handlebar Base (10), which are marked with "Right" stickers. Orient these parts so that the wide side of the tube on the Right Handlebar and the Right Link Arm (16) are on the same side. Attach the Right Handlebar (9) to the Right Handlebar Base (10) with two M6 x 38mm Button Bolts (57) and two M6 Locknuts (56). Make sure that the Locknuts are in the hexagonal holes. Attach the Left Handlebar (not shown) to the Left Handlebar Base (not shown) in the same way. Wide Side of the Tube 57 16 9 56 Hexagonal Holes 10 10. Apply grease to two Wave Washers (78). Slide a Wave Washer onto each end of the Handlebar Axle (33). Slide the Left and Right Handlebars (7, 9) onto the Handlebar Axle (33). Make sure that each Handlebar is on the correct side of the exercise bike. Tighten an M8 x 16mm Screw (84), a Small Axle Cover (49), and an M8 Washer (85) into each end of the Handlebar Axle (33) at the same time. 10 84 7 78 49 85 33 78 9 85 49 Grease 84 9
-
 1
1 -
2
-
3
-
 4
4 -
 5
5 -
 6
6 -
 7
7 -
 8
8 -
 9
9 -
 10
10 -
 11
11 -
 12
12 -
 13
13 -
 14
14 -
15
-
16
-
17
-
18
-
19
-
20
 |
 |