RCA L32HD41 User Guide & Warranty - Page 13
PC Connection, Viewing the Picture from the Connected Component, Viewing a PC - remote for
 |
UPC - 846042701594
View all RCA L32HD41 manuals
Add to My Manuals
Save this manual to your list of manuals |
Page 13 highlights
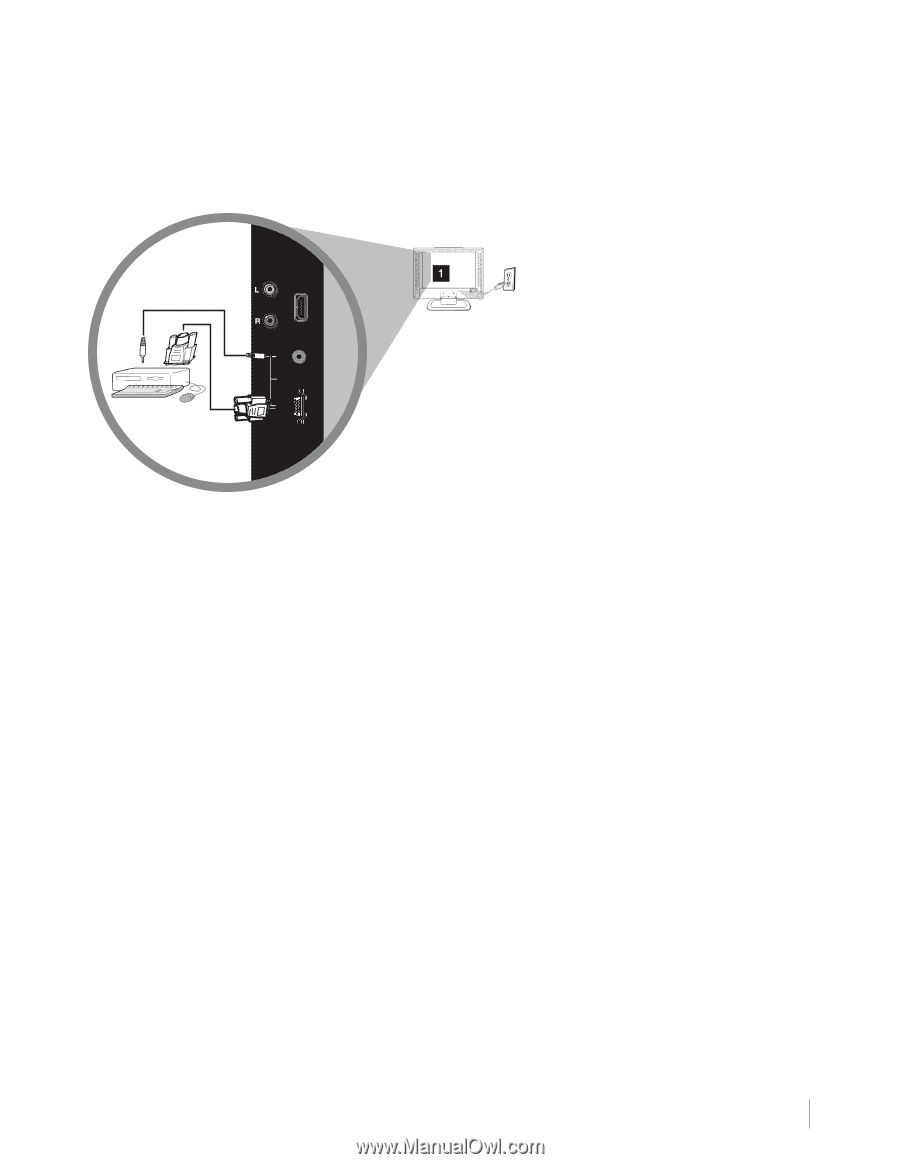
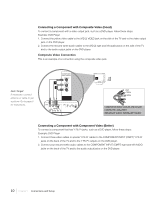
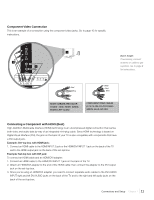
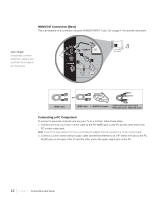
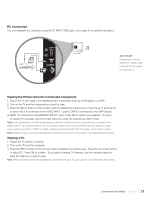
PC Connection This is an example of a connection using the PC INPUT VIDEO jack. Go to page 12 for specific instructions. HDMI/DVI INPU 1 AUDIO PC INPUT Don't forget: If necessary, connect antenna or cable to get a picture. Go to page 8 for instructions. VIDEO Viewing the Picture from the Connected Component 1. Plug in the TV (see page 14 for details) and the component, such as a DVD player or a VCR. 2. Turn on the TV and the component you want to view. 3. Press the INPUT button on the remote control to display the signal source. Press the up or down arrow to select VID 2 (if connected to the VIDEO INPUT 2 jacks), CMPT (if connected to the CMPT jacks) or HDMI 1 (if connected to the HDMI/DVI INPUT 1 jack). Press OK to confirm your selection. To return to viewing TV channels, use the number buttons to enter the channel you wish to view. Note: If the picture from the DVD player appears black and white and your component is connected to the VIDEO INPUT, you may be tuned to the wrong input. Make sure you press INPUT and use the up or down arrow until you see VID 1, CMPT or HDMI 1 displayed at the top left of the TV screen. Press OK to confirm. Note: When you have connected all additional components to your TV, go to page 15 for initial setup instructions. Viewing a PC 1. Plug in the TV and the computer. 2. Turn on the TV and the computer. 3. Press the INPUT button on the remote control to display the signal source. Press the up or down arrow to select PC. Press OK to confirm. To go back to viewing TV channels, use the number buttons to enter the channel you wish to view. Note: When you have connected all additional components to your TV, go to page 15 for initial Setup Instructions. Connections and Setup Chapter 1 13
-
 1
1 -
2
-
3
-
4
-
5
-
6
-
7
-
 8
8 -
 9
9 -
 10
10 -
 11
11 -
 12
12 -
 13
13 -
 14
14 -
 15
15 -
 16
16 -
 17
17 -
 18
18 -
19
-
20
-
21
-
22
-
23
-
24
-
25
-
26
-
27
-
28
-
29
-
30
-
31
-
32
-
33
-
34
-
35
-
36
-
37
-
38
-
39
-
40
 |
 |