Reebok 8100 Es Treadmill English Manual - Page 19
To Create A Custom Workout
 |
View all Reebok 8100 Es Treadmill manuals
Add to My Manuals
Save this manual to your list of manuals |
Page 19 highlights
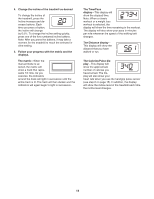
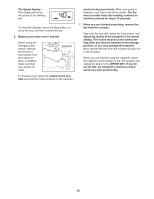
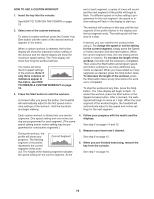
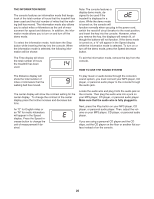
HOW TO USE A CUSTOM WORKOUT 1. Insert the key into the console. See HOW TO TURN ON THE POWER on page 13. 2. Select one of the custom workouts. To select a custom workout, press the Create Your Own button until the name of the desired workout appears in the matrix. When a custom workout is selected, the Incline display will show the maximum incline setting of the workout and the Speed display will show the maximum speed setting. The Time display will show how long the workout will last. The matrix will show the first speed settings of the workout. Note: If only three columns of indicators appear in the matrix, see HOW TO CREATE A CUSTOM WORKOUT on page 18. 3. Press the Start button to start the workout. A moment after you press the button, the treadmill will automatically adjust to the first speed and incline settings of the workout. Hold the handrails and begin walking. end of each segment, a series of tones will sound and the next segment of the profile will begin to flash. If a different speed or incline setting is programmed for the next segment, the speed or incline setting will flash in the display to alert you. The workout will continue in this way until the last segment of the profile flashes in the display and the last segment ends. The walking belt will then slow to a stop. If desired, you can redefine the workout while using it. To change the speed or incline setting for the current segment, simply press the Speed or Incline increase and decrease buttons. When the current segment ends, the new setting will be saved in memory. To increase the length of the workout, first wait until the workout is completed. Then, press the Start button and program speed and incline settings for as many additional segments as desired. When you have added as many segments as desired, press the Stop button twice. To decrease the length of the workout, press the Stop button twice at any time before the workout is completed. To stop the workout at any time, press the Stop button. The Time display will begin to flash. To restart the workout, press the Start button or the Speed increase button. After a moment, the walking belt will begin to move at 1 mph. When the next segment of the workout begins, the treadmill will automatically adjust to the speed and incline settings for the next segment. Each custom workout is divided into one-minute segments. One speed setting and one incline setting are programmed for each segment. (The same speed setting and/or incline setting may be programmed for consecutive segments.) During the workout, the profile will show your Current Segment progress. The flashing segment of the profile represents the current segment of the work- out. The height of the flashing segment indicates the speed setting for the current segment. At the 4. Follow your progress with the matrix and the displays. See step 5 on pages 14 and 15. 5. Measure your heart rate if desired. See step 6 on page 15. 6. When you are finished exercising, remove the key from the console. See step 7 on page 15. 19
-
 1
1 -
2
-
3
-
4
-
5
-
6
-
7
-
8
-
9
-
10
-
11
-
12
-
13
-
 14
14 -
 15
15 -
 16
16 -
 17
17 -
 18
18 -
 19
19 -
 20
20 -
 21
21 -
 22
22 -
 23
23 -
 24
24 -
25
-
26
-
27
-
28
-
29
-
30
-
31
-
32
 |
 |
