Ricoh GX5050N User Guide - Page 175
Curled inkjet transparency may jam. Straighten any curls before loading.
 |
UPC - 026649055218
View all Ricoh GX5050N manuals
Add to My Manuals
Save this manual to your list of manuals |
Page 175 highlights
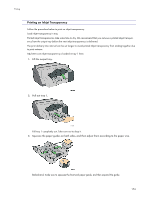
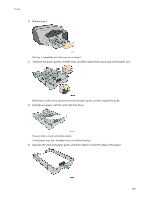
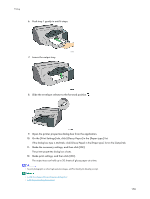
Printing 4. Load inkjet transparency into tray 1 with the notched corner in the right front corner of the tray. Curled inkjet transparency may jam. Straighten any curls before loading. If other paper is loaded, remove it, and then load inkjet transparency. To prevent the leading edge of transparencies from being scratched, place transparencies one at a time. 5. Squeeze the front end paper guide, and then slide it to meet the edge of the inkjet transparency. 6. Push tray 1 gently in until it stops. 7. Lower the output tray. 175
-
 1
1 -
2
-
3
-
4
-
5
-
6
-
7
-
8
-
9
-
10
-
11
-
12
-
13
-
14
-
15
-
16
-
17
-
18
-
19
-
20
-
21
-
22
-
23
-
24
-
25
-
26
-
27
-
28
-
29
-
30
-
31
-
32
-
33
-
34
-
35
-
36
-
37
-
38
-
39
-
40
-
41
-
42
-
43
-
44
-
45
-
46
-
47
-
48
-
49
-
50
-
51
-
52
-
53
-
54
-
55
-
56
-
57
-
58
-
59
-
60
-
61
-
62
-
63
-
64
-
65
-
66
-
67
-
68
-
69
-
70
-
71
-
72
-
73
-
74
-
75
-
76
-
77
-
78
-
79
-
80
-
81
-
82
-
83
-
84
-
85
-
86
-
87
-
88
-
89
-
90
-
91
-
92
-
93
-
94
-
95
-
96
-
97
-
98
-
99
-
100
-
101
-
102
-
103
-
104
-
105
-
106
-
107
-
108
-
109
-
110
-
111
-
112
-
113
-
114
-
115
-
116
-
117
-
118
-
119
-
120
-
121
-
122
-
123
-
124
-
125
-
126
-
127
-
128
-
129
-
130
-
131
-
132
-
133
-
134
-
135
-
136
-
137
-
138
-
139
-
140
-
141
-
142
-
143
-
144
-
145
-
146
-
147
-
148
-
149
-
150
-
151
-
152
-
153
-
154
-
155
-
156
-
157
-
158
-
159
-
160
-
161
-
162
-
163
-
164
-
165
-
166
-
167
-
168
-
169
-
 170
170 -
 171
171 -
 172
172 -
 173
173 -
 174
174 -
 175
175 -
 176
176 -
 177
177 -
 178
178 -
 179
179 -
 180
180 -
181
-
182
-
183
-
184
-
185
-
186
-
187
-
188
-
189
-
190
-
191
-
192
-
193
-
194
-
195
-
196
-
197
-
198
-
199
-
200
-
201
-
202
-
203
-
204
-
205
-
206
-
207
-
208
-
209
-
210
-
211
-
212
-
213
-
214
-
215
-
216
-
217
-
218
-
219
-
220
-
221
-
222
-
223
-
224
-
225
-
226
-
227
-
228
-
229
-
230
-
231
-
232
-
233
-
234
-
235
-
236
-
237
-
238
-
239
-
240
-
241
-
242
-
243
-
244
-
245
-
246
-
247
-
248
-
249
-
250
-
251
-
252
-
253
-
254
-
255
-
256
-
257
-
258
-
259
-
260
-
261
-
262
-
263
-
264
-
265
-
266
-
267
-
268
 |
 |
175
Printing
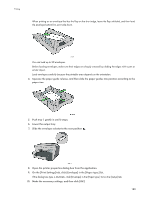
4.
Load inkjet transparency into tray 1 with the notched corner in the right front corner of the tray.
Curled inkjet transparency may jam. Straighten any curls before loading.
If other paper is loaded, remove it, and then load inkjet transparency.
To prevent the leading edge of transparencies from being scratched, place transparencies one at a time.
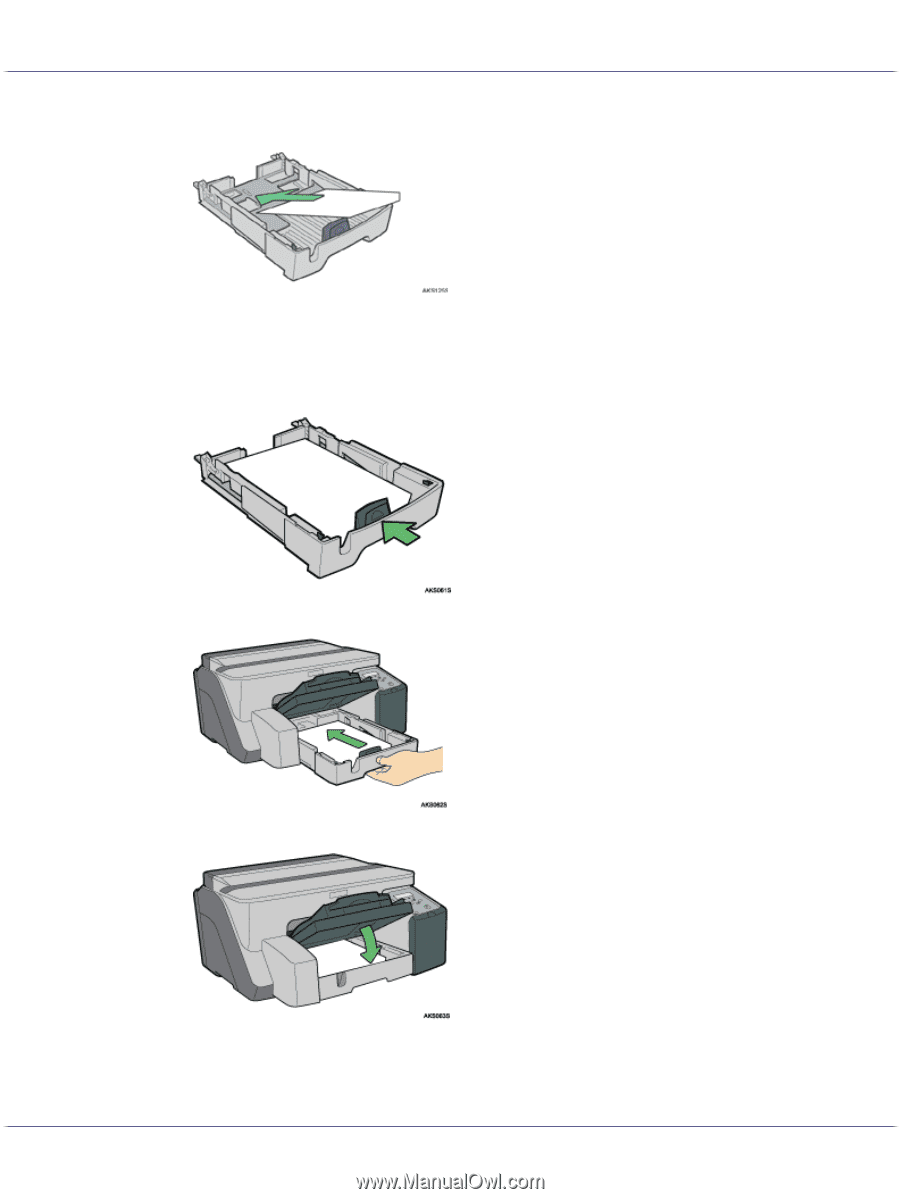
5.
Squeeze the front end paper guide, and then slide it to meet the edge of the inkjet transparency.
6.
Push tray 1 gently in until it stops.
7.
Lower the output tray.