Ricoh MP161SPF Operating Instructions - Page 51
Basic Procedure for Sending by Scan to Folder
 |
View all Ricoh MP161SPF manuals
Add to My Manuals
Save this manual to your list of manuals |
Page 51 highlights
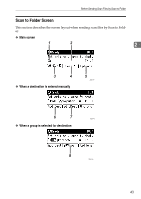
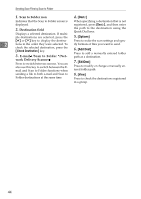
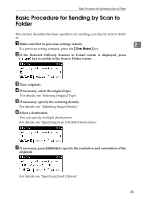
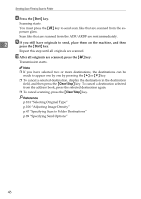
Basic Procedure for Sending by Scan to Folder Basic Procedure for Sending by Scan to Folder This section describes the basic operation for sending scan files by Scan to Folder. A Make sure that no previous settings remain. 2 If a previous setting remains, press the {Clear Modes} key. B If the Network Delivery Scanner or E-mail screen is displayed, press [ ] key to switch to the Scan to Folder screen. C Place originals. D If necessary, select the original type. For details, see "Selecting Original Type". E If necessary, specify the scanning density. For details, see "Adjusting Image Density". F Select a destination. You can specify multiple destinations. For details, see "Specifying Scan to Folder Destinations". G If necessary, press [Options] to specify the resolution and orientation of the originals. For details, see "Specifying Send Options". 45
-
 1
1 -
2
-
3
-
4
-
5
-
6
-
7
-
8
-
9
-
10
-
11
-
12
-
13
-
14
-
15
-
16
-
17
-
18
-
19
-
20
-
21
-
22
-
23
-
24
-
25
-
26
-
27
-
28
-
29
-
30
-
31
-
32
-
33
-
34
-
35
-
36
-
37
-
38
-
39
-
40
-
41
-
42
-
43
-
44
-
45
-
 46
46 -
 47
47 -
 48
48 -
 49
49 -
 50
50 -
 51
51 -
 52
52 -
 53
53 -
 54
54 -
 55
55 -
 56
56 -
57
-
58
-
59
-
60
-
61
-
62
-
63
-
64
-
65
-
66
-
67
-
68
-
69
-
70
-
71
-
72
-
73
-
74
-
75
-
76
-
77
-
78
-
79
-
80
-
81
-
82
-
83
-
84
-
85
-
86
-
87
-
88
-
89
-
90
-
91
-
92
-
93
-
94
-
95
-
96
-
97
-
98
-
99
-
100
-
101
-
102
-
103
-
104
-
105
-
106
-
107
-
108
-
109
-
110
-
111
-
112
-
113
-
114
-
115
-
116
-
117
-
118
-
119
-
120
-
121
-
122
-
123
-
124
-
125
-
126
-
127
-
128
 |
 |
