Ridgid R2401 Operation Manual - Page 8
Assembly - trim router
 |
View all Ridgid R2401 manuals
Add to My Manuals
Save this manual to your list of manuals |
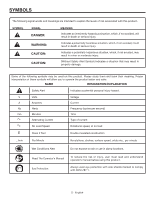
Page 8 highlights
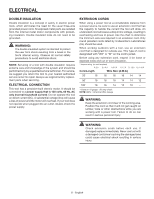
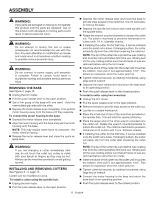
ASSEMBLY WARNING: If any parts are damaged or missing do not operate this product until the parts are replaced. Use of this product with damaged or missing parts could result in serious personal injury. WARNING: Do not attempt to modify this tool or create accessories not recommended for use with this tool. Any such alteration or modification is misuse and could result in a hazardous condition leading to possible serious personal injury. WARNING: Do not connect to power supply until assembly is complete. Failure to comply could result in accidental starting and possible serious personal injury. Removing the base See Figure 2, page 14. n Unplug the trim router. n Pull the quick release lever to the open position. n Get a firm grasp of the base with one hand. Hold the overmolded grip area with the other. n Depress the motor release lever completely. Then pull the motor housing away from the base until they seperate. To connect the motor housing to the base: n Depress the motor release lever completely. n Align the motor housing with the base and push the motor housing onto the base. NOTE: This may require some force to overcome the motor retention spring. n Release the motor release lever and close the quick release lever. WARNING: If you are changing a cutter immediately after use, do not touch the collet nut, cutter, or collet with your hands or fingers as they may be hot. Always use the wrenches provided to avoid getting burned. INSTALLING and removing CUTTERS See Figures 3 - 4, page 14. Cutters can be installed two ways. To install a cutter using the spindle lock: n Unplug the trim router. n Pull the quick release lever to the open position. n Depress the motor release lever and move the base to provide clear access to the collet nut. It is not neccesary to remove the base. n Depress the spindle lock button and rotate spindle until the spindle locks. n Rotate the wrench counterclockwise to loosen the collet nut. The collet is machined to precision tolerances to fit cutters with 1/4 in. diameter shanks. n If installing the cutter for the first time, it can be installed once the collet nut is loose. If changing cutters, the cutter will easily slip from the collet after loosening the collet nut. NOTE: The tip of the cutter has a protective wax coating that must be removed before first-time use. Simply peel off the wax coating and be sure that all traces of wax are removed before using the trim router. n Insert the shank of the cutter into the collet until it touches the bottom, then pull it out approximately 1/16". This allows for expansion when the cutter gets hot. n Tighten collet nut securely, by rotating it clockwise, using large end of wrench. n Depress the motor release lever and return the base back to an operating position. n Push the quick release lever to the closed position. To install a cutter using two wrenches: n Unplug the trim router. n Pull the quick release lever to the open position. n Remove the base to provide clear access to the collet nut. n Lay flat on a stable workbench. n Place the small end of one of the wrenches provided on the spindle flats. This will hold the spindle stationary. n Place the larger end of the other wrench provided onto the collet nut. Rotate the wrench counterclockwise to loosen the collet nut. The collet is machined to precision tolerances to fit cutters with 1/4 in. diameter shanks. n If installing the cutter for the first time, it can be installed once the collet nut is loose. If changing cutters, the cutter will easily slip from the collet after loosening the collet nut. NOTE: The tip of the cutter has a protective wax coating that must be removed before first-time use. Simply peel off the wax coating and be sure that all traces of wax are removed before using the trim router. n Insert the shank of the cutter into the collet until it touches the bottom, then pull it out approximately 1/16". This allows for expansion when the cutter gets hot. n Tighten collet nut securely, by rotating it clockwise, using large end of wrench. n Connect the motor housing to the base and return the base back to an operating position. n Push the quick release lever to the closed position. 8 - English
-
 1
1 -
2
-
 3
3 -
 4
4 -
 5
5 -
 6
6 -
 7
7 -
 8
8 -
 9
9 -
 10
10 -
 11
11 -
 12
12 -
 13
13 -
14
-
15
-
16
-
17
-
18
-
19
-
20
-
21
-
22
-
23
-
24
-
25
-
26
-
27
-
28
-
29
-
30
-
31
-
32
-
33
-
34
-
35
-
36
-
37
-
38
-
39
-
40
 |
 |
