Ridgid R2401 Operation Manual - Page 9
Operation, Assembly - laminate trim router
 |
View all Ridgid R2401 manuals
Add to My Manuals
Save this manual to your list of manuals |
Page 9 highlights
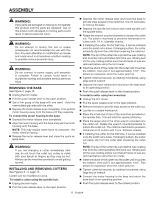
ASSEMBLY WARNING: If the collet nut is not tightened securely, the cutter could come out during use, causing serious personal injury. Attaching the square subbase See Figures 5, page 14. n Unplug the trim router. n Turn the trim router upside down to remove the four sub- base screws and the round subbase. n Attach the square subbase using the same screws. n Tighten the screws securely. Do not over tighten. WARNING: Always use the base for laminate trimming. Use of the trim router without a base or using the incorrect base can result in serious personal injury. OPERATION WARNING: Do not allow familiarity with tools to make you careless. Remember that a careless fraction of a second is sufficient to inflict serious injury. WARNING: The bit will continue to spin after the slide switch is set to the (O) OFF position. Wait for the bit to come to a complete stop to continue operation. Failure to do so could result in possible serious injury. WARNING: Always wear eye protection with side shields marked to comply with ANSI Z87.1. Failure to do so could result in objects being thrown into your eyes resulting in possible serious injury. WARNING: Do not use any attachments or accessories not recommended by the manufacturer of this tool. The use of attachments or accessories not recommended can result in serious personal injury. APPLICATIONS You may use this tool for the purposes listed below: n Smooth, professional trimming of laminates n Trimming counter tops and finishing cabinet work n Trimming wood and plastics starting/stopping the trim router See Figure 6, page 14. n To turn the trim router ON, slide the slide switch on top of the trim router up to the (I) ON position. NOTE: The trim router has a soft start feature. The trim router will start at a slow speed and gradually get up to the speed set by the adjustable speed dial. n Return the slide switch down to the (O) OFF position when finished. adjusting the speed See Figure 7, page 15. To adjust the speed of the trim router, rotate the variable speed dial located on the front of the motor housing. Rotate the dial to the left to increase speed. Higher numbers on the dial indicate higher speeds. Rotate the dial to the right to decrease speed. The speed is adjustable from 20,000 r/min to 30,000 r/min. OPERATing The trim router See Figure 8, page 15. Before starting the trim router, unplug it and make sure the cutter is securely tightened in the collet and that the depth of cut is properly set. Never start the trim router while the cutter is in contact with the workpiece. After completing a cut, pull the cutter slightly away from the cut surface. Turn the trim router off and wait for the rotating cutter to completely stop before removing the base from the work surface. When cutting, fit the base of the trim router over the work surface and firmly hold the body of the trim router with your hand. Make sure the trim router is running at full speed before contacting the workpiece. WARNING: Avoid hand positions that may expose fingers to cutter through open areas of trim router base. Fingers entering the opening in the trim router base can be seriously cut or burned. 9 - English
-
 1
1 -
2
-
3
-
 4
4 -
 5
5 -
 6
6 -
 7
7 -
 8
8 -
 9
9 -
 10
10 -
 11
11 -
 12
12 -
 13
13 -
 14
14 -
15
-
16
-
17
-
18
-
19
-
20
-
21
-
22
-
23
-
24
-
25
-
26
-
27
-
28
-
29
-
30
-
31
-
32
-
33
-
34
-
35
-
36
-
37
-
38
-
39
-
40
 |
 |
