Rocketfish RF-TVMP20 User Manual (English) - Page 11
Option 1: Installing on a wood stud wall, STEP 5
 |
View all Rocketfish RF-TVMP20 manuals
Add to My Manuals
Save this manual to your list of manuals |
Page 11 highlights
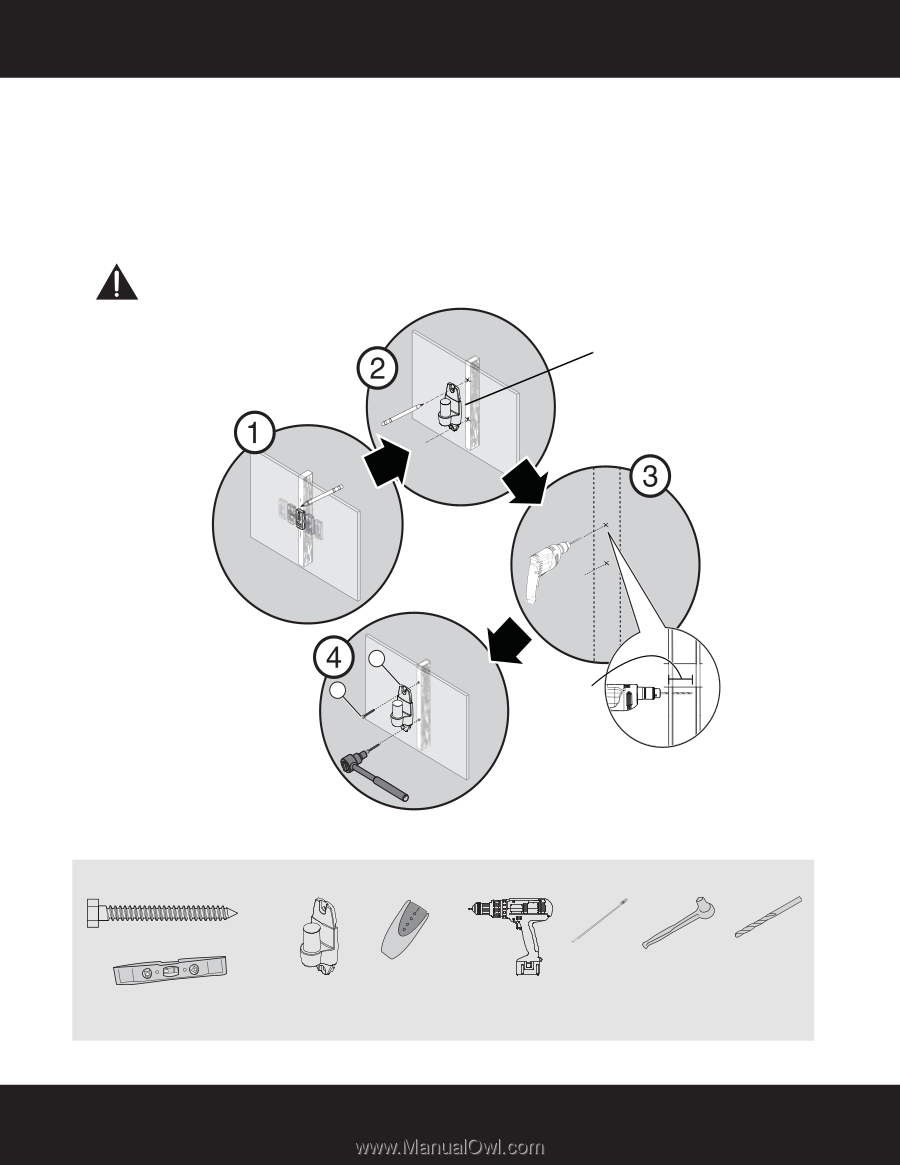
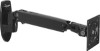
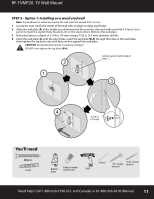
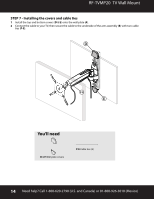
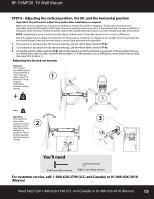
RF-TVMP20 TV Wall Mount STEP 5 - Option 1: Installing on a wood stud wall Note: Any wallboard or material covering the wall must not exceed 5/8" (16 mm). 1 Locate the stud. Verify the center of the stud with an edge-to-edge stud finder. 2 Align the wall plate (A) at the height you determined in the previous step and make sure that it is level. Use a pencil to mark the lag bolt hole locations (2) on the stud centers. Remove the wall plate. 3 Drill pilot holes to a depth of 2-3/4 in. (70 mm) using a 7/32 in. (5.5 mm) diameter drill bit. 4 Align the wall plate (A) with the pilot holes, insert the lag bolts (W-A) through the holes in the wall plate, then tighten the lag bolts only until they are firm against the wall plate. CAUTION: Avoid potential injuries or property damage! DO NOT over-tighten the lag bolts (W-A). Center pencil mark made in Step 1. A W-A 2-3/4 in. (70 mm) You'll need W-A (2) Level A Wall Edge-to edge stud finder Drill plate Pencil 7/32" wood 1/2" socket drill bit wrench Need help? Call 1-800-620-2790 (U.S. and Canada) or 01-800-926-3010 (Mexico) 11
-
 1
1 -
2
-
3
-
4
-
5
-
 6
6 -
 7
7 -
 8
8 -
 9
9 -
 10
10 -
 11
11 -
 12
12 -
 13
13 -
 14
14 -
 15
15 -
 16
16
 |
 |