Ryobi P635K Operation Manual - Page 11
SElEctinG thE propEr SpraY tip, opEratinG thE rollEr
 |
View all Ryobi P635K manuals
Add to My Manuals
Save this manual to your list of manuals |
Page 11 highlights
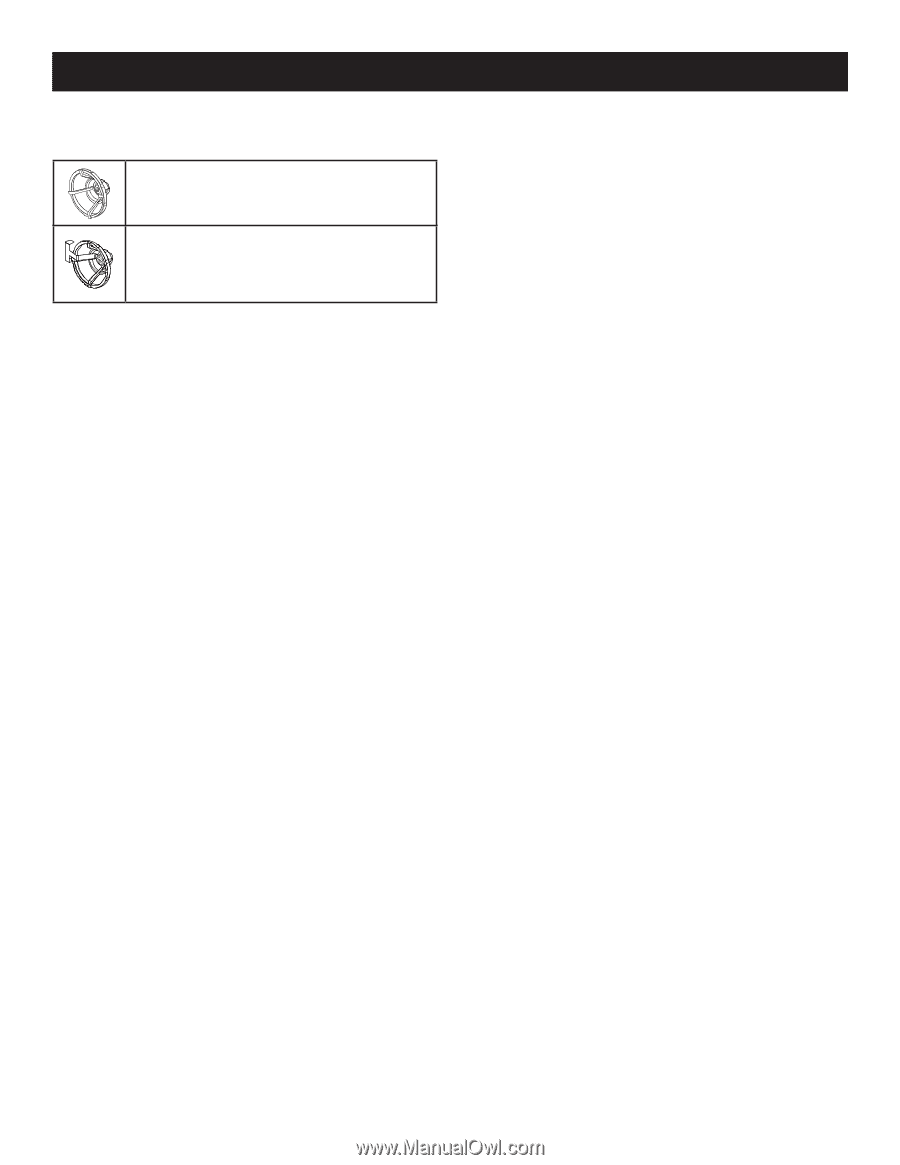
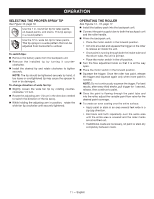
OPERATION selecting the proper spray tip See Figure 13, page 16. Use the 1 in. round fan tip for latex paints, oil-based paints, and stains. This tip sprays in a round pattern. Use the 12 in. wide fan tip for latex paints. This tip sprays in a wide pattern that can be adjusted from horizontal to vertical. To switch tips: Remove the battery pack from the backpack unit. Remove the installed tip by turning it counter- clockwise. Install the desired tip and rotate clockwise to tighten securely. NOTE: The tip should be tightened securely by hand. A too loose or overtightened tip may cause the sprayer to leak or be damaged. To change direction of wide fan tip: Slightly loosen the wide fan tip by rotating counterclockwise 1/4 turn. Rotate the adjusting arm 1/4 turn in the direction needed to switch the direction of the tip spray. While holding the adjusting arm in position, rotate the wide fan tip clockwise until securely tightened. operating the roller See Figures 14 - 15, page 17. Install the battery pack into the backpack unit. Connect the paint supply tube to both the backpack unit and the roller handle. Prime the backpack unit: • Place the motor switch in the forward position. • Aim into a bucket and squeeze the trigger on the roller to release air inside the unit. • Once paint is running through both the intake tube and the return tube, the unit is primed. • Place the motor switch in the off position. Turn the flow adjustment knob so that it is all the way open. Place the motor switch in the forward position. Squeeze the trigger. Once the roller has paint, release the trigger and squeeze again only when more paint is needed. NOTE: Do not continuously squeeze the trigger. For best results, after every third stroke, pull trigger for 1 second, release, then continue to paint. Once the paint is flowing through the paint tube and into the roller, adjust the variable paint flow valve for the desired paint coverage. To create an even coating over the entire surface: • Apply paint or stain in an area several feet wide in a zig-zag direction. • Roll back and forth repeatedly over the same area until the entire area is covered and the roller marks are smoothed out. • If additional coats are necessary, let paint or stain dry completely between coats. 11 - English
-
 1
1 -
2
-
3
-
4
-
5
-
 6
6 -
 7
7 -
 8
8 -
 9
9 -
 10
10 -
 11
11 -
 12
12 -
 13
13 -
 14
14 -
 15
15 -
 16
16 -
17
-
18
-
19
-
20
-
21
-
22
-
23
-
24
-
25
-
26
-
27
-
28
-
29
-
30
-
31
-
32
-
33
-
34
-
35
-
36
-
37
-
38
-
39
-
40
-
41
-
42
-
43
-
44
 |
 |