Samsung AA59-00411A User Manual (user Manual) (ver.1.0) (English) - Page 25
Setting the Function Help, Upgrading the Software, Setting Up Your Remote Control
 |
UPC - 811558012564
View all Samsung AA59-00411A manuals
Add to My Manuals
Save this manual to your list of manuals |
Page 25 highlights
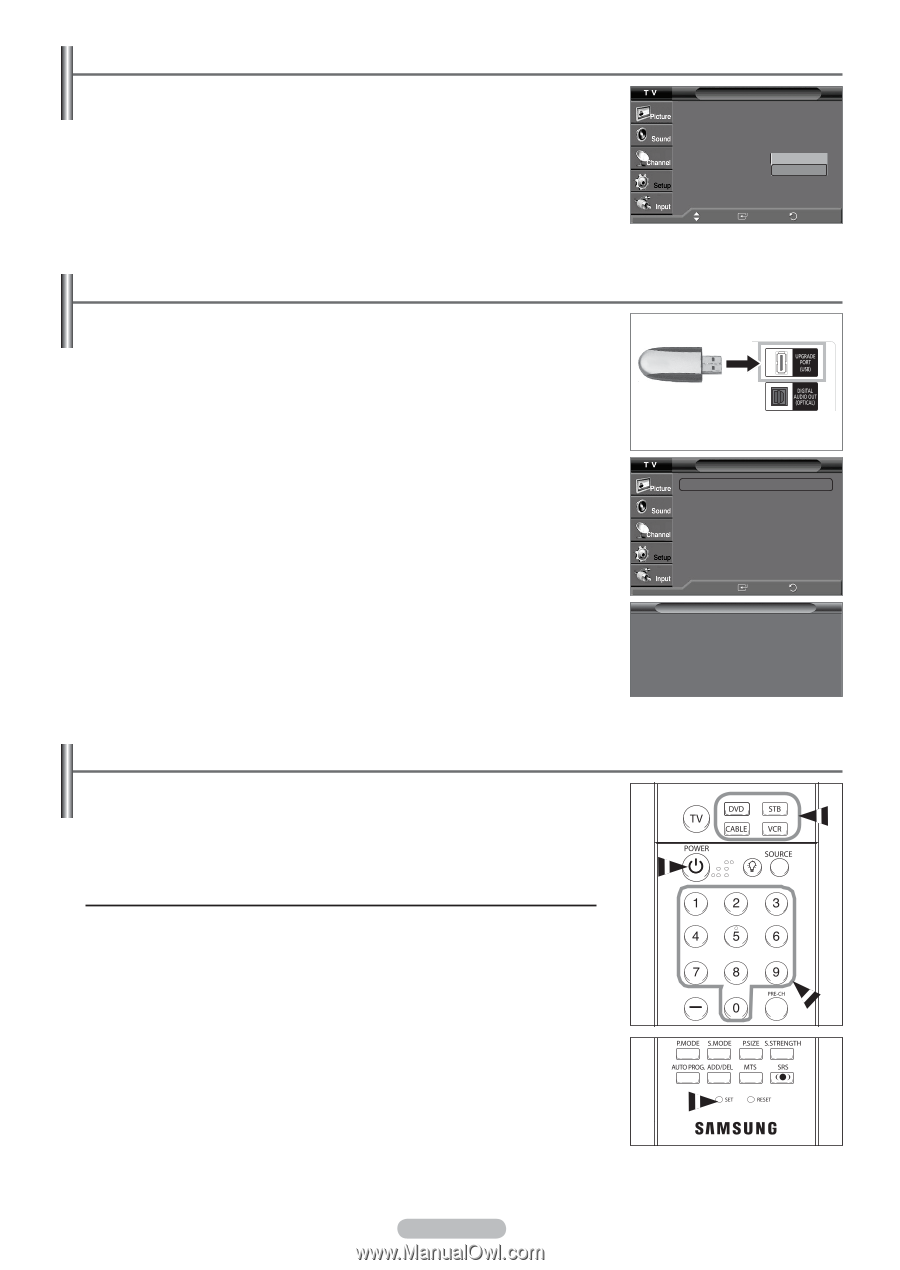
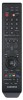
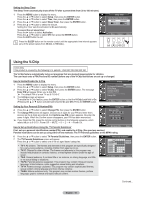
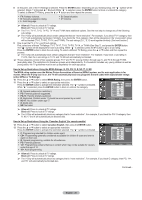
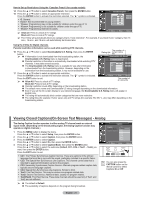
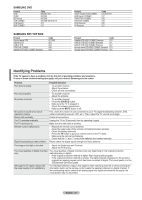
Setting the Function Help Displays help on the menu functions. 1 Press the MENU button to display the menu. Press the ▲ or ▼ button to select Setup, then press the ENTER button. 2 Press the ▲ or ▼ button to select Function Help, then press the ENTER button. Press the ▲ or ▼ button to select On or Off, then press the ENTER button. Press the EXIT button to exit. ➢ The default setting of the function help is On. Setup ▲ More Melody HDMI Black Level Film Mode Function Help SW Upgrade : Medium : Normal : Off : OOfnf On Move Enter Return Upgrading the Software Samsung may offer upgrades for your TV's firmware in the future. Please contact the Samsung call center at 1-800-SAMSUNG to receive information about downloading upgrades and using a USB drive. Upgrades will be possible by connecting a USB drive to the USB port located on the back of your TV. 1 Insert a USB drive containing the firmware upgrade into the USB Upgrade Port on the back of the TV. 2 Press the MENU button to display the menu. Press the ▲ or ▼ button to select Setup, then press the ENTER button. 3 Press the ▲ or ▼ button to select SW Upgrade, then press the ENTER button. 4 Press the ENTER button to select USB. The message Scanning for USB.. It may take up to 30 seconds. is displayed. Please be careful to not disconnect the power or remove the USB drive while upgrades are being applied. The TV will shut off and turn on automatically after completing the firmware upgrade. Please check the firmware version after the upgrades are complete. ➢ The firmware and upgrade process may be different by country and region. USB Drive SW Upgrade USB ► Enter Software Upgrade Scanning for USB.. It may take up to 30 seconds. Return Setting Up Your Remote Control After your remote control has been properly set up, your remote control can operate in five different modes: TV, VCR, Cable, DVD, or Set-Top Box. Pressing the corresponding button on the remote control allows you to switch between these modes, and control whichever piece of equipment you choose. ➢ The remote control might not be compatible with all DVD Players, VCRs, Cable boxes, and Set-Top Boxes. Setting Up Your Remote Control to Operate Your VCR, Cable box, DVD or Set Top Box 1 Turn off your VCR, CABLE, DVD or STB. 2 Press the VCR, CABLE, DVD or STB button on your TV's remote control. 3 Press the SET button on your TV's remote control. 4 Using the number buttons on your remote control, enter three digits of the VCR, Cable box, DVD or Set Top Box code listed on pages 25~27 of this manual for your brand of VCR, Cable box, DVD or Set Top Box. Make sure you enter three digits of the code, even if the first digit is a "0". (If more than one code is listed, try the first one.) 4 Press the POWER button on the remote control. Your VCR, Cable box, DVD or Set Top Box should turn on if your remote control is set up correctly. If your VCR, Cable box, DVD or Set Top Box does not turn on, repeat steps 2, 3, and 4, but try one of the other codes listed for the brand of your particular VCR, Cable box, DVD or Set Top Box. ➢ Note on Using Remote Control Modes: VCR, CABLE, DVD, STB. When your remote control is in VCR, Cable box, DVD or Set Top Box mode, the volume buttons still control your TV's volume. English - 24 Continued...
-
 1
1 -
2
-
3
-
4
-
5
-
6
-
7
-
8
-
9
-
10
-
11
-
12
-
13
-
14
-
15
-
16
-
17
-
18
-
19
-
 20
20 -
 21
21 -
 22
22 -
 23
23 -
 24
24 -
 25
25 -
 26
26 -
 27
27 -
 28
28 -
 29
29 -
 30
30 -
31
-
32
-
33
-
34
-
35
-
36
 |
 |