Samsung CLX-4195FW User Manual Ver.1.0 (English) - Page 201
Creating the ad hoc network in Windows, Using Enhanced Features and Participating
 |
View all Samsung CLX-4195FW manuals
Add to My Manuals
Save this manual to your list of manuals |
Page 201 highlights
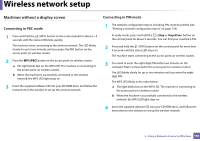
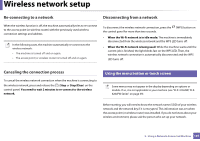
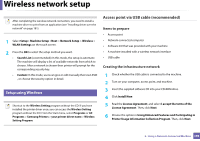
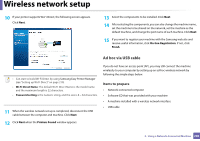
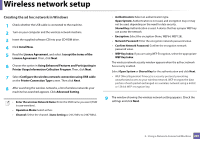
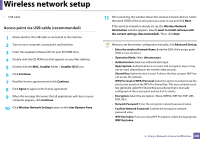
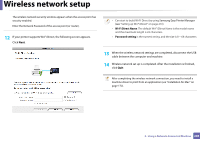
Wireless network setup Creating the ad hoc network in Windows 1 Check whether the USB cable is connected to the machine. 2 Turn on your computer and the wireless network machine. 3 Insert the supplied software CD into your CD-ROM drive. 4 Click Install Now. 5 Read the License Agreement, and select I accept the terms of the License Agreement. Then, click Next. 6 Choose the option in Using Enhanced Features and Participating in Printer Usage Information Collection Program. Then, click Next. 7 Select Configure the wireless network connection using USB cable on the Printer Connection Type screen. Then click Next. 8 After searching the wireless networks, a list of wireless networks your machine has searched appears. Click Advanced Setting. • Enter the wireless Network Name: Enter the SSID name you want (SSID is case-sensitive). • Operation Mode: Select ad hoc. • Channel: Select the channel. (Auto Setting or 2412 MHz to 2467 MHz). • Authentication: Select an authentication type. Open System: Authentication is not used, and encryption may or may not be used, depending on the need for data security. Shared Key: Authentication is used. A device that has a proper WEP key can access the network. • Encryption: Select the encryption (None, WEP64, WEP128). • Network Password: Enter the encryption network password value. • Confirm Network Password: Confirm the encryption network password value. • WEP Key Index: If you are using WEP Encryption, select the appropriate WEP Key Index. The wireless network security window appears when the ad hoc network has security enabled. Select Open System or Shared Key for the authentication and click Next. • WEP (Wired Equivalent Privacy) is a security protocol preventing unauthorized access to your wireless network. WEP encrypts the data portion of each packet exchanged on a wireless network using a 64-bit or 128-bit WEP encryption key. 9 The window showing the wireless network setting appears. Check the settings and click Next. 2. Using a Network-Connected Machine 201
-
 1
1 -
2
-
3
-
4
-
5
-
6
-
7
-
8
-
9
-
10
-
11
-
12
-
13
-
14
-
15
-
16
-
17
-
18
-
19
-
20
-
21
-
22
-
23
-
24
-
25
-
26
-
27
-
28
-
29
-
30
-
31
-
32
-
33
-
34
-
35
-
36
-
37
-
38
-
39
-
40
-
41
-
42
-
43
-
44
-
45
-
46
-
47
-
48
-
49
-
50
-
51
-
52
-
53
-
54
-
55
-
56
-
57
-
58
-
59
-
60
-
61
-
62
-
63
-
64
-
65
-
66
-
67
-
68
-
69
-
70
-
71
-
72
-
73
-
74
-
75
-
76
-
77
-
78
-
79
-
80
-
81
-
82
-
83
-
84
-
85
-
86
-
87
-
88
-
89
-
90
-
91
-
92
-
93
-
94
-
95
-
96
-
97
-
98
-
99
-
100
-
101
-
102
-
103
-
104
-
105
-
106
-
107
-
108
-
109
-
110
-
111
-
112
-
113
-
114
-
115
-
116
-
117
-
118
-
119
-
120
-
121
-
122
-
123
-
124
-
125
-
126
-
127
-
128
-
129
-
130
-
131
-
132
-
133
-
134
-
135
-
136
-
137
-
138
-
139
-
140
-
141
-
142
-
143
-
144
-
145
-
146
-
147
-
148
-
149
-
150
-
151
-
152
-
153
-
154
-
155
-
156
-
157
-
158
-
159
-
160
-
161
-
162
-
163
-
164
-
165
-
166
-
167
-
168
-
169
-
170
-
171
-
172
-
173
-
174
-
175
-
176
-
177
-
178
-
179
-
180
-
181
-
182
-
183
-
184
-
185
-
186
-
187
-
188
-
189
-
190
-
191
-
192
-
193
-
194
-
195
-
 196
196 -
 197
197 -
 198
198 -
 199
199 -
 200
200 -
 201
201 -
 202
202 -
 203
203 -
 204
204 -
 205
205 -
 206
206 -
207
-
208
-
209
-
210
-
211
-
212
-
213
-
214
-
215
-
216
-
217
-
218
-
219
-
220
-
221
-
222
-
223
-
224
-
225
-
226
-
227
-
228
-
229
-
230
-
231
-
232
-
233
-
234
-
235
-
236
-
237
-
238
-
239
-
240
-
241
-
242
-
243
-
244
-
245
-
246
-
247
-
248
-
249
-
250
-
251
-
252
-
253
-
254
-
255
-
256
-
257
-
258
-
259
-
260
-
261
-
262
-
263
-
264
-
265
-
266
-
267
-
268
-
269
-
270
-
271
-
272
-
273
-
274
-
275
-
276
-
277
-
278
-
279
-
280
-
281
-
282
-
283
-
284
-
285
-
286
-
287
-
288
-
289
-
290
-
291
-
292
-
293
-
294
-
295
-
296
-
297
-
298
-
299
-
300
-
301
-
302
-
303
-
304
-
305
-
306
-
307
-
308
-
309
-
310
-
311
-
312
-
313
-
314
-
315
-
316
-
317
-
318
-
319
-
320
-
321
-
322
-
323
-
324
-
325
-
326
-
327
-
328
-
329
-
330
-
331
-
332
-
333
-
334
-
335
-
336
-
337
-
338
-
339
-
340
-
341
-
342
-
343
-
344
-
345
-
346
-
347
-
348
-
349
-
350
-
351
-
352
-
353
-
354
-
355
-
356
-
357
-
358
-
359
-
360
-
361
-
362
-
363
-
364
-
365
-
366
-
367
-
368
 |
 |
