Samsung Galaxy S7 User Manual - Page 23
Initial Set Up, Smart Switch - battery
 |
View all Samsung Galaxy S7 manuals
Add to My Manuals
Save this manual to your list of manuals |
Page 23 highlights
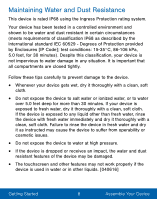
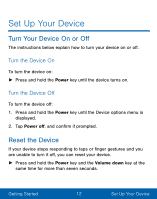
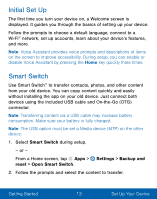
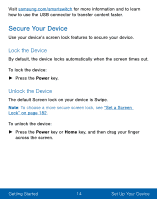
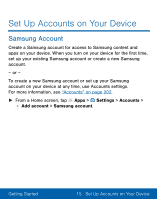
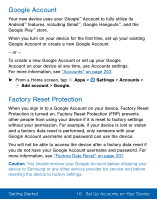
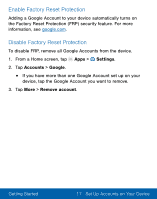
Initial Set Up The first time you turn your device on, a Welcome screen is displayed. It guides you through the basics of setting up your device. Follow the prompts to choose a default language, connect to a Wi-Fi® network, set up accounts, learn about your device's features, and more. Note: Voice Assistant provides voice prompts and descriptions of items on the screen to improve accessibility. During setup, you can enable or disable Voice Assistant by pressing the Home key quickly three times. Smart Switch Use Smart Switch™ to transfer contacts, photos, and other content from your old device. You can copy content quickly and easily without installing the app on your old device. Just connect both devices using the included USB cable and On-the-Go (OTG) connector. Note: Transferring content via a USB cable may increase battery consumption. Make sure your battery is fully charged. Note: The USB option must be set a Media device (MTP) on the other device. 1. Select Smart Switch during setup. - or - From a Home screen, tap Apps > Settings > Backup and reset > Open Smart Switch. 2. Follow the prompts and select the content to transfer. Getting Started 13 Set Up Your Device
-
 1
1 -
2
-
3
-
4
-
5
-
6
-
7
-
8
-
9
-
10
-
11
-
12
-
13
-
14
-
15
-
16
-
17
-
 18
18 -
 19
19 -
 20
20 -
 21
21 -
 22
22 -
 23
23 -
 24
24 -
 25
25 -
 26
26 -
 27
27 -
 28
28 -
29
-
30
-
31
-
32
-
33
-
34
-
35
-
36
-
37
-
38
-
39
-
40
-
41
-
42
-
43
-
44
-
45
-
46
-
47
-
48
-
49
-
50
-
51
-
52
-
53
-
54
-
55
-
56
-
57
-
58
-
59
-
60
-
61
-
62
-
63
-
64
-
65
-
66
-
67
-
68
-
69
-
70
-
71
-
72
-
73
-
74
-
75
-
76
-
77
-
78
-
79
-
80
-
81
-
82
-
83
-
84
-
85
-
86
-
87
-
88
-
89
-
90
-
91
-
92
-
93
-
94
-
95
-
96
-
97
-
98
-
99
-
100
-
101
-
102
-
103
-
104
-
105
-
106
-
107
-
108
-
109
-
110
-
111
-
112
-
113
-
114
-
115
-
116
-
117
-
118
-
119
-
120
-
121
-
122
-
123
-
124
-
125
-
126
-
127
-
128
-
129
-
130
-
131
-
132
-
133
-
134
-
135
-
136
-
137
-
138
-
139
-
140
-
141
-
142
-
143
-
144
-
145
-
146
-
147
-
148
-
149
-
150
-
151
-
152
-
153
-
154
-
155
-
156
-
157
-
158
-
159
-
160
-
161
-
162
-
163
-
164
-
165
-
166
-
167
-
168
-
169
-
170
-
171
-
172
-
173
-
174
-
175
-
176
-
177
-
178
-
179
-
180
-
181
-
182
-
183
-
184
-
185
-
186
-
187
-
188
-
189
-
190
-
191
-
192
-
193
-
194
-
195
-
196
-
197
-
198
-
199
-
200
-
201
-
202
-
203
-
204
-
205
-
206
-
207
-
208
-
209
-
210
-
211
-
212
-
213
-
214
-
215
-
216
-
217
-
218
-
219
-
220
-
221
-
222
-
223
-
224
-
225
-
226
-
227
-
228
 |
 |