Samsung L73 User Manual - Page 50
PictBridge - usb cable
 |
UPC - 044701007456
View all Samsung L73 manuals
Add to My Manuals
Save this manual to your list of manuals |
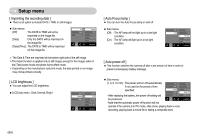
Page 50 highlights
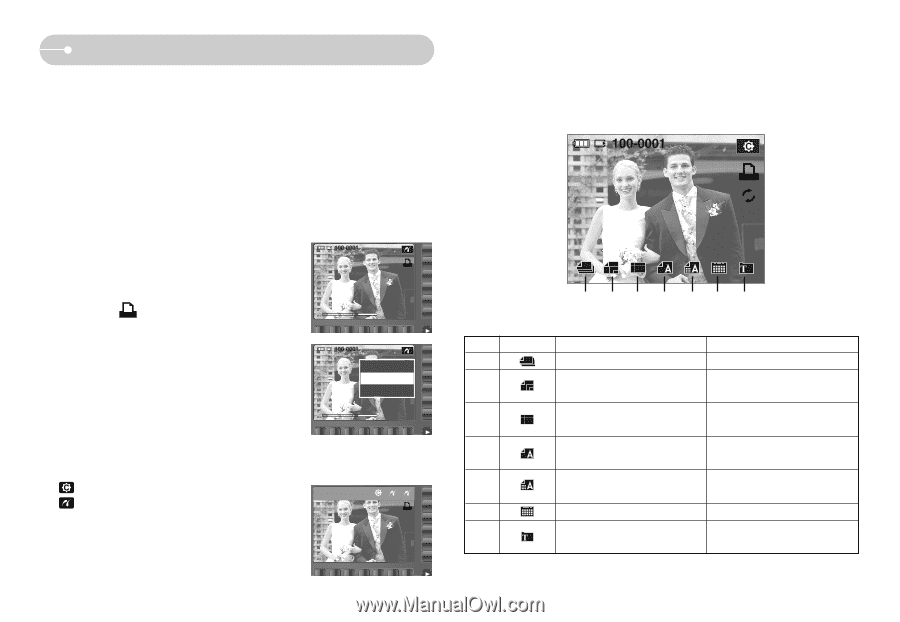
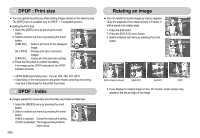
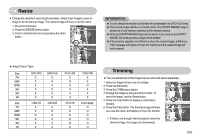
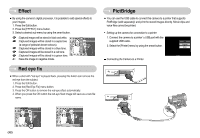
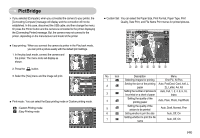
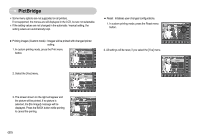
PictBridge ※ If you selected [Computer], when you connected the camera to your printer, the [Connecting Computer] message will display and the connection will not be established. In this case, disconnect the USB cable, and then change the menu. Or press the Printer button and the camera is connected to the printer displaying the [Connecting Printer] message. But, the camera may not connect to the printer, depending on the manufacturer and model of the printer ■ Easy printing : When you connect the camera to printer in the Play back mode, you can print a picture easily with the default print settings. 1. In the play back mode, connect the camera and the printer. The menu icons will display as shown. 2. Press the button. ◀ 3. Select the [Yes] menu and the image will print. Print? Yes No ◀ ◀ ◀ ■ Print mode : You can select the Easy printing mode or Custom printing mode. : Custom Printing mode : Easy Printing mode ■ Custom Set : You can select the Paper Size, Print Format, Paper Type, Print Quality, Date Print, and File Name Print menus for printed pictures. No. Icon Description Menu 1 Selecting images for printing One Pic, All Pics Setting the size of the printing Auto, PostCard, Card, 4x6, L, 2 paper 2L, Letter, A4, A3 Setting the number of pictures to Auto, Full, 1, 2, 4, 8, 9, 16, 3 be printed on a sheet of paper Index 4 Setting the quality of the printing paper Auto, Plain, Photo, FastPhoto 5 Setting the quality of the picture to be printed Auto, Draft, Normal, Fine 6 Setting whether to print the date Auto, Off, On 7 Setting whether to print the file name Auto, Off, On 《49》
-
 1
1 -
2
-
3
-
4
-
5
-
6
-
7
-
8
-
9
-
10
-
11
-
12
-
13
-
14
-
15
-
16
-
17
-
18
-
19
-
20
-
21
-
22
-
23
-
24
-
25
-
26
-
27
-
28
-
29
-
30
-
31
-
32
-
33
-
34
-
35
-
36
-
37
-
38
-
39
-
40
-
41
-
42
-
43
-
44
-
 45
45 -
 46
46 -
 47
47 -
 48
48 -
 49
49 -
 50
50 -
 51
51 -
 52
52 -
 53
53 -
 54
54 -
 55
55 -
56
-
57
-
58
-
59
-
60
-
61
-
62
-
63
-
64
-
65
-
66
-
67
-
68
-
69
-
70
-
71
-
72
-
73
-
74
-
75
-
76
-
77
-
78
 |
 |