Sanyo DP26746 Owners Manual - Page 11
Digital Av Connections - no picture
 |
UPC - 086483058660
View all Sanyo DP26746 manuals
Add to My Manuals
Save this manual to your list of manuals |
Page 11 highlights
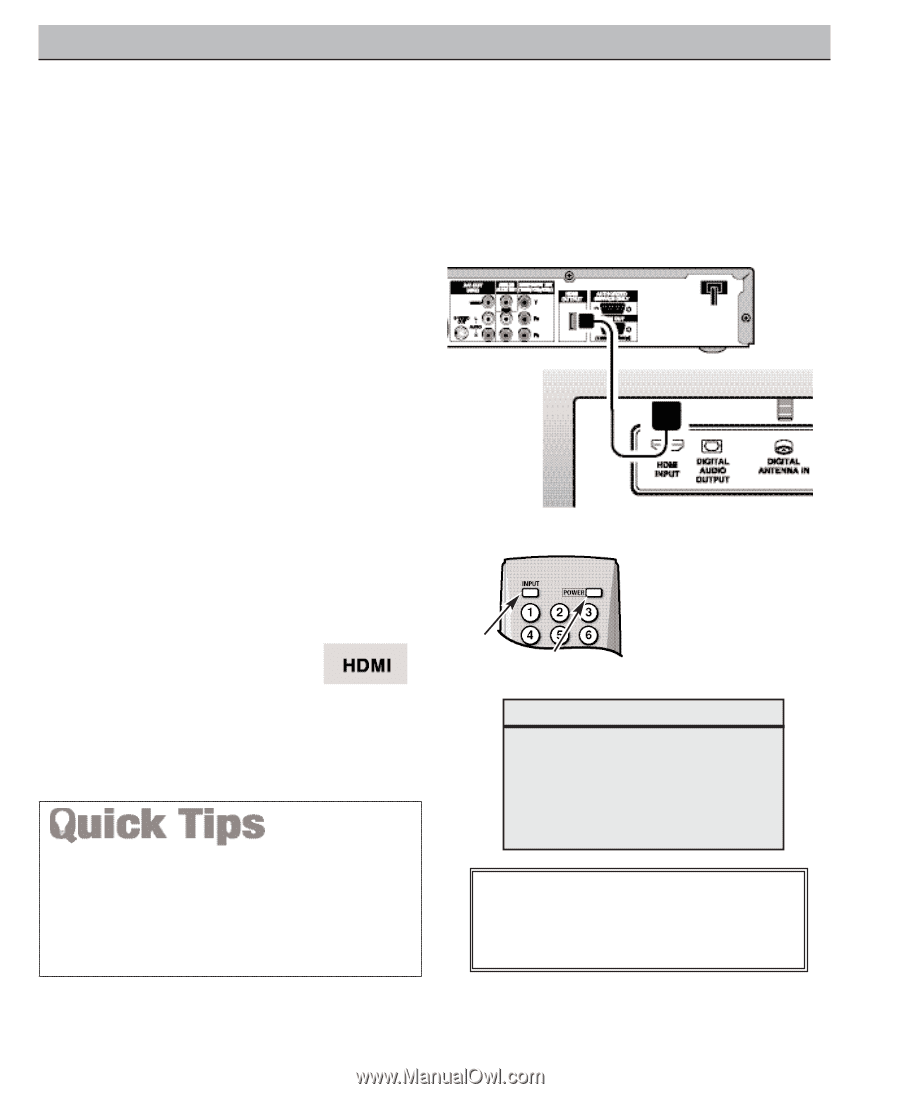
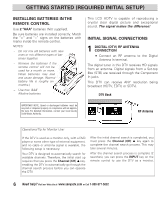
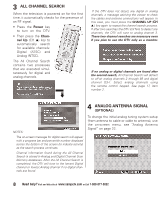
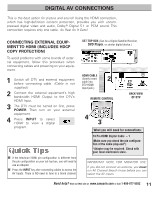
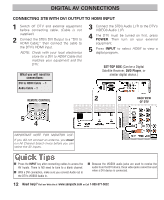
DIGITAL AV CONNECTIONS This is the best option for picture and sound! Using the HDMI connection, which has high-definition content protection, provides you with uncompressed digital video and audio, Dolby ® Digital 5.1 or PCM sound. This connection requires only one cable. As Real As It Gets! CONNECTING EXTERNAL EQUIPMENT TO HDMI (INCLUDES HDCP COPY PROTECTION) To avoid problems with some brands of external equipment, follow this procedure when connecting cables and powering on your equipment. 1 Switch off DTV and external equipment before connecting cable. (Cable is not supplied.) 2 Connect the external equipment's high bandwidth HDMI Output to the DTV's HDMI Input. 3 The DTV must be turned on first, press POWER. Then turn on your external equipment. 4 Press INPUT to select HDMI to view a digital program. I If the television HDMI pin configuration is different from the pin configuration on your set-top box, you will need to use an Adapter. I Press the INPUT key after connecting cables to access the AV Inputs. There is NO need to tune to a blank channel. SET-TOP BOX (Can be a Digital Satellite Receiver, DVD Player, or similar digital device.) HDMI CABLE (Gently insert 2 cable into DTV HDMI Input jack.) REMOTE CONTROL BACK VIEW OF DTV 4 3 What you will need for connections: 19 Pin HDMI Digital Cable - 1 (Make sure you check the pin configuration of the cable plug-end*) *Adapter may be required. Check with your local electronics store. IMPORTANT NOTE FOR MONITOR USE: If you did not connect an antenna, you must run All Channel Search twice before you can select the AV inputs. 11 Need help? Visit our Web site at www.sanyoctv.com or Call 1-800-877-5032
-
 1
1 -
2
-
3
-
4
-
5
-
 6
6 -
 7
7 -
 8
8 -
 9
9 -
 10
10 -
 11
11 -
 12
12 -
 13
13 -
 14
14 -
 15
15 -
 16
16 -
17
-
18
-
19
-
20
-
21
-
22
-
23
-
24
-
25
-
26
-
27
-
28
-
29
-
30
-
31
-
32
-
33
-
34
-
35
-
36
-
37
-
38
-
39
-
40
-
41
-
42
-
43
-
44
-
45
-
46
-
47
-
48
-
49
-
50
-
51
-
52
-
53
-
54
-
55
-
56
-
57
-
58
-
59
-
60
-
61
-
62
-
63
-
64
-
65
-
66
-
67
-
68
 |
 |