Sanyo EF60 Instruction Manual, PLC-EF60 - Page 64
Lamp Replacement, Do Not Operate A Projector While Any Of Lamps Is
 |
View all Sanyo EF60 manuals
Add to My Manuals
Save this manual to your list of manuals |
Page 64 highlights
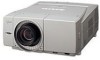
Maintenance and Cleaning Lamp Replacement When the life of the projection lamp of this projector draws to an end, the LAMP1 and 2 REPLACE indicators light orange. If this indicator lights orange, replace the lamp with a new one promptly. Top Control CAUTION For continued safety, replace with a lamp of the same type. Do not drop a lamp or touch a glass bulb! The glass can shatter and may cause injury. Allow a projector to cool, for at least 45 minutes before you open the Lamp cover. The inside of the projector can become very hot. LAMP 1 REPLACE indicator LAMP 2 REPLACE indicator These indicators light orange when the life of the projection lamps draws to an end. Follow these steps to replace the lamp. 1 Turn off the projector and disconnect the AC plug. Allow the projector to cool for at least 45 minutes. 2 Loosen each screw on the lamp covers with a screwdriver, and remove the lamp covers. 3 Loosen 2 screws of each lamp with a screwdriver and pull out one lamp and another with grasping the handle. 4 Replace the lamp with a new one and tighten the 2 screws back into the positions. Make sure that the lamp is set properly. Replace the lamp covers and tighten the screws. 5 Connect the AC power cord to the projector and turn on the projector. 6 Reset the Lamp time. See "Lamp time" on p59. Lamp covers Screws (Unremovable) Lamp 1 Handle Lamp 2 CAUTION : DO NOT OPERATE A PROJECTOR WHILE ANY OF LAMPS IS REMOVED. IT MAY RESULT IN MALFUNCTIONS, FIRE HAZARD, OR OTHER ACCIDENTS. Screws NOTES ON LAMP REPLACEMENT: TO MAINTAIN QUALITY OF PICTURE (BETTER BALANCE OF COLOR AND BRIGHTNESS IN THE ENTIRE SCREEN), WE RECOMMEND REPLACING ALL 2 LAMPS AT A TIME. Handle 64
-
 1
1 -
2
-
3
-
4
-
5
-
6
-
7
-
8
-
9
-
10
-
11
-
12
-
13
-
14
-
15
-
16
-
17
-
18
-
19
-
20
-
21
-
22
-
23
-
24
-
25
-
26
-
27
-
28
-
29
-
30
-
31
-
32
-
33
-
34
-
35
-
36
-
37
-
38
-
39
-
40
-
41
-
42
-
43
-
44
-
45
-
46
-
47
-
48
-
49
-
50
-
51
-
52
-
53
-
54
-
55
-
56
-
57
-
58
-
 59
59 -
 60
60 -
 61
61 -
 62
62 -
 63
63 -
 64
64 -
 65
65 -
 66
66 -
 67
67 -
 68
68 -
 69
69 -
70
-
71
-
72
-
73
-
74
-
75
-
76
-
77
-
78
-
79
-
80
-
81
-
82
-
83
-
84
 |
 |
