Seagate Maxtor Fusion Installation Guide - Page 6
Step 3. Set up Your Fusion - installation cd
 |
View all Seagate Maxtor Fusion manuals
Add to My Manuals
Save this manual to your list of manuals |
Page 6 highlights
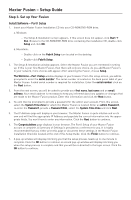
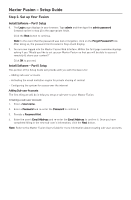
Maxtor Fusion - Setup Guide Step 3. Set up Your Fusion Install Software - Part I Setup 1. Insert your Maxtor Fusion Installation CD into your CD-ROM/DVD-ROM drive. a. Windows: - The Setup & Installation screen appears. If this screen does not appear, click Start ➔ Run. Browse to the CD-ROM/DVD-ROM drive containing the installation CD, double-click Setup and click OK. b. Macintosh: - Double-click on the Fabrik Setup icon located on the desktop. - Double-click Fabrik Setup. 2. The Setup & Installation window appears. Select the Maxtor Fusion you are interested in setting up. If this is your first Maxtor Fusion, then there will only one choice. As you add Maxtor Fusion's to your network, more choices will appear. After selecting the Fusion, choose Setup. The Welcome - Part I Setup window displays in your browser. From this setup screen, you will be prompted to enter the serial number. The serial number is located on the back panel label of your Maxtor Fusion. A valid serial number is required for installation. Enter the serial number click on the Next button. 3. From the next screen, you will be asked to provide your first name, last name and an email address. Your email address is necessary to keep you informed about any updates or changes that are made to the Maxtor Fusion product. Enter this information and click the Next button. 4. You will then be prompted to provide a password for the admin user account. From this screen, select the System Time Zone for which the Maxtor Fusion is located. Enter an admin Password, re-enter the Password, provide a Password Hint, select the System Time Zone and click Next. 5. The IP Address page will display in your browser. The Maxtor Fusion is quite intuitive and on its own and will find the appropriate IP Address and populate the correct information into the appropriate fields. You won't have to enter any information. Click the Next button to continue. 6. The Congratulations page displays in your browser. The Part I Setup of your Maxtor Fusion account is complete. A Summary of Settings is provided as a reference for you. It is highly recommended that you either print this page or document these settings in the Maxtor Fusion Installation Checklist located at the end of this Setup Guide. Click the Finish button to continue. 7. A pop-up window will display informing you that the setup process needs up to one minute to complete. Click the OK button to continue. A second pop-up window will display informing you when the setup process is complete and that you will be re-directed to the login screen. Click the OK button to continue.
-
 1
1 -
 2
2 -
 3
3 -
 4
4 -
 5
5 -
 6
6 -
 7
7 -
 8
8 -
 9
9 -
 10
10 -
 11
11 -
 12
12 -
13
-
14
 |
 |