Seagate Maxtor Fusion Installation Guide - Page 9
II. The Dynamic DNS home opens. - software
 |
View all Seagate Maxtor Fusion manuals
Add to My Manuals
Save this manual to your list of manuals |
Page 9 highlights
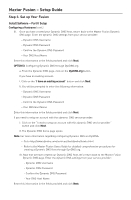
Maxtor Fusion - Setup Guide Step 3. Set up Your Fusion Install Software - Part II Setup Configuring a Hostname (cont.) III. Once you have created your Dynamic DNS Host, return back to the Maxtor Fusion Dynamic DNS page. Enter the dynamic DNS settings from your service provider: - Dynamic DNS Username - Dynamic DNS Password - Confirm the Dynamic DNS Password - Your DNS Host Name Enter this information in the fields provided and click Next. OPTION 3: Configuring Dynamic DNS through DynDNS.org a. From the Dynamic DNS page, click on the DynDNS.org button. If you have an existing account: I. Click on the "I have an existing account" button and click Next. II. You will be prompted to enter the following information: - Dynamic DNS Username - Dynamic DNS Password - Confirm the Dynamic DNS Password - Your DNS Host Name Enter this information in the fields provided and click Next. If you need to setup an account with this dynamic DNS service provider: I. Click on the "I need to setup an account with this dynamic DNS service provider" button and click Next. II. The Dynamic DNS home page opens. Note: For more information regarding configuring Dynamic DNS via DynDNS: - Go to http://www.dyndns.com/services/dns/dyndns/howto.html - Refer to the Maxtor Fusion Users Guide for detailed comprehensive procedures for creating a Dynamic DNS Host through DynDNS.org. III. Now that we have created our Dynamic DNS Host, let's return back to the Maxtor Fusion Dynamic DNS page. Enter the dynamic DNS settings from your service provider: - Dynamic DNS Username - Dynamic DNS Password - Confirm the Dynamic DNS Password - Your DNS Host Name Enter this information in the fields provided and click Next.
-
 1
1 -
2
-
3
-
 4
4 -
 5
5 -
 6
6 -
 7
7 -
 8
8 -
 9
9 -
 10
10 -
 11
11 -
 12
12 -
 13
13 -
 14
14
 |
 |
