Sennheiser Set 880 Instruction manual Set 880 - Page 11
Connecting the transmitter to audio sources
 |
View all Sennheiser Set 880 manuals
Add to My Manuals
Save this manual to your list of manuals |
Page 11 highlights
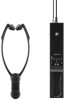
Putting the Set 880 into operation Connecting the transmitter to audio sources You can connect the transmitter to a digital and/or an analog audio source (e.g. a TV and a stereo hi-fi system) and switch between the audio sources/inputs. You can also refer to the beginner's video guides on how to connect your digital wireless headphone system to a TV: www.sennheiser.com/how-to-videos. E Switch your audio source off before connecting the transmitter. E Check the connection possibilities of your audio source (audio output, usually marked "OUT"). E Select the corresponding connection cable and, if necessary, a suitable adapter E To connect the transmitter to your audio source, refer to the connection diagram suitable for your audio source (see the following chapters). Follow the color codings on the transmitter and on the cables. Connection possibilities of the audio source Color coding on the Connection cable transmitter Page A Optical (digital) 3.5 mm jack socket B (analog) C RCA (analog) L D SCART (analog) Optical digital cable 12 Stereo audio cable 13 Stereo audio cable with RCA adapter (3.5 mm jack socket to 2 RCA plugs) 14 Stereo audio cable with SCART adapter (3.5 mm jack socket to SCART connector; optional 14 accessory) Accessories and adapters are available from your local Sennheiser partner. Set 880 | 11
-
 1
1 -
2
-
3
-
4
-
5
-
 6
6 -
 7
7 -
 8
8 -
 9
9 -
 10
10 -
 11
11 -
 12
12 -
 13
13 -
 14
14 -
 15
15 -
 16
16 -
17
-
18
-
19
-
20
-
21
-
22
-
23
-
24
-
25
-
26
-
27
-
28
-
29
-
30
-
31
-
32
-
33
-
34
-
35
-
36
-
37
-
38
-
39
-
40
-
41
-
42
-
43
-
44
-
45
-
46
-
47
-
48
 |
 |
