Sennheiser TeamConnect Ceiling 2 Configuration of 802.1X for TeamConnect Ceili - Page 3
Prerequisites, Connecting to the TeamConnect Ceiling 2 - microphone
 |
View all Sennheiser TeamConnect Ceiling 2 manuals
Add to My Manuals
Save this manual to your list of manuals |
Page 3 highlights
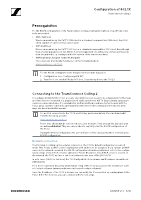
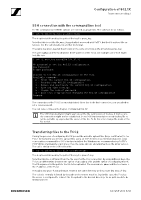
Configuration of 802.1X TeamConnect Ceiling 2 Prerequisites For the 802.1X configuration of the TeamConnect Ceiling 2 ceiling microphone array (TCC2) some tools are needed: • SSH client tool We recommend using the PuTTY SSH client or a standard command line SSH client. Any SSH client capable of openssh keys can be used. • SCP client tool We recommend using the PuTTY SCP tool or a standard command line SCP client. Even though they are very popular, tools like WinSCP are not supported since they rely on more permissions than are granted (e. g. reading out the file system of the remote machine). • SSH keys (pnac_key pair + pnac-ft_key pair) These keys are provided by Sennheiser on the following website: www.sennheiser.com/tcc2 For the 802.1X configuration two things need to be done in parallel: 1. Configuration (see „Configuring 802.1X") 2. Transfer of the needed files by SCP (see „Transferring files to the TCC2") Connecting to the TeamConnect Ceiling 2 To configure 802.1X for the TCC2, a secure shell (SSH) session needs to be established. For this task an SSH client tool is needed. If a graphical tool (GUI) is preferred, PuTTY (https://www.putty.org/) can be recommended since it is available for multiple platforms and was tested to work with the TCC2. Linux systems come with a preinstalled SSH client for the command line (Console). Both ways are described in this manual. For an SSH connection to the TCC2, an SSH key pair is mandatory. You can download it from the following website: www.sennheiser.com/tcc2 These keys should not be considered a security measure. They are publicly available and are not confidential. They are only needed to explicitly start the 802.1X configuration of the TCC2. During the 802.1X configuration the user will later set his own password for reentering the 802.1X configuration. Network connection The first step is setting up the network connection. The TCC2's default configuration is auto-IP mode. This means a DHCP client is waiting for an IP address to be assigned. If you operate a DHCP server in the network, on which the 802.1X configuration should be performed, refer to the configuration or logs of the DHCP server to obtain the TCC2's IP address. If no DHCP server is present on the network, the TCC2 will use a link-local address in the area of 169.254.0.0/16. In both cases (DHCP or link-local) the TCC2 will publish its hostname and IP address via multicast DNS (mDNS). For a more convenient discovery and network setup of the TCC2 you can use the Sennheiser Control Cockpit software (www.sennheiser.com/control-cockpit-software). Once the IP address of the TCC2 is known, you can verify the IP connection by sending pings to the TCC2. If the TCC2 replies, you can continue with the next steps. AN 1258 v1.0 | 3/12
-
 1
1 -
 2
2 -
 3
3 -
 4
4 -
 5
5 -
 6
6 -
 7
7 -
 8
8 -
 9
9 -
10
-
11
-
12
 |
 |
