Sharp AR-208 AR-208S AR-208D Operation Manual Suite
Sharp AR-208 Manual
 |
UPC - 708562050784
View all Sharp AR-208 manuals
Add to My Manuals
Save this manual to your list of manuals |
Sharp AR-208 manual content summary:
- Sharp AR-208 | AR-208S | AR-208D Operation Manual Suite - Page 1
AR-208S/AR-208D DIGITAL MULTIFUNCTIONAL SYSTEM OPERATION MANUAL (for general information) Page PREPARATIONS 9 LOADING PAPER 14 MAKING COPIES 20 CONVENIENT COPY FUNCTIONS 26 INSTALLING THE SOFTWARE 36 PRINTER/SCANNER FUNCTIONS 49 USER SETTINGS 54 TROUBLESHOOTING AND MAINTENANCE - Sharp AR-208 | AR-208S | AR-208D Operation Manual Suite - Page 2
the hardware, software or firmware embodied in or used in conjunction with this Product. Your sole remedy, in the event that you encounter any difficulties with this Product, is against the authorized dealer from which you purchased the Product. AR-208S Digital Multifunctional System AR-208D Digital - Sharp AR-208 | AR-208S | AR-208D Operation Manual Suite - Page 3
...3 SOFTWARE LICENSE 4 ENVIRONMENTAL INFORMATION 4 INTRODUCTION ...6 MAIN FEATURES...7 1 PREPARATIONS PART NAMES...9 POWER ON AND OFF 12 2 LOADING PAPER PAPER...14 LOADING THE PAPER TRAY 15 BYPASS FEED (including special paper 17 CHANGING A TRAY'S PAPER SIZE SETTING 19 3 MAKING COPIES NORMAL - Sharp AR-208 | AR-208S | AR-208D Operation Manual Suite - Page 4
52 OPERATION IN COPY, PRINTER, AND SCANNER MODES 52 HOW TO USE THE ONLINE MANUAL 53 7 USER SETTINGS USER PROGRAMS 54 SELECTING A SETTING FOR A USER PROGRAM 59 8 TROUBLESHOOTING AND MAINTENANCE DISPLAY MESSAGES 61 TROUBLESHOOTING THE MACHINE 63 PROBLEMS DURING SETUP OF THE SOFTWARE 67 MISFEED - Sharp AR-208 | AR-208S | AR-208D Operation Manual Suite - Page 5
dusty • exposed to direct sunlight • poorly ventilated • subject to extreme temperature or humidity changes, e.g., near an air conditioner or heater. Be sure to allow the required space around the machine for servicing and proper ventilation. 8" (20 cm) 4" (10 cm) 4" (10 cm) 3 - Sharp AR-208 | AR-208S | AR-208D Operation Manual Suite - Page 6
object. Store spare toner cartridges in a cool dry drum (green portion). • Scratches or smudges on the drum will cause dirty copies. Trademark acknowledgements • Microsoft®, Windows®, Windows® 98, Windows® Me, Windows® 2000, Windows® XP, Windows SOFTWARE LICENSE. ENVIRONMENTAL INFORMATION For users - Sharp AR-208 | AR-208S | AR-208D Operation Manual Suite - Page 7
radiation exposure. This Digital Equipment is CLASS 1 LASER PRODUCT (IEC 60825-1 Edition 1.2-2001) SAFETY PRECAUTIONS This Digital Copier is rated Class 1 is advisable to place the unit in a ventilated area. For users in Canada The Environmental Choice Program guidelines are applied to the products - Sharp AR-208 | AR-208S | AR-208D Operation Manual Suite - Page 8
are as follows: Operation Manual (this manual) Explains the machine and how to use it as a copier. Also explains how to install the software that allows the machine to be used as a printer and scanner for your computer. Online Manual (on the accessory CD-ROM) This manual explains the procedures for - Sharp AR-208 | AR-208S | AR-208D Operation Manual Suite - Page 9
, using the document glass with the polygon rotating in the copy ready state and "LSU SETTING" set to ON in the user programs (8-1/2" x 11", paper fed from paper tray). *2 When user program 24 is set to OFF. High-quality digital image • High-quality copying at 600 dpi is performed. • In addition to - Sharp AR-208 | AR-208S | AR-208D Operation Manual Suite - Page 10
can be installed to enable use of the machine as a printer. Color scanner function • The accompanying scanner driver can be installed and the machine connected to a computer using a USB cable to enable use as a scanner. Fax function (option) • The optional Facsimile Expansion Kit can be installed - Sharp AR-208 | AR-208S | AR-208D Operation Manual Suite - Page 11
that you should know before using the machine. PART NAMES 1 RSPF Original guides Document feeder cover 1 Exit area 2 Document feeder tray 5 3 6 7 4 Bypass tray Interface USB connector 12 17 Toner cartridge 8 9 10 11 12 3 13 Photoconductive drum 5 14 15 16 1 Document glass - Sharp AR-208 | AR-208S | AR-208D Operation Manual Suite - Page 12
panel 1 2 AR-208S 11 6 7 8 9 10 11 12 13 14 15 1 [MODE SELECT] key / Mode indicators Press this key to select the mode. The indicator of the selected mode lights (copy, printer, scanner, fax mode indicators). 2 Display This shows messages indicating the machine status and any problems that - Sharp AR-208 | AR-208S | AR-208D Operation Manual Suite - Page 13
) This returns all functions to the default settings. When pressed in a setting menu, this returns the settings and display to the initial state. 167 [START] key ( ) / Ready indicator The ready indicator lights up when copying or scanning is possible. To begin copying, press the [START] key ( ). The - Sharp AR-208 | AR-208S | AR-208D Operation Manual Suite - Page 14
are canceled. The "AUTO CLEAR" can be changed in the user programs. (p.54) When in the copy mode READY TO COPY. 100% 8.5x11 0 The main screen of copy mode appears. Copy ratio: 100%, Exposure: Automatic Copy quantity: 0, All special copier modes: Off Scanning unit (scan head) When the machine is - Sharp AR-208 | AR-208S | AR-208D Operation Manual Suite - Page 15
and "AUTO SHUT-OFF TIME" in the user programs. It is suggested that you set times enabled, this function may help prevent wasteful use of toner that occurs when the RSPF cover is not completely in the display and copying may not take place. If copying does not take place, copying can be performed by - Sharp AR-208 | AR-208S | AR-208D Operation Manual Suite - Page 16
not closed or is improperly closed. PAPER For best results, use only SHARP recommended paper. Paper tray type Paper type Size Weight Paper tray Standard envelopes that have metal clasps, plastic snappers, strings, windows, linings, self-adhesive strips, patches or synthetic materials. Do not - Sharp AR-208 | AR-208S | AR-208D Operation Manual Suite - Page 17
a SHARP service center. ● Before using other than SHARP recommended paper, make a test copy to Do not load paper above the maximum height line ( ). Exceeding the line will cause a paper misfeed. • If the is no space between the paper and the guide, and make sure that the guide is not set - Sharp AR-208 | AR-208S | AR-208D Operation Manual Suite - Page 18
LOADING PAPER 3 Gently push the paper tray back into the machine. Note • If you loaded a paper size that is different from the previously loaded paper size, change the paper size setting as explained in "CHANGING A TRAY'S PAPER SIZE SETTING" (p.19) • When not using the machine for an extended - Sharp AR-208 | AR-208S | AR-208D Operation Manual Suite - Page 19
has already been printed on by a laser printer or plain paper fax machine. This may cause smudges or unclean images. Envelopes Do not use the following envelopes, as misfeeds will occur. • Envelopes with metal tabs, clasps, strings, holes, or windows. • Envelopes with rough fibers, carbon paper, or - Sharp AR-208 | AR-208S | AR-208D Operation Manual Suite - Page 20
tray paper guides to the paper width. Insert the paper (print face down) all the way into the bypass tray. 3 Press the [TRAY SELECT] key ( Print face ) to select the bypass tray. Note for loading thick paper Copying on thick paper requires higher fusing temperature setting. Set the user program - Sharp AR-208 | AR-208S | AR-208D Operation Manual Suite - Page 21
or a misfeed. • During printing (even in copy mode), the paper size setting cannot be changed. guide Front guide • The front guide is a slide-type guide. Grasp the locking knob on the guide and slide the guide to the indicator line of the paper to be loaded. • The left guide is an insert-type guide - Sharp AR-208 | AR-208S | AR-208D Operation Manual Suite - Page 22
Using the document glass Note • The document glass can scan up to 8-1/2" x 14" original. • When a copy is made, the edges will not be copied (image loss). For the image loss, see the "SPECIFICATIONS" (p.82). 1 Open the RSPF, and place the original face down on the document glass. [How to place - Sharp AR-208 | AR-208S | AR-208D Operation Manual Suite - Page 23
edges will not be copied (image loss). For the image loss, see the "SPECIFICATIONS" (p.82). • When using the margin shift function, check the position of the margins carefully. (p.34) 1 Make sure that an original has not been left on the document glass. 3 2 Adjust the original guides to the size - Sharp AR-208 | AR-208S | AR-208D Operation Manual Suite - Page 24
MAKING COPIES Originals that cannot be used in the RSPF The following originals cannot be used. These may cause misfeeds or smudging and unclear images. • Transparencies, tracing paper, other transparent or translucent paper, and photographs. • Carbon paper, thermal paper. • Originals that are - Sharp AR-208 | AR-208S | AR-208D Operation Manual Suite - Page 25
Press the numeric keys to set the number of copies. OPY. x11 55 MAKING COPIES The set number of copies appears in the display. A maximum of 99 copies can be set. If you wish to make only a single copy, copying is possible with the display showing "0". Note If you enter the wrong number, press - Sharp AR-208 | AR-208S | AR-208D Operation Manual Suite - Page 26
. This function automatically adjusts the copy image according to the original being copied. If you wish to select the read. ● PHOTO ... Halftones in the photo are reproduced with greater clarity. 1 Place the original(s). 2 Press the [EXPOSURE] key to select the original type. The original image - Sharp AR-208 | AR-208S | AR-208D Operation Manual Suite - Page 27
400% in increments of 1%. Use the [ ] key ( ) or the [ ] key ( ) for fine adjustment. ZOOM - 99% + Note • To return the ratio to 100%, press the [COPY RATIO] key until 100% appears. • Press the [COPY RATIO] key to set the approximate ratio, then press the [ ] key ( ) or [ ] key ( ). • To decrease - Sharp AR-208 | AR-208S | AR-208D Operation Manual Suite - Page 28
used, two-sided copies of two-sided originals can easily be made. (On the AR-208S, only two-sided original → one sided copy is possible.) Document copies from twosided originals. * AR-208D only When performing automatic two-sided copying of one-sided originals, the orientation of the copied image - Sharp AR-208 | AR-208S | AR-208D Operation Manual Suite - Page 29
AR-208D only) 1 Place the original that you wish to copy onto the front side of the paper on the document glass and close the RSPF. 2 Press the [2-SIDED COPY] key until "1 TO 2" appears, and then press the [ENTER] key. 2-SIDED COPY memory. To immediately print the scanned image, press the [ ] key. - Sharp AR-208 | AR-208S | AR-208D Operation Manual Suite - Page 30
"2 TO 2"*2 → "2 TO 1" 2-SIDED COPY 2 TO 1 • "1 TO 2"*2: Two-sided copies from one-sided originals • "2 TO 2"*2: Two-sided copies from two-sided originals • "2 TO 1": One-sided copies from two-sided originals *1 On the AR-208S, press the [2-SIDED SCAN] key. *2 AR-208D only 3 Press the [ENTER] key - Sharp AR-208 | AR-208S | AR-208D Operation Manual Suite - Page 31
(photo, text, etc.) and the amount of memory allocated to the printer. The amount of memory allocated to the printer can be changed with "MEM. FOR PRINTER" in the user programs. (p.56) 1 2 3 3 2 1 1 2 3 1 2 3 Sort copy Using the document glass 1 Place the first original. (p.20) 2 Press the - Sharp AR-208 | AR-208S | AR-208D Operation Manual Suite - Page 32
Using the RSPF 1 Place the originals. (p.21) Note • If "SORT AUTO SELECT" is enabled in the user programs, the default output mode for copying from the RSPF is sort mode (p.57). In this case go directly to step 4. A checkmark " " will automatically appear in the display (p.11). • If "SORT - Sharp AR-208 | AR-208S | AR-208D Operation Manual Suite - Page 33
combinations of original size and paper size may result in images being cut off. • 2 IN 1 copying cannot be used in combination with the margin shift copying. 4 • The 2 IN 1 layout pattern can be changed with "LAYOUT IN 2IN1" in the user programs (p.55). • The bypass tray cannot be used for - Sharp AR-208 | AR-208S | AR-208D Operation Manual Suite - Page 34
appears and the original is scanned into memory. To immediately print the scanned image, press the [ ] key. 6 Replace the original with the next original ] key ( ). Repeat step 6 until all originals have been scanned. Copies will be output each time two originals have been scanned. When the number - Sharp AR-208 | AR-208S | AR-208D Operation Manual Suite - Page 35
"8.5x11", "5.5x8.5", "A4", "B5", "A5" 5 Select the number of copies and any other settings, and press the [START] key ( ). The copy is delivered to the paper output tray. Note • To cancel 2 IN 1 copying, press the [CLEAR] key ( ). • To cancel 2 IN 1 copy mode, press the [CLEAR ALL] key ( ). 33 - Sharp AR-208 | AR-208S | AR-208D Operation Manual Suite - Page 36
AB AB Margin Margin Copy AB Document glass Original Note • This feature cannot be used with the 2 IN 1 feature. • The margin width can be changed with "MARGIN WIDTH" in the user programs. (p.56) • Note that a margin is created by shifting the image, and thus if the image is shifted too far - Sharp AR-208 | AR-208S | AR-208D Operation Manual Suite - Page 37
, see the previous page. MARGIN SHIFT LONG EDGE 5 Select the number of copies and any other settings, and then press the [START] key ( ). The copy is delivered to the paper output tray. Note • To cancel margin shift copying, press the [CLEAR] key ( ). • To cancel margin shift mode, press the - Sharp AR-208 | AR-208S | AR-208D Operation Manual Suite - Page 38
to use the printer function of the machine. The printer driver includes the Print Status Window. This is a utility that monitors the machine and informs you of the printing status, the name of the document currently being printed, and error messages. Scanner driver The scanner driver allows you to - Sharp AR-208 | AR-208S | AR-208D Operation Manual Suite - Page 39
2000 Professional, Windows XP or Windows Vista preinstalled model standardly equipped with a USB port. *3 Printing is not available in MS-DOS mode. *4 The machine does not support printing from a Macintosh environment. *5 Administrator's rights are required to install the software using the - Sharp AR-208 | AR-208S | AR-208D Operation Manual Suite - Page 40
versions of Windows, some screen images may be different from those in this manual. • In the following explanations it is assumed that the mouse is configured for right hand operation. • If an error message appears, follow the instructions on the screen to solve the problem. After the problem is - Sharp AR-208 | AR-208S | AR-208D Operation Manual Suite - Page 41
the on-screen instructions. Caution • If you are using Windows Vista and a security warning window appears, be sure to click "Install this driver software anyway". • If you are running Windows 2000/XP and a warning message appears regarding the Windows logo test or digital signature, be sure - Sharp AR-208 | AR-208S | AR-208D Operation Manual Suite - Page 42
" button to restart your computer. Installing the Utility Software 11 Click the "Button Manager" or the "Sharpdesk" button. Click the "Display Readme" button to show information on packages that are selected. Follow the on-screen instructions. In Windows 98/Me/2000, if the following screen appears - Sharp AR-208 | AR-208S | AR-208D Operation Manual Suite - Page 43
appears, be sure to click "Install this driver software anyway". • If you are running Windows 2000/XP and a warning message appears regarding the Windows logo test or digital signature, be sure to click "Continue Anyway" or "Yes". A message will appear instructing you to connect the machine to your - Sharp AR-208 | AR-208S | AR-208D Operation Manual Suite - Page 44
with a PC/AT compatible computer that was originally equipped with USB and had Windows 98, Windows Me, Windows 2000 Professional, Windows XP or Windows Vista preinstalled. • Do not connect the USB cable before installing the printer driver. The USB cable should be connected during installation of - Sharp AR-208 | AR-208S | AR-208D Operation Manual Suite - Page 45
INSTALLING THE SOFTWARE Using the machine as a shared printer If the machine will be used as a shared printer on a network, follow these steps to install the printer driver in the client computer. Note To configure the appropriate settings in the print server, see the operation manual or help - Sharp AR-208 | AR-208S | AR-208D Operation Manual Suite - Page 46
used as the default printer, make the selections and click the "Next" button. Follow the on-screen instructions. Caution • If you are using Windows Vista and a security warning window appears, be sure to click "Install this driver software anyway". • f you are running Windows 2000/XP and a warning - Sharp AR-208 | AR-208S | AR-208D Operation Manual Suite - Page 47
button, click "Control Panel", click "Printers and Other Hardware", and then click "Scanners and Cameras". In Windows Vista, click the "Start" button, select "Control Panel" and click "Hardware and Sound", and then click "Scanners and Cameras". 2 Click the "SHARP AR-XXXX" icon and select "Properties - Sharp AR-208 | AR-208S | AR-208D Operation Manual Suite - Page 48
THE SOFTWARE 5 Select "Start this program" and then select "Sharp Button event" pull-down menu. Select "Start this program", select "Sharp Button Manager T" from the pull-down menu, and then click be changed with the setting window of Button Manager. For the factory default settings of the scan menu - Sharp AR-208 | AR-208S | AR-208D Operation Manual Suite - Page 49
THE SOFTWARE Windows 98/Me/2000 1 Click the "Start" button, select "Settings", and then click "Control Panel". 2 Double-click the "Scanners and Cameras" icon. Note If the "Scanners and Cameras" icon does not appear in Windows Me, click "view all Control Panel options". 3 Select "SHARP AR-XXXX - Sharp AR-208 | AR-208S | AR-208D Operation Manual Suite - Page 50
SOFTWARE 6 Select "Sharp "SC2:" through "SC6:". Select "SC2:" from the "Scanner events" pull-down menu. Select "Sharp Button Manager T" in "Send to this application" and click 6 can be changed with the setting window of Button Manager. For the factory default settings of the scan menu and the - Sharp AR-208 | AR-208S | AR-208D Operation Manual Suite - Page 51
as a printer or scanner, the printer driver or scanner driver must first be installed as explained in the "INSTALLING THE SOFTWARE". Note • If a problem occurs in printer or scanner mode, see the Online Manual. • When using USB 2.0 (Hi-Speed mode), be sure to read "System requirements for USB - Sharp AR-208 | AR-208S | AR-208D Operation Manual Suite - Page 52
is opened for machine maintenance, or when a misfeed occurs or the machine runs out of paper or toner. BASIC PROCEDURE FOR PRINTING The basic procedure for printing is explained in the following. To use convenient printer functions, see the "Online Manual" or the printer driver help file. 1 Make - Sharp AR-208 | AR-208S | AR-208D Operation Manual Suite - Page 53
been set in Button Manager will automatically start and the scanned image will be pasted into the application. Note If the machine is in copy mode, press the [MODE SELECT] key to switch to scanner mode and clear the previously set copy settings. Scanning from the operation panel of the machine - Sharp AR-208 | AR-208S | AR-208D Operation Manual Suite - Page 54
to scan from the "Scanner and Camera Wizard" in Windows XP. See the Online Manual for the procedures for TWAIN and WIA scanning. For information on TWAIN and WIA settings, see the help file for the scanner driver or Windows Help. OPERATION IN COPY, PRINTER, AND SCANNER MODES Some operations cannot - Sharp AR-208 | AR-208S | AR-208D Operation Manual Suite - Page 55
HOW TO USE THE ONLINE MANUAL The online manual provides detailed instructions for operating the unit as a printer and scanner. It also provides methods for dealing with printing or scanner problems. 1 Turn on your computer. 2 Insert the supplied CD-ROM into your CD-ROM drive. 3 Click the "start" - Sharp AR-208 | AR-208S | AR-208D Operation Manual Suite - Page 56
consist of the following items. To change a user program setting, see "SELECTING A SETTING FOR A USER PROGRAM" (p.59). Copy mode Program number Program name 1 AUTO CLEAR 2 PREHEAT MODE 3 AUTO SHUT-OFF Setting codes (factory default setting appears in bold) 1: 10 SEC. 2: 30 SEC. 3: 60 - Sharp AR-208 | AR-208S | AR-208D Operation Manual Suite - Page 57
USER SETTINGS Program number Program name Setting codes (factory default setting appears in bold) Explanation copies in the output tray in copy mode, and each print job in printer mode. 9 ROTATE ORIG. IMAGE* 1: ON 2: OFF • When two-sided copying is performed, this function rotates the image - Sharp AR-208 | AR-208S | AR-208D Operation Manual Suite - Page 58
. (p.60) 17 SOUND AT DEFAULT 1: ON 2: OFF • Use this to sound a beep when a base setting is selected. (p.60) 18 TONER SAVE MODE 1: ON 2: OFF • This mode reduces toner usage by about 10% when copying. Toner save mode is effective when the exposure mode is AUTO or TEXT. * AR-208D only 56 - Sharp AR-208 | AR-208S | AR-208D Operation Manual Suite - Page 59
USER SETTINGS Program number Program name Setting codes (factory default setting appears in bold) Explanation • This VALID COPY WIDTH 1: 8.5x11 2: 5.5x8.5 28 LSU SETTING 1: ON 2: OFF • Set the allowed paper sizes for copying from the bypass tray. When "5.5x8.5" is selected, a copy of - Sharp AR-208 | AR-208S | AR-208D Operation Manual Suite - Page 60
USER SETTINGS Print mode Program number Program name Setting codes (factory default setting appears in bold) Explanation 1 FORCED OUTPUT 1: ON 2: OFF • When this function is enabled, printing in printer mode will automatically continue using a different size of paper if the specified size - Sharp AR-208 | AR-208S | AR-208D Operation Manual Suite - Page 61
printer mode, the user programs are accessed by simply pressing the [MENU] key. MAIN MENU 1:USER PROGRAM 2 Press the [ ] key ( ) or [ ] key ( ) to select the item that you wish to configure in the USER item. See "USER PROGRAM" (p.54 to p.58) for the program code. USER PROGRAM 2:PREHEAT MODE - Sharp AR-208 | AR-208S | AR-208D Operation Manual Suite - Page 62
USER SETTINGS Audible disabled. If you wish to enable the base setting beep, see "SOUND AT DEFAULT" on page 56. If you wish to change the volume of the beep settings are preset standard selections for each copy setting. The base settings are as follows: Copy ratio 100% Paper feed location Tray - Sharp AR-208 | AR-208S | AR-208D Operation Manual Suite - Page 63
8 TROUBLESHOOTING AND MAINTENANCE Problems related to general use of the machine, the copy function, and software setup are explained here. Be sure to check the problem carefully before calling for service, as many problems can be solved by the user. If you are unable to solve the problem, turn - Sharp AR-208 | AR-208S | AR-208D Operation Manual Suite - Page 64
Reinstall the toner cartridge. 74 TONER Error CARTRIDGE IS indicator Steadily NEAR EMPTY. Replacement of toner cartridge will be needed soon. Prepare a new cartridge. 74 lit MAINTENANCE REQUIRED CALL FOR SERVICE Service by an authorized SHARP service technician is required. - MEMORY FULL - Sharp AR-208 | AR-208S | AR-208D Operation Manual Suite - Page 65
TROUBLESHOOTING THE MACHINE The following problems are related to the general operation of the machine and copying. Problem Cause and solution key ( ) or [ ] key Copies are too dark or ( ) to manually select an appropriate too light. exposure. → If the copy is too light or too dark even 57 - Sharp AR-208 | AR-208S | AR-208D Operation Manual Suite - Page 66
TROUBLESHOOTING AND MAINTENANCE Problem Part of the image is cut off or there is too much blank space. Wrinkles appear in the paper or the image disappears in places. Copies are smudged or dirty. Images rub off the copy is not appropriate. → In the user programs, set "PAPER TYPE" (program 29) to - Sharp AR-208 | AR-208S | AR-208D Operation Manual Suite - Page 67
Problem Paper misfeed. White or black lines appear on copies. TROUBLESHOOTING AND MAINTENANCE Cause and solution Page Misfeed occur. → To remove the misfeed, see "MISFEED 70 REMOVAL". The paper is outside of the specified size and weight range. → Use copy paper within the specified 14 - Sharp AR-208 | AR-208S | AR-208D Operation Manual Suite - Page 68
TROUBLESHOOTING AND MAINTENANCE Problem Cause and solution Paper size for a paper tray cannot be set. Copying or printing is performed. → Set the paper size after copying DISPLAY MESSAGES" to check the Error indicator ( ) is meaning of the error indicator and error lit or blinking. message in - Sharp AR-208 | AR-208S | AR-208D Operation Manual Suite - Page 69
PROBLEMS DURING SETUP OF THE SOFTWARE If the software does not install correctly, check the following items on your computer. To remove the software, see "Removing the software" (p.69). MFP driver cannot be installed (Windows 2000/XP) If the MFP driver cannot be installed in Windows 2000/XP, follow - Sharp AR-208 | AR-208S | AR-208D Operation Manual Suite - Page 70
Maintenance". • In Windows Vista, click the "Start" button, select "Control Panel", and then click "System and Maintenance". • In Windows Windows 98/Me, double-click the "System" icon and click the "Device Manager" tab. • In Windows appear in Windows Me, click manual for USB troubleshooting or - Sharp AR-208 | AR-208S | AR-208D Operation Manual Suite - Page 71
Vista, click the "Uninstall a program". • In Windows 98/Me/2000, double-click the "Add/Remove Programs" icon. 3 Select "SHARP AR-208 Series MFP Driver" and Button Manager from the list, and remove the software. For more information, refer to your operating manual or to the help files for your - Sharp AR-208 | AR-208S | AR-208D Operation Manual Suite - Page 72
feeder tray after a misfeed. Return the required number of originals. This number will be cleared when copying is resumed or the [CLEAR] key ( . Remove the misfed paper following the instructions for each location in the illustration below. If the error indicator blinks, proceed to "A: Misfeed in - Sharp AR-208 | AR-208S | AR-208D Operation Manual Suite - Page 73
TROUBLESHOOTING AND MAINTENANCE A: Misfeed in the paper feed area 1 Gently remove the misfed paper from the paper feed area as shown in the illustration. If the error indicator blinks and the misfed paper is not visible in the paper feed area, pull out the paper tray and remove the misfed paper. If - Sharp AR-208 | AR-208S | AR-208D Operation Manual Suite - Page 74
TROUBLESHOOTING AND MAINTENANCE 2 Gently remove the misfed paper from under the fusing unit the photoconductive drum (green portion) when removing the misfed paper. Doing so may damage the drum and cause smudges on copies. • Do not remove the misfed paper from above the fusing unit. Unfixed toner on - Sharp AR-208 | AR-208S | AR-208D Operation Manual Suite - Page 75
TROUBLESHOOTING AND MAINTENANCE 4 Raise the fusing unit release lever, close the front cover and then close the side cover by pressing the round projections near the side cover open button. The error Note Open and close the RSPF to clear the error indicator. "RETURN X ORIGINAL(S) START TO RESUME" - Sharp AR-208 | AR-208S | AR-208D Operation Manual Suite - Page 76
TONER CARTRIDGE REPLACEMENT When toner is low, the error indicator will light up and "TONER CARTRIDGE IS NEAR EMPTY." will appear in the display to alert you to purchase a new toner cartridge. If copying is continued while the indicator is lit, copies will gradually become lighter until the toner - Sharp AR-208 | AR-208S | AR-208D Operation Manual Suite - Page 77
TROUBLESHOOTING AND MAINTENANCE 3 Gently pull the toner cartridge out while pressing the lock release lever. Toner cartridge lock release lever Note • After removing the toner cartridge, do not shake it or tap on it. Doing so may cause toner to leak from the cartridge. Put the old cartridge - Sharp AR-208 | AR-208S | AR-208D Operation Manual Suite - Page 78
Even after a new toner cartridge is installed, the start ( ) indicator may not light up, indicating copying cannot be restarted (toner is not sufficiently fed). In this case, open and close the side cover. The copier will feed toner again approximately 2 minutes and then copying can be restarted - Sharp AR-208 | AR-208S | AR-208D Operation Manual Suite - Page 79
the toner cartridge is displayed as a percentage. *1 AR-208D only *2 When the optional Facsimile Expansion Kit is installed. 8 MAINTENANCE REQUIRED When the error indicator will blink and "MAINTENANCE REQUIRED CALL FOR SERVICE" will appear in the display, service by an authorized SHARP service - Sharp AR-208 | AR-208S | AR-208D Operation Manual Suite - Page 80
sharp copies hightemperature parts of copied. Wipe the glass, RSPF scanning window, cover and RSPF roller with a soft, clean cloth. If necessary, dampen the cloth with a glass cleaner. Document glass/scanning window RSPF RSPF scanning window RSPF roller Black line If this area is dirty, copying - Sharp AR-208 | AR-208S | AR-208D Operation Manual Suite - Page 81
TROUBLESHOOTING AND MAINTENANCE Transfer charger 1 Turn the power switch off. (p.13) 2 Ensure end along the groove of the transfer charger. If the cleaner is stopped on the way, smudges on copies may occur. 4 Return the charger cleaner to its original position. Close the side cover by pressing - Sharp AR-208 | AR-208S | AR-208D Operation Manual Suite - Page 82
use only genuine SHARP parts and supplies. For best copying results, be sure to use only SHARP Genuine Supplies which are designed, engineered and tested to maximize the life and performance of SHARP copiers. Look for the Genuine Supplies label on the toner package. Facsimile Expansion Kit (AR-FX13 - Sharp AR-208 | AR-208S | AR-208D Operation Manual Suite - Page 83
. 2 Click "Control Panel", select "Printer and Other Hardware", and then click "Printer and Faxes". • In Windows Vista, click "Control Panel", and then click "Printer". • In Windows 98/Me/2000, select "Setting" and click "Printers". 3 Click the "SHARP AR-XXXX" printer driver icon and from the "File - Sharp AR-208 | AR-208S | AR-208D Operation Manual Suite - Page 84
SPECIFICATIONS Model Type Photoconductive type Document glass type Copy/printing system Originals Originals size Copy size Copying speed*1 Continuous copy First-copy time*2 Warm-up time*3 Copy ratio Exposure system Paper feed AR-208S AR-208D Digital Multifunctional System, Desktop OPC drum - Sharp AR-208 | AR-208S | AR-208D Operation Manual Suite - Page 85
Max. 1.0 kW Space requirements (with trays extended) copy is output varies depending on the installation site and the state of the machine in use. *3 The warm-up time may vary depending on machine operating conditions and ambient conditions such as temperature. *4 Not including toner cartridges - Sharp AR-208 | AR-208S | AR-208D Operation Manual Suite - Page 86
Memory Emulation Interface Interface cables 20 ppm 600 dpi Approx. 30 MB SPLC (Sharp Printer Language with Compression) USB 2.0 (Full-Speed/Hi-Speed compatible interface) [USB cable] USB cable that supports USB 2.0. Please purchase a commercially available USB cable. * When printing same document - Sharp AR-208 | AR-208S | AR-208D Operation Manual Suite - Page 87
Interface Drop out color Supported operating systems Void area Interface cables Scanner utilities Flatbed scanner Document glass/RSPF Cold Width) 2.88 msec/line 1 bit or 12 bit R.G.B 1 or 8 bits / pixel / A/D 16 bit Black and white 2 value, Grayscale, Full color TWAIN WIA (Windows XP/Vista only) STI - Sharp AR-208 | AR-208S | AR-208D Operation Manual Suite - Page 88
APPENDIX 250-sheet paper feed unit (AR-D33) Paper size Paper weight Paper capacity Weight Dimensions Power part of our policy of continuous improvement, SHARP reserves the right to make design and specification changes for product improvement without prior notice. The performance specification - Sharp AR-208 | AR-208S | AR-208D Operation Manual Suite - Page 89
Product Name : AR-208NT/ AR-208T (Black Toner) Date Issued : Nov. 1, 2007 MSDS No. F-01601 Supplier Identification : Sharp Corporation 22-22 634-36-00 Switzerland Sharp Electronics(Schweiz)AG Telephone number for information : 01-846-6111 Middle East U.A.E. Sharp Middle East - Sharp AR-208 | AR-208S | AR-208D Operation Manual Suite - Page 90
tests performed using toner. When used as intended according to instructions, studies do not indicate any symptoms of fibrosis will occur. Environmental Effects : Not toxic to aquatic organisms [Estimated from the other product containing similar material] Specific Hazards : Dust explosion - Sharp AR-208 | AR-208S | AR-208D Operation Manual Suite - Page 91
Equipment : Not required under intended use. : Not required under intended use. : Not required under intended use. : Not required under intended use. : Use of a dust mask and goggles are recommended when handling a large quantity of toner is based upon the development of lung tumors in - Sharp AR-208 | AR-208S | AR-208D Operation Manual Suite - Page 92
No. F-01601 : In a study in rats of chronic inhalation exposure to a typical toner, a mild to moderate degree of lung fibrosis was observed in 92% of the rats /EC and 67/548/EEC Symbol & Indication : Not required R-Phrase : Not required 76/769/EEC : All chemical substances in this product - Sharp AR-208 | AR-208S | AR-208D Operation Manual Suite - Page 93
IDENTIFICATION Product Name : AR-208ND / AR-208DV (Black Developer) Supplier Identification : Sharp Corporation 22-22 Nagaike- Sharp Electronics France S.A. Telephone number for information : 01-49-90-34-00 Europe Austria Italy Sharp Electronics GMBH Telephone number for information Sharp - Sharp AR-208 | AR-208S | AR-208D Operation Manual Suite - Page 94
tests performed using toner. When used as intended according to instructions, studies do not indicate any symptoms of fibrosis will occur. Environmental Effects : Not toxic to aquatic organisms [Estimated from the other product containing similar material] Specific Hazards : Dust explosion - Sharp AR-208 | AR-208S | AR-208D Operation Manual Suite - Page 95
Equipment : Not required under intended use. : Not required under intended use. : Not required under intended use. : Not required under intended use. : Use of a dust mask and goggles are recommended when handling a large quantity of toner is based upon the development of lung tumors in - Sharp AR-208 | AR-208S | AR-208D Operation Manual Suite - Page 96
MSDS No. F-31601 : In a study in rats of chronic inhalation exposure to a typical toner, a mild to moderate degree of lung fibrosis was observed in 92% of the rats EC and 67/548/EEC Symbol & Indication : Not required R-Phrase : Not required 76/769/EEC : All chemical substances in this product - Sharp AR-208 | AR-208S | AR-208D Operation Manual Suite - Page 97
26 Conventions used in this manual and online manual 6 [COPY RATIO] key 11, 25 D Display 10 Display messages 61 Document feeder cover 9, 73 Document feeder tray 9, 21 Document glass 9, 31 E [ENTER] key 10 Envelopes 17 Environmental information 4 Error indicator 10, 61, 70 [E-SORT - Sharp AR-208 | AR-208S | AR-208D Operation Manual Suite - Page 98
Photoconductive drum 9 Plug and play screen does not appear 68 Power cord 9 Power off 13 Power on 12 Power save indicator 10 Power save modes 13 Power switch 9, 12, 13 Preheat mode 13 Preparations 9 Printer driver 36 Printer/scanner functions 49 Problems during setup of the software 67 - Sharp AR-208 | AR-208S | AR-208D Operation Manual Suite - Page 99
.... 75 Toner cartridge replacement 74 Transfer charger 9 Tray location indicator 10, 61 [TRAY SELECT] key 10, 18, 23 Troubleshooting 61 U USB connector 9, 42 User programs - Copy mode 54 - Print mode 58 User settings 54 Using the manual 6 Using the printer mode 50 Using the scanner mode - Sharp AR-208 | AR-208S | AR-208D Operation Manual Suite - Page 100
98/Me/2000 47 - Windows XP/Vista 45 Installing the software 38 Online manual, using 53 Print job, canceling 50 Printer mode, using 50 Scanner mode, using 51 Scanning from your computer 52 Scanning using the keys on the machine 51 Troubleshooting and maintenance Checking the total count 77 - Sharp AR-208 | AR-208S | AR-208D Operation Manual Suite - Page 101
MEMO - Sharp AR-208 | AR-208S | AR-208D Operation Manual Suite - Page 102
MEMO - Sharp AR-208 | AR-208S | AR-208D Operation Manual Suite - Page 103
● Connect the equipment into an outlet on a circuit different from that to which the receiver is connected. ● Consult the dealer or an experienced radio/TV technician for help. Notice for Users in U.S.A. Declaration of Conformity SHARP Digital Multifunctional System, AR-208S/AR-208D This device - Sharp AR-208 | AR-208S | AR-208D Operation Manual Suite - Page 104
Plaza, Mahwah, New Jersey 07430-1164. www.sharpusa.com SHARP ELECTRONICS OF CANADA LTD. 335 Britannia Road East, Mississauga, Ontario, L4Z 1W9 This manual has been printed using a vegetable-based soy oil ink to help protect the environment. Printed on 100% post-consumer recycled paper PRINTED - Sharp AR-208 | AR-208S | AR-208D Operation Manual Suite - Page 105
MODEL AR-FX13 FACSIMILE EXPANSION KIT OPERATION MANUAL Page • INSTALLATION 11 • INITIAL SETTINGS 13 • CHOOSING SUITABLE MEDIA 50 • HOW TO USE THE FAX FUNCTION 52 • SPECIAL FUNCTIONS 67 • TROUBLESHOOTING 85 • APPENDIX 92 - Sharp AR-208 | AR-208S | AR-208D Operation Manual Suite - Page 106
user's authority to operate this equipment. Note: This equipment has been tested and found to comply with the limits for a Class B digital device, pursuant to Part line cord. Note • This manual (fax function) describes the AR-208S/AR-208D model with optional facsimile expansion kit (AR-FX13 - Sharp AR-208 | AR-208S | AR-208D Operation Manual Suite - Page 107
program this information into your FAX machine, you should complete the following steps: See page 21 of this Operation Manual. Important safety instructions • If any of your telephone equipment is not operating properly, you should immediately remove it from your telephone line, as it may cause harm - Sharp AR-208 | AR-208S | AR-208D Operation Manual Suite - Page 108
service. If the equipment is causing harm to the telephone network, your telephone company may ask you to disconnect the equipment until the problem is resolved. If you have any questions or problems which cannot be solved by reading this manual, please contact Sharp Electronics Corporation 1 Sharp - Sharp AR-208 | AR-208S | AR-208D Operation Manual Suite - Page 109
OF CONTENTS INTRODUCTION ...i QUICK REFERENCE GUIDE ...3 LIST OF FAX FUNCTIONS...6 1 INSTALLATION CONNECTIONS 11 ● CONNECTING THE TELEPHONE LINE CORD ...11 FINAL PREPARATIONS 12 ● CONNECTING OTHER DEVICES 12 2 INITIAL SETTINGS PART NAMES 13 A LOOK AT THE FAX OPERATION PANEL ..... 14 ABOUT THE - Sharp AR-208 | AR-208S | AR-208D Operation Manual Suite - Page 110
FAX 81 OPERATION IN COPY, PRINTER, SCANNER, AND FAX MODES 84 6 TROUBLESHOOTING PRINTING OUT REPORTS 85 ● ACTIVITY REPORT AUTO LISTING 88 ● PRINTING TRANSACTION REPORTS........ 89 TROUBLESHOOTING 90 MESSAGES AND SIGNALS 91 ● DISPLAY MESSAGES 91 ● AUDIBLE SIGNALS 91 7 APPENDIX SPECIFICATIONS - Sharp AR-208 | AR-208S | AR-208D Operation Manual Suite - Page 111
The following quick reference guide provides brief explanations the operation of the machine. Selecting the transmission mode (p.26) Memory transmission mode Direct transmission mode The indicator lights up when memory - Sharp AR-208 | AR-208S | AR-208D Operation Manual Suite - Page 112
fax Dialing methods Direct Dialing (p.59) Speed Dialing (p.59) Rapid Key Dialing (p.59) Chain Dialing (p.60) Search Dialing (p.61) Redialing (p.61) Press the numeric keys to dial. SPEED/ SEARCH Enter a two-digit the [REDIAL/PAUSE] key. Dial the next part of the number (a Group Key cannot be used - Sharp AR-208 | AR-208S | AR-208D Operation Manual Suite - Page 113
machine and requesting automatic transmission of an original placed in that machine (p.73) Select "POLLING MODE". Dial. * Another fax machine can also call your fax machine and request automatic transmission of a original placed in your machine. For this to take place, the reception mode of your - Sharp AR-208 | AR-208S | AR-208D Operation Manual Suite - Page 114
5 : DAY LIGHT SAVING 3 : MEMORY STATUS 4 : USER PROGRAM 1 : DOC. GLASS SIZE 2 : FIXED DOC. SIZE 3 : RESO. PRIORITY 4 : # OF RINGS (AUTO) 5 : # OF RINGS (MANUAL) Settings (factory default setting appears in bold) Enable transfer of received faxes to another fax machine when printing is not possible - Sharp AR-208 | AR-208S | AR-208D Operation Manual Suite - Page 115
on received faxes. 1 : ALWAYS PRINTS 2 : ERROR ONLY 3 : NEVER PRINTS 4 : IMAGE MEM. PRINT Enable printing of the original image on transaction reports. 1 : ALWAYS PRINTS 2 : ERROR ONLY 3 : NEVER PRINTS 8 : RECALL TIMES BUSY Set the number of recall attempts that are made when the line is busy. 00 - Sharp AR-208 | AR-208S | AR-208D Operation Manual Suite - Page 116
: INDEX PRINT 23 : DATE&TIME FORMAT 24 : 2-SIDED RX (AR-208D only) 25 : TRAY SELECTION (When the 250-sheet paper feed unit is installed.) ("24: TRAY SELECTION" when the AR-208S is used.) Settings (factory default setting appears in bold) When a fax is received that is larger that the printing paper - Sharp AR-208 | AR-208S | AR-208D Operation Manual Suite - Page 117
2 : REPEAT 8 : POLLING MODE 9 : SERIAL POLL MODE Settings (factory default setting appears in bold) Enable the anti junk function to block fax reception from specified fax numbers. 1 : ON 2 : OFF Program (or delete) fax numbers from which fax reception is to be blocked. 1 : SET 2 : CLEAR Activate - Sharp AR-208 | AR-208S | AR-208D Operation Manual Suite - Page 118
or numbers. Note • If you mistakenly select the wrong item, press the [CLEAR] key ( ) and repeat the procedure from step 2. • To cancel a setting for a fax function, press the [MENU] key. 5 Press the [ENTER] key. The setting or information is entered. 6 Press the [MENU] key. Press the [MENU] key - Sharp AR-208 | AR-208S | AR-208D Operation Manual Suite - Page 119
and how to use it as a copier. Also explains how to install the software that allows the machine to be used as a printer and scanner for your computer. The following information is contained in the operation manual for the machine : OPERATION MANUAL contents CAUTIONS PART NAMES POWER ON AND OFF - Sharp AR-208 | AR-208S | AR-208D Operation Manual Suite - Page 120
tone, the machine will automatically cut in and take over the line. Note, however, if you also have a PC modem on the same line, you must turn on the Remote Reception function, and deactivate the Fax Signal Receive function. See "SETTING UP THE MACHINE FOR USE WITH A PC MODEM" (p.38) and "USING THE - Sharp AR-208 | AR-208S | AR-208D Operation Manual Suite - Page 121
2 Chapter 2 INITIAL SETTINGS PART NAMES RSPF Original guides Document 1 feeder cover 2 Exit area Document feeder tray 3 5 4 Bypass tray TEL TEL jack LINE jack LINE 9 1 Document glass 2 Operation panel 3 Front cover 4 Paper tray 5 Bypass tray paper guides 6 7 8 9 10 6 Paper output tray - Sharp AR-208 | AR-208S | AR-208D Operation Manual Suite - Page 122
or telephone number automatically. 2 [MEMORY] key / indicator Used for sending faxes in memory (indicator is lit) or direct sending (indicator is not lit). 3 [SPEED/SEARCH] key Press this key to dial a two digit Speed Dial number. During character inputting, use this key to delete an incorrect entry - Sharp AR-208 | AR-208S | AR-208D Operation Manual Suite - Page 123
manual dialing. (To close the line, press the [SPEAKER] key again.) 16 LINE STATUS indicator Lit when sending/receiving faxes, blinking when receiving data. 17 [MODE SELECT] key / Mode indicators Press this key to select the mode. The indicator of the selected mode lights (copy, printer, scanner - Sharp AR-208 | AR-208S | AR-208D Operation Manual Suite - Page 124
equipped with a two-line liquid crystal display (LCD) on the operation panel for displaying various messages and settings during operation. This LCD can display up to 20 characters on each line the user programs of copy mode. See "User Programs" in the Operation Manual (for general information). 16 - Sharp AR-208 | AR-208S | AR-208D Operation Manual Suite - Page 125
procedure below. 1 Press the [MENU] key. 5 Press the [ENTER] key. 2 Press the [ ] key ( ) or [ ] key ( ) until "4:USER PROGRAM" appears, and then press the [ENTER] key. Selection "4:USER PROGRAM" 3 Press the [ ] key ( ) or [ ] key ( ) until "18:RINGER VOLUME" appears, and then press the [ENTER - Sharp AR-208 | AR-208S | AR-208D Operation Manual Suite - Page 126
[MENU] key. 6 Press the [MENU] key. Press the [MENU] key to exit. 2 Press the [ ] key ( ) or [ ] key ( ) until "4:USER PROGRAM" appears, and then press the [ENTER] key. Selection "4:USER PROGRAM" 3 Press the [ ] key ( ) or [ ] key ( ) until "17:BEEP LENGTH" appears, and then press the [ENTER] key - Sharp AR-208 | AR-208S | AR-208D Operation Manual Suite - Page 127
. 6 Press the [MENU] key. Press the [MENU] key to exit. 2 Press the [ ] key ( ) or [ ] key ( ) until "4:USER PROGRAM" appears, and then press the [ENTER] key. 2 Selection "4:USER PROGRAM" 3 Press the [ ] key ( ) or [ ] key ( ) until "19:BEEPER VOLUME" appears, and then press the [ENTER] key - Sharp AR-208 | AR-208S | AR-208D Operation Manual Suite - Page 128
FAX SETUP HOW TO ENTER CHARACTERS You can enter letters with the numeric can be entered 1 1 Space 2 ABC2 a b c 3 DEF 3 d e f 4 GH I 4 g h i 5 JKL5 j k l 6 MNO 6mn o 7 PQRS 7 p q r s 8 TUV8 t u v 9 WX Y Z 9 w x y z 00 ● To enter two characters in succession which require using the same key, - Sharp AR-208 | AR-208S | AR-208D Operation Manual Suite - Page 129
require that your name, telephone/fax number, and the date and time appear on each fax message you send. Enter your name and fax and fax number: 1 Press the [MENU] key. 5 Enter your fax number with the numeric keys. Enter your own fax number (maximum 20 digits) by space, press the [1] key twice. 21 - Sharp AR-208 | AR-208S | AR-208D Operation Manual Suite - Page 130
INITIAL SETTINGS 8 Press the [ENTER] key. 9 Press the [MENU] key. Press the [MENU] key to exit. SETTING THE DATE AND TIME The date and time that appear in the display are printed at the top of each page you transmit. Set the date and time by pressing the keys on the operation panel as shown below. - Sharp AR-208 | AR-208S | AR-208D Operation Manual Suite - Page 131
the steps below: 1 Press the [MENU] key. 6 Press the [ENTER] key. 2 Press the [ ] key ( ) or [ ] key ( ) until "4:USER PROGRAM" appears, and then press the [ENTER] key. Selection "4:USER PROGRAM" 3 Press the [ ] key ( ) or [ ] key ( ) until "23:DATE&TIME FORMAT" appears, and then press the [ENTER - Sharp AR-208 | AR-208S | AR-208D Operation Manual Suite - Page 132
the steps below: 1 Press the [MENU] key. 6 Press the [ENTER] key. 2 Press the [ ] key ( ) or [ ] key ( ) until "4:USER PROGRAM" appears, and then press the [ENTER] key. Selection "4:USER PROGRAM" 3 Press the [ ] key ( ) or [ ] key ( ) until "23:DATE&TIME FORMAT" appears, and then press the [ENTER - Sharp AR-208 | AR-208S | AR-208D Operation Manual Suite - Page 133
INITIAL SETTINGS Daylight Saving Time Setting Enable this setting to have the internal clock automatically move forward and backward at the beginning and end of Daylight Saving Time. Note If a transmission is in progress when the clock adjustment time for daylight savings time arrives, the clock - Sharp AR-208 | AR-208S | AR-208D Operation Manual Suite - Page 134
takes place as follows in each mode: Memory transmission (the MEMORY indicator is lit) When a fax is sent from the RSPF and there are no previously stored fax jobs and no job in progress (the telephone line is not being used), dialing and scanning begin at the same time. Each page is transmitted - Sharp AR-208 | AR-208S | AR-208D Operation Manual Suite - Page 135
mode when you only want to receive faxes on your telephone line. The machine will automatically answer all calls and receive incoming faxes. ● MAN. mode: This is the most convenient mode for receiving phone calls if you have an extension phone. To have true manual mode, the machine must be set to - Sharp AR-208 | AR-208S | AR-208D Operation Manual Suite - Page 136
] key. 6 Press the [MENU] key. Press the [MENU] key to exit. 2 Press the [ ] key ( ) or [ ] key ( ) until "4:USER PROGRAM" appears, and then press the [ENTER] key. Selection "4:USER PROGRAM" 3 Press the [ ] key ( ) or [ ] key ( ) until "4:# OF RINGS (AUTO)" appears, and then press the [ENTER] key - Sharp AR-208 | AR-208S | AR-208D Operation Manual Suite - Page 137
and then press the [ENTER] key. Selection "5:# OF RINGS (MANUAL)" 5 Press the [ENTER] key. 2 6 Press the [MENU] key. Press the [MENU] key to exit. SELECTING THE RECEPTION PAPER SIZE Set the size of paper to be used to print received faxes. A size setting other than "A4", "8.5x11", or "8.5x14" is - Sharp AR-208 | AR-208S | AR-208D Operation Manual Suite - Page 138
[ENTER] key. Selection "4:USER PROGRAM" 3 Press the [ ] key ( ) or [ ] key ( ) until "25:TRAY SELECTION" appears, and then press the [ENTER] key. Selection "25:TRAY SELECTION" 6 Press the [MENU] key. Press the [MENU] key to exit. Note Select "24: TRAY SELECTION" when the AR-208S is used. 4 Press - Sharp AR-208 | AR-208S | AR-208D Operation Manual Suite - Page 139
. Your machine must be set to match the kind of telephone line you are using: touch-tone or pulse. 1 Press the [MENU] key. 6 Press the [MENU] key. Press the [MENU] key to exit. 2 Press the [ ] key ( ) or [ ] key ( ) 2 until "4:USER PROGRAM" appears, and then press the [ENTER] key. Selection - Sharp AR-208 | AR-208S | AR-208D Operation Manual Suite - Page 140
be cleared from memory. • If a communication error occurs because the memory becomes full during transmission, line is busy. If "00" is entered, the machine will not make any recall attempts. 1 Press the [MENU] key. 5 Press the [ENTER] key. 2 Press the [ ] key ( ) or [ ] key ( ) until "4:USER - Sharp AR-208 | AR-208S | AR-208D Operation Manual Suite - Page 141
of recall attempts made when a communication error occurs. If "0" is entered, the machine will not make any recall attempts. 1 Press the [MENU] key. 6 Press the [MENU] key. Press the [MENU] key to exit. 2 Press the [ ] key ( ) or [ ] key ( ) until "4:USER PROGRAM" appears, and then press the - Sharp AR-208 | AR-208S | AR-208D Operation Manual Suite - Page 142
a transmission is not successful because the line is busy or a communication error occurs. This setting is used to key. 2 Press the [ ] key ( ) or [ ] key ( ) until "4:USER PROGRAM" appears, and then press the [ENTER] key. Selection "4:USER PROGRAM" 3 Press the [ ] key ( ) or [ ] key ( ) until " - Sharp AR-208 | AR-208S | AR-208D Operation Manual Suite - Page 143
due to the communication error. 1 Press the [MENU] key USER PROGRAM" 3 Press the [ ] key ( ) or [ ] key ( ) until "11:RECALL INT. ERR" appears, and then press the [ENTER] key. Selection "11:RECALL INT. ERR" 4 Press the numeric keys to select the recall interval. Enter the recall interval ("00 - Sharp AR-208 | AR-208S | AR-208D Operation Manual Suite - Page 144
This makes it easy to separate different jobs on the output tray. Separate faxes with index marks. Use the following procedure to set the index function: ] key ( ) or [ ] key ( ) until "4:USER PROGRAM" appears, and then press the [ENTER] key. Selection "4:USER PROGRAM" 3 Press the [ ] key ( ) or [ - Sharp AR-208 | AR-208S | AR-208D Operation Manual Suite - Page 145
For most faxing jobs, you will most likely want to specify the resolution. However, you can also set a default resolution when the [ ] key ( ) or [ ] key ( ) 2 until "4:USER PROGRAM" appears, and then press the [ENTER] key. Selection "4:USER PROGRAM" 3 Press the [ ] key ( ) or [ ] key ( - Sharp AR-208 | AR-208S | AR-208D Operation Manual Suite - Page 146
and the machine detects a fax tone. However, if you are using a modem on the same line, you must deactivate this [ ] key ( ) until "4:USER PROGRAM" appears, and then press the [ENTER] key. Selection "4:USER PROGRAM" 3 Press the [ ] key ( ) or [ ] key ( ) until "15:FAX SIGNAL RCV" appears, and then - Sharp AR-208 | AR-208S | AR-208D Operation Manual Suite - Page 147
digit Fax Remote Number (Factory setting: 5) and . Follow the procedure below to use this feature. Note If you are not using a PC modem on the same line as your machine, and have not turned off the Fax ) until "4:USER PROGRAM" appears, and then press the [ENTER] key. Selection "4:USER PROGRAM" 3 - Sharp AR-208 | AR-208S | AR-208D Operation Manual Suite - Page 148
the [MENU] key. Press the [MENU] key to exit. 2 Press the [ ] key ( ) or [ ] key ( ) until "4:USER PROGRAM" appears, and then press the [ENTER] key. Selection "4:USER PROGRAM" 3 Press the [ ] key ( ) or [ ] key ( ) until "13:FAX REMOTE NUMBER" appears, and then press the [ENTER] key. Selection "13 - Sharp AR-208 | AR-208S | AR-208D Operation Manual Suite - Page 149
on your regular single line. If you subscribe to a distinctive ringing service, you can set your fax to automatically answer when it 2 Press the [ ] key ( ) or [ ] key ( ) until "4:USER PROGRAM" appears, and then press the [ENTER] key. Selection "4:USER PROGRAM" 3 Press the [ ] key ( ) or [ ] key ( - Sharp AR-208 | AR-208S | AR-208D Operation Manual Suite - Page 150
key ("01" to "18"). To program a Speed Dial number, press two numeric keys ("00" to "99") and then press the [ENTER] key. 7 Enter the fax number with the numeric keys. Enter the fax number (maximum of 40 digits including pauses) using the numeric keys. 8 Press the [ENTER] key. 4 Press the [ ] key - Sharp AR-208 | AR-208S | AR-208D Operation Manual Suite - Page 151
a pause between certain digits in the number to allow time for connection. For example, if you are on a PBX telephone system that requires an access number, such as "9", to be dialed to access an outside line, you will need to enter a pause between the access number and the fax number of the other - Sharp AR-208 | AR-208S | AR-208D Operation Manual Suite - Page 152
[ ] key ( ) or [ ] key ( ) until "1:FAX NUMBER" appears, and then press the [ENTER] key. Selection "1:FAX NUMBER" 4 Press the [ ] key ( ) or [ ] press the appropriate Rapid key. To delete a Speed Dial number, enter the 2-digit number with the numeric keys and then press the [ENTER] key. 7 Press - Sharp AR-208 | AR-208S | AR-208D Operation Manual Suite - Page 153
by simply pressing the appropriate Group key once. They are convenient for the Broadcasting function, which is used to transmit an original to a group of fax machines. All Rapid keys can be programmed as Group keys. To program or clear a group key, follow the steps below. Note that one key cannot - Sharp AR-208 | AR-208S | AR-208D Operation Manual Suite - Page 154
INITIAL SETTINGS 9 Enter a name for the Group Key with the numeric keys. Enter the name of the group by pressing numeric keys as described in "HOW TO ENTER CHARACTERS" on page 20 (maximum of 20 characters). If you do not want to enter a name, skip this step. To add numbers: The entered name appears. - Sharp AR-208 | AR-208S | AR-208D Operation Manual Suite - Page 155
To delete all numbers from the Group Key: Select "2:GROUP" and press the [ENTER] key. 7 Enter the numbers that you wish to delete. Enter the fax numbers using any of the following methods: • Press a Rapid Key. • Enter a Speed Dial number with the numeric keys. • Enter a number with the numeric keys - Sharp AR-208 | AR-208S | AR-208D Operation Manual Suite - Page 156
the machine to take over the line and prepare to receive a fax. The Quiet Detect Time can be set from 00 to 10 seconds, following the procedure Setting Quiet Detect Time to 00 turns the function off. However, the machine will not be able to receive faxes sent using manual dialing (picking up the - Sharp AR-208 | AR-208S | AR-208D Operation Manual Suite - Page 157
you can set up the machine to receive both phone and fax messages from callers on touch-tone lines. Follow this procedure: 1. Set the Quiet Detect Time to 00. 2. Alter your phone message to tell callers that they can send a fax by pressing the Remote Reception Number (factory set to 5), followed by - Sharp AR-208 | AR-208S | AR-208D Operation Manual Suite - Page 158
SUITABLE MEDIA ORIGINALS SUITABLE FOR FAXING Make sure that the originals you want to fax meet specifications and guidelines listed in this edges to guide it into the machine. When using the document glass Maximum 14" (356 mm) Note 8-1/2" (216 mm) When you are using the faxing functions of the - Sharp AR-208 | AR-208S | AR-208D Operation Manual Suite - Page 159
to the internal mechanisms of the machine should not be used. ● When faxing, any writing on the originals that is yellow, yellowish-green, or light windows, or perforations ● Transparency films, tracing paper, or other transparencies ● Originals with plastic or metallic coatings 3 Note • SHARP - Sharp AR-208 | AR-208S | AR-208D Operation Manual Suite - Page 160
TO USE THE FAX FUNCTION The machine offers a range of sophisticated features that allow you to control image quality, reception mode that copying is not in progress, then gently close the RSPF. 2 Adjust the original guides to the width of your original(s). 4 There are two ways to send the fax: • - Sharp AR-208 | AR-208S | AR-208D Operation Manual Suite - Page 161
the original size setting. (See "ORIGINAL SIZE" (p.54)) When faxing from the document glass, if the size of the original is different from the specified size, part of the image may be cut off. 4 6 If you have more than one original to read into memory, place the next page, and press the [START - Sharp AR-208 | AR-208S | AR-208D Operation Manual Suite - Page 162
[ ] key ( ) or [ ] key ( ) until "4:USER PROGRAM" appears, and then press the [ENTER] key. Selection "4:USER PROGRAM" 3 Press the [ ] key ( ) or [ ] "2:FIXED DOC. SIZE". Note To temporarily change the original size setting when faxing from the document glass, use the "1: DOC. GLASS SIZE" setting. - Sharp AR-208 | AR-208S | AR-208D Operation Manual Suite - Page 163
has gradations of color (such as a color original). This setting will produce a clearer image than Fine used alone. • S. FINE (HALF TONE) Use S.FINE (HALF TONE) automatically selected. 4 CONTRAST The fax automatically controls the contrast, but you can also control it manually. To do this, press - Sharp AR-208 | AR-208S | AR-208D Operation Manual Suite - Page 164
selected, a message is printed. (p.57) Transmission Beep Receiving machine Reception DATE : MAY-11-200X FRI 07:30 PM T O : SERVICE CENTER FAX # : 0333829161 FROM : SHARP FAX # : 0666211221 PAGES : 02PAGES WERE SENT (INCLUDING THIS PAGE) If the cover sheet function is not selected, the message - Sharp AR-208 | AR-208S | AR-208D Operation Manual Suite - Page 165
HOW TO USE THE FAX FUNCTION MESSAGE FUNCTION One of the following messages can be selected: "CONFIDENTIAL", the cover sheet function is not used, the message will be added to the top of the first page of the fax. To add a message to a cover sheet, follow these steps: 1 Press the [COVER SHEET] key. 2 - Sharp AR-208 | AR-208S | AR-208D Operation Manual Suite - Page 166
face up For the size and weight of two-sided originals that can be scanned using the RSPF, see page 50. Tablet If you are faxing a two-sided tablet type original, select "ON (NON-ROTATE)". 2 Press the [2-SIDED TX] key until the appropriate setting appears. The selections are as follows: OFF - Sharp AR-208 | AR-208S | AR-208D Operation Manual Suite - Page 167
fax fax you want to reach is not a Rapid key or Speed Dial number, use Direct Keypad Dialing to manually fax machine you want to send to by pressing the numeric keys. If it is not correct, press the [CLEAR] key ( ) to backspace and clear one digit the two-digit number by and clear two digit at a time, - Sharp AR-208 | AR-208S | AR-208D Operation Manual Suite - Page 168
with the numeric keys to dial one fax number up to 50 digits long. The following are some examples of SPEAKER] KEY When dialing normally with the [SPEAKER] key, press the [SPEAKER] key and dial using the numeric keys. You can hear the line and fax tones from the other machine through the speaker - Sharp AR-208 | AR-208S | AR-208D Operation Manual Suite - Page 169
remember the Rapid key or Speed Dial number in which you have stored a particular fax number, you can search for the number by following the steps below: 1 Press made. 4 3 Press the [ENTER] key. REDIALING You can send a fax to the number you last dialed, you can redialing it using the following - Sharp AR-208 | AR-208S | AR-208D Operation Manual Suite - Page 170
. 1. The memory becomes full and scanning stops. "MEMORY FULL ERROR" appears in the display. 2. To clear the pages that have line transmission (p.26), the pages that were scanned are automatically transmitted. CANCELING (DELETING) A STORED FAX JOB This procedure is used to check and cancel a fax - Sharp AR-208 | AR-208S | AR-208D Operation Manual Suite - Page 171
mode (See "SETTING THE NUMBER OF RINGS FOR MANUAL RECEPTION" (p.29)). You can also receive faxes; however, all calls must first be answered by picking up the receiver on the extension phone or telephone connected to the same line. USING A.M. MODE 4 Select this mode when an answering machine - Sharp AR-208 | AR-208S | AR-208D Operation Manual Suite - Page 172
for the reception of faxes. TWO-SIDED RECEPTION (AR-208D only) This function is used to print a received fax consisting of two or 2 Press the [ ] key ( ) or [ ] key ( ) until "4:USER PROGRAM" appears, and then press the [ENTER] key. Selection "4:USER PROGRAM" 3 Press the [ ] key ( ) or [ ] key ( ) - Sharp AR-208 | AR-208S | AR-208D Operation Manual Suite - Page 173
part of the original, you should use the Receive Reduce function, which scales the fax to the printing paper size. Note In some cases the size or resolution of a received fax may not permit reduction. When this happens the fax USER PROGRAM" appears, and then press the [ENTER] key. Selection "4:USER - Sharp AR-208 | AR-208S | AR-208D Operation Manual Suite - Page 174
to answer a call you cannot converse. Note You cannot use the [SPEAKER] key for fax transmission/reception while copying is in progress. 2 When the handset is off hook or the [SPEAKER] key is used, press the [START] key ( ). MANUAL MODE 1:SEND, 2:RECEIVE Press the [ ] key ( ) or [ ] key ( ) to - Sharp AR-208 | AR-208S | AR-208D Operation Manual Suite - Page 175
resolution. Substitute Reception into Memory This is a back-up function that is automatically activated if your fax runs out of paper, the TD cartridge needs replacement (See the Operation Manual for general information.), or the paper jams. • If you received originals in memory because the - Sharp AR-208 | AR-208S | AR-208D Operation Manual Suite - Page 176
faxes read into memory and then sent to a different fax machine for printing. This function is used when you cannot print received faxes, for example when the machine runs out of toner press the [ENTER] key. Enter the transferring fax number (maximum 40 digits) by pressing the numeric keys. 2 Press - Sharp AR-208 | AR-208S | AR-208D Operation Manual Suite - Page 177
number has not been programmed. Program the number and then transfer the fax. Note If you set the data transfer mode, when data cannot be transferred because the other fax machine was busy, or when the error condition on your fax machine is corrected, the data does not print out. To print the - Sharp AR-208 | AR-208S | AR-208D Operation Manual Suite - Page 178
document glass), reading it into memory, and entering the fax number. Once the current operation is completed, your fax will automatically dial originals on the document glass and that copying is not in progress, then gently close the RSPF. 2 Adjust the original guides to the width of your original. - Sharp AR-208 | AR-208S | AR-208D Operation Manual Suite - Page 179
the numeric keys. • Press one or more Group keys. • Enter a number with the numeric keys. 4 Press the [ENTER] key. To enter another fax number, return to step 3. 5 Press the [START] key ( ). Transmission will begin. Note Adjust the resolution and contrast settings after the [BROADCAST] key - Sharp AR-208 | AR-208S | AR-208D Operation Manual Suite - Page 180
SPECIAL FUNCTIONS Broadcasting using a Group key If the fax machines to which you want to broadcast have all been programmed into one Group key, you can perform the broadcasting operation using the following simplified - Sharp AR-208 | AR-208S | AR-208D Operation Manual Suite - Page 181
, the next step is not necessary. • Press the [SPEED/SEARCH] key and enter a two-digit Speed Dial number. • Enter the fax number with the numeric keys. Note A group key can be pressed to perform serial polling. Fax reception will take place in the order that the destinations are stored in the - Sharp AR-208 | AR-208S | AR-208D Operation Manual Suite - Page 182
fax Select serial polling Polling is approved sending Fax beep received beep Other fax B memory Original is set memory Next fax machine is polled Fax received sending Repeated for the next fax SERIAL POLL MODE" 3 Dial the number of the fax machine you want to poll using one of the - Sharp AR-208 | AR-208S | AR-208D Operation Manual Suite - Page 183
reception is possible while your machine is on polling transmission standby. Your fax machine memory Select memory polling The original is read into memory Polling fax machine polling Polling is approved Original is sent from memory beep Select polling Original is received 5 Setting up - Sharp AR-208 | AR-208S | AR-208D Operation Manual Suite - Page 184
SPECIAL FUNCTIONS Adding a original to polling memory: Use this procedure to add an original to another original that has already been scanned into polling memory. Place the original in the RSPF or on the document glass and follow the steps below. 1 Press the [MENU] key. Deleting originals from - Sharp AR-208 | AR-208S | AR-208D Operation Manual Suite - Page 185
Permitted fax number numbers match These two numbers are compared polling allowed Follow these steps to enable polling security: 1 Press the [MENU] key. 4 5 Press the [ ] key ( ) or [ ] key ( ) to select "1:ON". Selection "1:ON" 2 Press the [ ] key ( ) or [ ] key ( ) until "4:USER PROGRAM - Sharp AR-208 | AR-208S | AR-208D Operation Manual Suite - Page 186
numbers: 1 Press the [MENU] key. 6 Enter the passcode (fax number of the machine to be allowed to poll your machine) with delete a passcode number: Select "2:CLEAR" and press the [ENTER] key. 5 Enter a two-digit number that will be used to identify the passcode number and then press the [ENTER] key. - Sharp AR-208 | AR-208S | AR-208D Operation Manual Suite - Page 187
ALL] key ( ) to cancel the entire transmission. Your fax machine Recipient • Select the recipient -sending method -time • Enter the time at which transmission will take place with the numeric keys. Enter two digits for the hour and two digits for the minute. 2 Press the [ ] key ( ) or [ ] key ( - Sharp AR-208 | AR-208S | AR-208D Operation Manual Suite - Page 188
• Press a Rapid key. If you press a Rapid Key, the next step is not necessary. • Enter a Speed Dial number with the numeric keys. • Enter the fax number with the numeric keys. 10 Press the [START] key ( ). CANCELING A TIMER TRANSMISSION JOB After a timer transmission job is set up, the job goes on - Sharp AR-208 | AR-208S | AR-208D Operation Manual Suite - Page 189
use the following procedure: 1 Press the [MENU] key. 2 Press the [ ] key ( ) or [ ] key ( ) until "5:ANTI JUNK FAX" appears, and then press the [ENTER] key. Selection "5:ANTI JUNK FAX" 3 Press the [ ] key ( ) or [ ] key ( ) to select "1:ANTI JUNK SELECT" and press the [ENTER] key. Selection "1:ANTI - Sharp AR-208 | AR-208S | AR-208D Operation Manual Suite - Page 190
and press the [ENTER] key. Selection "1:SET" Note If you enter a two-digit number that already has a fax number stored, "#xx STORED:CHANGE?" will appear. To change the fax number that has been stored under that 2-digit number, press the [ ] key ( ) or [ ] key ( ) to select "YES", press the [ENTER - Sharp AR-208 | AR-208S | AR-208D Operation Manual Suite - Page 191
the [ ] key ( ) or [ ] key ( ) to select "2:JUNK FAX #" and press the [ENTER] key. Selection "2:JUNK FAX #" 4 Press the [ ] key ( ) or [ ] key ( ) to select "2:CLEAR" and press the [ENTER] key. Selection "2:CLEAR" 5 Press the numeric keys to enter the two-digit number (01 to 10) that identifies the - Sharp AR-208 | AR-208S | AR-208D Operation Manual Suite - Page 192
Printer Copying Printing Copy Key entry Yes Yes During copying No Printer Printing Yes Scanner During scanning No Yes Fax transmission Key entry During direct transmission No Yes No Yes During scanning No Yes During memory Yes Yes transmission Fax reception During manual - Sharp AR-208 | AR-208S | AR-208D Operation Manual Suite - Page 193
Chapter 6 TROUBLESHOOTING PRINTING OUT REPORTS The machine is capable of printing a range of reports on faxing activities as PAGES CVR. X X TIMES XXXX 2. ACTIVITY REPORT: You can print out a list of faxes sent and received as well as the sender or recipient and the time of the operation, etc - Sharp AR-208 | AR-208S | AR-208D Operation Manual Suite - Page 194
TROUBLESHOOTING 5. PASSCODE LIST: You can print a list of your fax information and polling security information. POLL SECURITY SYSTEM # ID # PASSCODE # SENDER'S NAME SENDER'S # FW. STA. NAME FW. STATION # PASSCODE LIST XXXX XXXX 01 02 03 - Sharp AR-208 | AR-208S | AR-208D Operation Manual Suite - Page 195
USER PROGRAM LIST DOC. GLASS SIZE FIXED DOC. SIZE RESO. PRIORITY #OF RINGS AUTO RX #OF RINGS MANUAL RX AUTO LISTING PRINT SELECTION ITEM RECALL TIMES (BUSY) RECALL TIMES (LINE ERROR) RECALL INTERVAL (BUSY) RECALL INTERVAL (LINE ERROR) SECURITY SELECTION FAX ALWAYS PRINTS IMAGE : ERROR ONLY Use - Sharp AR-208 | AR-208S | AR-208D Operation Manual Suite - Page 196
TROUBLESHOOTING ACTIVITY REPORT AUTO LISTING This setting is used to automatically print the Activity Report for transmissions and receptions. The Activity Report will automatically print when information on a total of 50 fax USER PROGRAM" appears, and then press the [ENTER] key. Selection "4:USER - Sharp AR-208 | AR-208S | AR-208D Operation Manual Suite - Page 197
printing conditions: "ALWAYS PRINTS" ...After each transmission, reception, or error. "ERROR ONLY".........After an error only. "NEVER PRINTS" ......Never prints. Note Part of the transmitted fax can be printed on the transaction report (IMAGE MEM. PRINT setting). To set the machine to print - Sharp AR-208 | AR-208S | AR-208D Operation Manual Suite - Page 198
images are distorted. The TD cartridge may be running out of toner. → Replace the TD cartridge. Operation Manual (for general information) Note If your problem cannot be solved by carrying out the instructions in the Check and Remedy column above, please contact your authorized SHARP dealer - Sharp AR-208 | AR-208S | AR-208D Operation Manual Suite - Page 199
appear in "XXX" in the 29 message. CAN NOT PRINT Toner cartridge is empty. Toner cartridge is not inserted. See the OPERATION MANUAL (for general information) NO XXX SIZE TRAY CHANGE TRAY SETTING second Meaning Indicates the end of transmission, reception, or line error. Warning tone 6 91 - Sharp AR-208 | AR-208S | AR-208D Operation Manual Suite - Page 200
capacity Error Correction Mode(ECM) Possible (1 telephone) Combined total of 18 One-Touch Dial and Group keys; 100 Speed Dial numbers; redialing (automatic) Yes Yes (50 pages) 2 MB Yes * As a part of our policy of continuous improvement, SHARP reserves the right to make design and specification - Sharp AR-208 | AR-208S | AR-208D Operation Manual Suite - Page 201
12 - Telephone line cord 11 Contrast 55 Cover sheet 56 D Dialing - Direct keypad dialing 59 - Rapid key dialing 59 - Redialing 61 - Search 61 - Speed dialing 59 - Using the [SPEAKER] key 60 Display 14, 16 Distinctive ringing 41 Document glass 13 E Entering your name and fax number 21 - Sharp AR-208 | AR-208S | AR-208D Operation Manual Suite - Page 202
39 Reports - Group list 85 - Junk fax # list 86 - Passcode list 86 - Telephone # guides 13 S Specifications 92 Storing numbers - Group keys 45 - Rapid key dialing 42 - Speed dialing 42 T TEL jack 13 Transmission mode - Direct transmission 26 - Memory transmission 26 Troubleshooting - Sharp AR-208 | AR-208S | AR-208D Operation Manual Suite - Page 203
keypad dialing 59 - Redialing 61 - Speed dialing 59 - Using the [SPEAKER] key 60 Receiving faxes 63 - Manual receiving 66 - Optional reception settings 64 Sending originals - Dialing and transmitting 59 - Manual sending 66 - Optional transmission settings 54 - Setting the original 52 - Sharp AR-208 | AR-208S | AR-208D Operation Manual Suite - Page 204
MEMO - Sharp AR-208 | AR-208S | AR-208D Operation Manual Suite - Page 205
MEMO - Sharp AR-208 | AR-208S | AR-208D Operation Manual Suite - Page 206
MEMO - Sharp AR-208 | AR-208S | AR-208D Operation Manual Suite - Page 207
of devices subject only to the requirement that the sum of the RENs of all the devices does not exceed five." The REN of this equipment is indicated on the copying machine. The registration number is indicated on the fax printed circuit board and on the copying machine. AVIS POUR NOS UTILISATEURS - Sharp AR-208 | AR-208S | AR-208D Operation Manual Suite - Page 208
AR-FX13 SHARP ELECTRONICS CORPORATION 1 Sharp Plaza, Mahwah, New Jersey 07430-1164. www.sharpusa.com SHARP ELECTRONICS OF CANADA LTD. 335 Britannia Road East, Mississauga, Ontario, L4Z 1W9 This manual has been printed using a vegetable-based soy oil ink to help protect the environment. Printed on - Sharp AR-208 | AR-208S | AR-208D Operation Manual Suite - Page 209
MODEL AR-NB2 A NETWORK EXPANSION KIT SOFTWARE SETUP GUIDE (for network printer) • SAFETY STANDARDS • INTRODUCTION • BEFORE INSTALLATION • SETUP IN A WINDOWS ENVIRONMENT • SETUP IN A MACINTOSH ENVIRONMENT Page 2 3 5 10 19 - Sharp AR-208 | AR-208S | AR-208D Operation Manual Suite - Page 210
in Canada This Class B digital apparatus complies with Canadian ICES-003. Cet appareil numérique de la classe B est conforme à la norme NMB-003 du Canada. Notice for Users in U.S.A. Declaration of Conformity SHARP Network Expansion Kit, AR-NB2 A This device complies with Part 15 of the FCC Rules - Sharp AR-208 | AR-208S | AR-208D Operation Manual Suite - Page 211
the North American version of the software. Versions for other countries and regions may vary slightly from the North American version. • This manual refers to the digital multifunctional system AR-208S/208D as "the machine". • Where "XX-XXXX" appears in this manual, please substitute the name of - Sharp AR-208 | AR-208S | AR-208D Operation Manual Suite - Page 212
SOFTWARE REQUIREMENTS 7 CONNECTING TO A NETWORK 8 CHECKING THE IP ADDRESS 8 ● HOW TO RESET THE NETWORK EXPANSION KIT 8 USER PROGRAMS FOR THE NETWORK EXPANSION KIT 9 SETUP IN A WINDOWS ENVIRONMENT INSTALLING THE SOFTWARE 10 ● INSTALLING THE PRINTER DRIVER 10 ● SHARING THE PRINTER USING WINDOWS - Sharp AR-208 | AR-208S | AR-208D Operation Manual Suite - Page 213
that you use the PCL6 printer driver. If you have a problem printing from older software using the PCL6 printer driver, use the PCL5e printer driver. - PS printer driver The PS printer driver supports the PostScript 3 page description language developed by Adobe Systems Incorporated. - PPD - Sharp AR-208 | AR-208S | AR-208D Operation Manual Suite - Page 214
the following software programs: Software for Windows • Printer Administration Utility This allows the administrator to monitor the machine and configure machine settings from a computer. To install and use the Printer Administration Utility, see the Readme file and the manual in PDF format on - Sharp AR-208 | AR-208S | AR-208D Operation Manual Suite - Page 215
with an Intel processor). SOFTWARE REQUIREMENTS The following requirements must be met to use the software described in this manual. Operating system environment Windows Software PCL6 printer driver, PCL5e printer driver PS printer driver, PPD driver Required expansion kits - PS3 expansion - Sharp AR-208 | AR-208S | AR-208D Operation Manual Suite - Page 216
on the network expansion kit at least 2 seconds to print out a Printer Setting List. Status button HOW TO RESET THE NETWORK EXPANSION KIT To reset hold down the status button until a beep sounds. Network scanner destination information and scanning settings will remain after the network Caution - Sharp AR-208 | AR-208S | AR-208D Operation Manual Suite - Page 217
programs. Note The procedure for selecting a user program setting is explained in "SELECTING A SETTING FOR A USER PROGRAM" in the operation manual. Additional user programs for Print mode Program number Program name Settings (factory default settings appear in bold) 4 ENABLE TCP/IP 1: YES - Sharp AR-208 | AR-208S | AR-208D Operation Manual Suite - Page 218
Click the "Printer Driver" button. To view information on the software, click the "Display Readme" button. 3 Double-click the "setup" icon ( ). In Windows Vista, if LPR Direct Print • Set as default printer: Yes • Printer driver name: Cannot be changed • PCL printer display fonts: Installed If you - Sharp AR-208 | AR-208S | AR-208D Operation Manual Suite - Page 219
click the "Next" button. If you are not installing the PCL printer driver (you are installing the PS printer driver), select "No" and click the "Next" button. 12 Follow the on-screen instructions. Read the message in the window that appears and click the "Next" button. Installation begins. • If - Sharp AR-208 | AR-208S | AR-208D Operation Manual Suite - Page 220
completes the installation of the software. • After installation, see "CONFIGURING THE PRINTER DRIVER" (p.18) to check the printer driver settings. • To install the Printer Status Monitor, see "INSTALLING THE PRINTER STATUS MONITOR" (p.15). If you installed the PS printer driver, Note the PS display - Sharp AR-208 | AR-208S | AR-208D Operation Manual Suite - Page 221
in the selected language, continue the installation with that language selected. 5 Read the message in the "Welcome" window and then click the "Next" button. 6 Click the "Printer Driver" button. To view information on the software, click the "Display Readme" button. 7 Click the "Custom installation - Sharp AR-208 | AR-208S | AR-208D Operation Manual Suite - Page 222
Be sure to select the same printer driver as the printer driver used in the print server (the machine). 12 Follow the on-screen instructions. • If you are using Windows Note 2000/XP/Server 2003 If a warning message regarding the Windows logo test or digital signature appears, be sure to click - Sharp AR-208 | AR-208S | AR-208D Operation Manual Suite - Page 223
with that language selected. 5 Read the message in the "Welcome" window and then click the "Next" button. 6 Click the "Printer Status Monitor" button. To view information on the software, click the "Display Readme" button. 7 Follow the on-screen instructions. 8 When the installation completed - Sharp AR-208 | AR-208S | AR-208D Operation Manual Suite - Page 224
the "Next" button. Caution Do not select "PS Printer Driver". The PS printer driver for the machine should only be installed from the CD-ROM that accompanies the network expansion kit. 3 Double-click the "setup" icon ( ). In Windows Vista, if a message screen appears asking you for confirmation - Sharp AR-208 | AR-208S | AR-208D Operation Manual Suite - Page 225
button, click "Control Panel" and then click "Printer". • In Windows Server 2003, click the "Start" button and then click "Printers and Faxes". • In Windows 98/Me/2000, click the "Start" button, select "Settings", and then click "Printers". 2 Insert the "Software CD-ROM" (Disc 1) into your computer - Sharp AR-208 | AR-208S | AR-208D Operation Manual Suite - Page 226
on the options that have been installed. Set the printer configuration properly. Otherwise, printing may not take place correctly. 2 Click the "SHARP XX-XXXX" printer driver icon and select "Properties" from the "File" menu. • If you are using Windows 2000/XP/Server 2003/Vista, go to step 4. • In - Sharp AR-208 | AR-208S | AR-208D Operation Manual Suite - Page 227
how to configure the printer driver settings. • MAC installing the software, be sure to read "ReadMe First AR-NB2A" icon ( ). • If the "Authorization" window Note appears in Mac OS X v10.1.5, click the lock icon ( ), enter the password, and click the "OK" button. • If the "Authenticate" window - Sharp AR-208 | AR-208S | AR-208D Operation Manual Suite - Page 228
software was successfully installed" appears in the installation window, click the "Close" button. This completes the installation of the software. Next, configure the printer driver Authenticate" window appears, Note enter the password and click the "OK" button. 12 Double-click the "Printer Setup - Sharp AR-208 | AR-208S | AR-208D Operation Manual Suite - Page 229
the printer driver varies depending on the operating system version. The procedure for versions 10.4 - 10.4.10 and the procedure for other versions are explained separately below. v10.4 - 10.4.10 10.1.5, v10.2.8, v10.3.9 (1) (1) (2) (2) (3) (4) (3) (4) (1) Click the "Default Browser - Sharp AR-208 | AR-208S | AR-208D Operation Manual Suite - Page 230
". If you are using Mac OS X v10.2.8, select "Show Info" from the "Printers" menu. 16 Select the machine configuration. If you selected "Auto Select" in (3) (3) Click the "Apply Changes" button. (4) Click to close the window. This completes the configuration of the printer driver. - 22 - Macintosh - Sharp AR-208 | AR-208S | AR-208D Operation Manual Suite - Page 231
license agreement and then click the "Yes" button. 7 Read the message in the window that appears and click the "Continue" button. Installation of the installation of the software. Next, configure the printer driver settings. 8 Select "Chooser" from the Apple Menu. 9 Create a printer. (1) (2) (3) - Sharp AR-208 | AR-208S | AR-208D Operation Manual Suite - Page 232
the window. 15 Click the close box ( ) to close the "Chooser". This completes the configuration of the printer driver. Installing the screen fonts The screen fonts for Mac OS 9.0 - 9.2.2 are contained in the "Font" folder of the "PRINTER UTILITIES" CD-ROM that accompanies the PS3 expansion kit. Copy - Sharp AR-208 | AR-208S | AR-208D Operation Manual Suite - Page 233
AR-NB2 A - Sharp AR-208 | AR-208S | AR-208D Operation Manual Suite - Page 234
MODEL AR-NB2 A NETWORK EXPANSION KIT OPERATION MANUAL (for network scanner) Page • INTRODUCTION 2 • BEFORE USING THE NETWORK SCANNER FUNCTION 4 • USING THE NETWORK SCANNER FUNCTION 17 • TROUBLESHOOTING 21 • SHARPDESK CD-ROM (for Windows) 25 • SPECIFICATIONS 29 - Sharp AR-208 | AR-208S | AR-208D Operation Manual Suite - Page 235
the network printer that accompanies the network expansion kit. ● The explanations in this manual assume that the person who will install the product and the users of the product have a working knowledge of Microsoft Windows. ● This manual refers to the digital multifunctional system AR-208S/208D as - Sharp AR-208 | AR-208S | AR-208D Operation Manual Suite - Page 236
(for Windows) SOFTWARE PROGRAMS 25 ● SHARPDESK (Desktop Document Management Software 25 ● NETWORK SCANNER TOOL 25 ● SHARP TWAIN AR/DM 25 USER'S GUIDES FOR SOFTWARE PROGRAMS 26 INSTALLING THE SOFTWARE PROGRAM ..27 ● INSTALLING SHARPDESK AND NETWORK SCANNER TOOL 27 ● INSTALLING SHARP TWAIN AR/DM - Sharp AR-208 | AR-208S | AR-208D Operation Manual Suite - Page 237
Desktop" in this manual.) * Before Scan to Desktop can be performed, the software in the CD-ROM that accompanies the network expansion kit (AR-NB2 A) must be installed. For the procedure for installing the software, see the "SHARPDESK CD-ROM (for Windows)" (p.25). 3. The scanned image can be sent - Sharp AR-208 | AR-208S | AR-208D Operation Manual Suite - Page 238
REQUIRED FOR THE NETWORK SCANNER FEATURE To use the Network Scanner the Web browser on your computer. Supported browsers: Internet Explorer 5.5 or later (Windows) Netscape Navigator 6.0 or later 2 browser. ☞"ABOUT THE WEB PAGE (FOR USERS)" (p.6) When you have finished using the Web page, click the ( - Sharp AR-208 | AR-208S | AR-208D Operation Manual Suite - Page 239
Status This shows information on the machine's paper trays and output trays, toner and other supplies, and the total sheet usage count. Out of paper Web page and enter the administrator user name and password. ☞"PROTECTING INFORMATION PROGRAMMED IN THE WEB PAGE ([Passwords])" (p.16) ☞"ABOUT THE WEB - Sharp AR-208 | AR-208S | AR-208D Operation Manual Suite - Page 240
where high-clarity image reproduction is required, such as a software program in the CD-ROM that accompanies the network expansion kit, the recipient must have a viewer program that can open the image format (file type) that was selected as explained above. • The factory default setting for the image - Sharp AR-208 | AR-208S | AR-208D Operation Manual Suite - Page 241
BEFORE USING THE NETWORK SCANNER FUNCTION STORING DESTINATIONS To store scanning destinations, click be established. (p.15)) E-mail destination information Item Name (Required) Initial (Optional) Custom Index E-mail Address (Required) Scan Mode Description Enter the name of the destination (up - Sharp AR-208 | AR-208S | AR-208D Operation Manual Suite - Page 242
THE NETWORK SCANNER FUNCTION Storing recipient can click the hyperlink to go directly to the location where the image data is stored. • Use "Scan Mode" to select a set Item Name (Required) Initial (Optional) Custom Index Hostname or IP Address (required)*1 User Name (Optional) Password (Optional) - Sharp AR-208 | AR-208S | AR-208D Operation Manual Suite - Page 243
will be processed in this directory after it is received. User Name (Optional) Password (Optional) Scan Mode Enter the login user name for the network scanner tool (maximum of 32 characters). Enter the login password for the network scanner tool (maximum of 32 characters). Select the name of the - Sharp AR-208 | AR-208S | AR-208D Operation Manual Suite - Page 244
SCANNER FUNCTION Storing Groups (Scan to E-mail) You can send a scanned image destinations Item Name (Required) Initial (Optional) Custom Index Address(es) (Required) Scan Mode Description the e-mail addresses with a comma (,), semi-colon (;), space ( ), or colon (:). Select the name of the scan - Sharp AR-208 | AR-208S | AR-208D Operation Manual Suite - Page 245
BEFORE USING THE NETWORK SCANNER FUNCTION Editing and deleting programmed transmission destinations To edit or delete programmed destinations, click [Destination] in the menu frame of the Web page. 1 Click [Destination] - Sharp AR-208 | AR-208S | AR-208D Operation Manual Suite - Page 246
password can be set for the administrator and users. (3) Clock Adjust This is used to set the time in the machine. Make sure the time is set correctly when performing Scan to E-mail. This setting does not appear on models that have the fax EXPANSION KIT" (p.24) (6) Services (p.15) This is used to - Sharp AR-208 | AR-208S | AR-208D Operation Manual Suite - Page 247
want to use. In the "Enable Scanner Delivery to:" field, click the checkbox next to each method that you want to use so that a checkmark appears in the checkbox. All transmission methods are initially selected (factory default settings). 4 Set a limit for the size of image files. To prevent the - Sharp AR-208 | AR-208S | AR-208D Operation Manual Suite - Page 248
Enter the required information in "SMTP", "DNS" and "LDAP". For explanations of each setting, click [Help] in the upper right-hand corner of the window. Note Click [Services] in the menu frame to display the services setup screen. Select the desired server and then configure the required parameters - Sharp AR-208 | AR-208S | AR-208D Operation Manual Suite - Page 249
factory default password to a new password. The administrator should also take care to remember the new password. From now on, the new password must be entered each time you wish to configure settings in the Web pages. A password can be set for the administrator and users. 1 Click [Passwords] in - Sharp AR-208 | AR-208S | AR-208D Operation Manual Suite - Page 250
the procedure for scanning from the machine after the network scanner settings have been configured in the Web page. For the operation panel and the parts of the machine that are used for network scanning, see the operation manual for the machine. BASIC TRANSMISSION PROCEDURE 1 Press the [MODE - Sharp AR-208 | AR-208S | AR-208D Operation Manual Suite - Page 251
server. Sending an image by entering an e-mail address manually 1 Press the [MODE SELECT] key to select scanner mode. The "SCAN" indicator lights up to indicate that scanner mode is selected. scanned using the settings of the scan mode that has the "Default Scan Mode" checkbox selected. - 18 - - Sharp AR-208 | AR-208S | AR-208D Operation Manual Suite - Page 252
scanner mode is selected. 2 Place the original in the document feeder tray or on the document glass. For information on how to place the original, see "IMAGE is scanned using the settings of the scan mode that has the "Default Scan Mode" checkbox selected. 4 Enter search characters and press the [ - Sharp AR-208 | AR-208S | AR-208D Operation Manual Suite - Page 253
SCANNER FUNCTION IMAGE can be entered key When entering e-mail address When entering search characters 11 1 Space 2 a b c 2 ABC ABC2 a b c 3 d e f 3 Y Z WX Y Z 9 w x y z _-.@ 00 0 # @.-_ ● To enter two characters in succession which require using the same key, press the [ ] key ( - Sharp AR-208 | AR-208S | AR-208D Operation Manual Suite - Page 254
3 TROUBLESHOOTING TROUBLESHOOTING If a problem or question arises, try to solve the situation using the following information before contacting your authorized SHARP dealer. Image transmission problems are explained here. For image scanning problems, see the operation manual for the machine. - Sharp AR-208 | AR-208S | AR-208D Operation Manual Suite - Page 255
should only be used in cases where high-clarity image reproduction is required, such as an original that includes photographs or error occurs when you send a scanned image, a message informing you of the error and an error code will appear in the operation panel on the machine. Error Code CE-00 - Sharp AR-208 | AR-208S | AR-208D Operation Manual Suite - Page 256
TROUBLESHOOTING IMPORTANT POINTS WHEN USING SCAN TO E-MAIL Be very careful not to send image data files that are too large. and in some cases, may even cause the mail server or network to go down. The images on the following page will produce the following file sizes when scanned as 8-1/2" x 11" - Sharp AR-208 | AR-208S | AR-208D Operation Manual Suite - Page 257
button on the network expansion kit at least 2 seconds to print out a Printer Setting List. Status button 3 HOW TO RESET THE NETWORK EXPANSION KIT To reset status button on the network expansion kit. Caution Network scanner destination information and scanning settings will remain after the network - Sharp AR-208 | AR-208S | AR-208D Operation Manual Suite - Page 258
information such as scanned image data from a Digital Laser Copier/Printer or documents created using word processing or spreadsheet application software. Some of the important features of Sharpdesk are: • Sharpdesk works with your scanner to let you read paper documents into your computer - Sharp AR-208 | AR-208S | AR-208D Operation Manual Suite - Page 259
contains user's guides (in PDF format) for each of the software programs. • Sharpdesk Installation Guide • Sharpdesk User's Guide • Network Scanner Tool User's Guide • SHARP TWAIN AR/DM User's Guide In addition to explaining how to use the programs, the user's guides also give detailed instructions - Sharp AR-208 | AR-208S | AR-208D Operation Manual Suite - Page 260
the on-screen instructions to create an index database. For detailed information, see the Sharpdesk Installation Guide and Sharpdesk User's Guide. * Sharpdesk Imaging is a version of Eastman Software's Imaging for Windows Professional Edition that has been customized by the Sharp Corporation. - 27 - Sharp AR-208 | AR-208S | AR-208D Operation Manual Suite - Page 261
To remove the software, follow the steps below. ● When Sharpdesk is uninstalled, Network Scanner Tool is also uninstalled. Note that if Network Scanner Tool is uninstalled, you will no longer be able to directly receive image data from the Digital Laser Copier/Printer. ● If a user-created file is - Sharp AR-208 | AR-208S | AR-208D Operation Manual Suite - Page 262
For information on power requirements, power consumption, dimensions, weight, and other specifications that are common to all features of the machine, refer to the operation manual for the machine. File format File creation method Scan destinations Supported client PC operating systems - Sharp AR-208 | AR-208S | AR-208D Operation Manual Suite - Page 263
AR-NB2 A (for network scanner) - Sharp AR-208 | AR-208S | AR-208D Operation Manual Suite - Page 264
AR-NB2 A Network expansion kit Online Manual (for network printer) Start Click this "Start" button. - Sharp AR-208 | AR-208S | AR-208D Operation Manual Suite - Page 265
to the digital multifunctional system AR-208S/208D as "the machine". Note ● For information on copier functions, adding paper and toner, removing misfeeds, using peripheral equipment, and other general information, see the operation manual for the machine. For information on the scanner functions - Sharp AR-208 | AR-208S | AR-208D Operation Manual Suite - Page 266
can click on a bookmark to jump directly to that section. How to Print Out This Manual To print this manual, select "Print" from the "File" menu of Acrobat Reader. Select the desired printer settings in the "Print" dialog box, and then click the "OK" button. Takes you back page by page. CONTENTS - Sharp AR-208 | AR-208S | AR-208D Operation Manual Suite - Page 267
to the paper Rotating the print image 180 degrees Printing a watermark ● How to Print a Watermark Printing text and lines/graphics in black ● Printing text in black ● Printing lines and vector graphics in black (part 1) 2 2 PRINTER UTILITIES (WINDOWS) 3 Printer utilities 17 ● Before using the - Sharp AR-208 | AR-208S | AR-208D Operation Manual Suite - Page 268
● Status message setup 39 ● Alerts message setup 40 5 TROUBLESHOOTING Troubleshooting ● Check the connections Removing the software ● Windows ● Macintosh (Mac OS 9.0 to 9.2.2) 6 SPECIFICATIONS Printer specifications Printer driver specifications 7 INDEX (part 2) 41 41 42 42 42 43 44 CONTENTS - Sharp AR-208 | AR-208S | AR-208D Operation Manual Suite - Page 269
1 Basic printing PRINTING FROM WINDOWS (part 1) The following example explains how SHARP XX-XXXX" is selected as the printer. If you need to change any print settings, click the "Preferences" button ("Properties" button in Windows 98/Me) to open the printer driver setup screen. The printer driver - Sharp AR-208 | AR-208S | AR-208D Operation Manual Suite - Page 270
1 Basic printing PRINTING FROM WINDOWS (part 2) If the tray runs out of paper during printing Printing will automatically resume when paper is loaded in the tray. When using the bypass tray, select printer mode with the mode select key on the machine, load paper as instructed by the message in the - Sharp AR-208 | AR-208S | AR-208D Operation Manual Suite - Page 271
and select "Properties" from the "File" menu. 2 Click "Printers and Other Hardware", and then click "Printers and Faxes". ● On Windows Vista, click "Printer". ● On Windows 2000, click "Printers". 3 Click the "SHARP XX-XXXX" printer driver icon and select "Properties" from the "File" menu. 3 On - Sharp AR-208 | AR-208S | AR-208D Operation Manual Suite - Page 272
will vary depending on the model. The printer driver setup screen allows you to select various functions that can be used when the network expansion kit is installed. For information on the printer functions of the network expansion kit, see "Printer driver specifications". CONTENTS INDEX 9 - Sharp AR-208 | AR-208S | AR-208D Operation Manual Suite - Page 273
WINDOWS Two-sided printing The printer driver setup screen of models that support two-sided printing contains a "Document Style" setting in the "Main" tab. This feature allows you to print on both sides of the paper. To use this function, open the printer driver open the printer driver. (part 1) ● - Sharp AR-208 | AR-208S | AR-208D Operation Manual Suite - Page 274
1 PRINTING FROM WINDOWS Two-sided printing (part 2) Pamphlet style Pamphlet style prints two pages convenient when you wish to compile printed pages into a pamphlet. To use this function, open the printer driver and select "Pamphlet Style" in "Document Style" in the "Main" tab. The direction of - Sharp AR-208 | AR-208S | AR-208D Operation Manual Suite - Page 275
1 PRINTING FROM WINDOWS Printing multiple pages on one page This feature allows you to reduce and print two, four, six, eight or sixteen document pages on a single sheet of paper. To use this function, open the printer driver setup screen and select the number of pages per sheet (2-Up, 4-Up, 6-Up, - Sharp AR-208 | AR-208S | AR-208D Operation Manual Suite - Page 276
PRINTING FROM WINDOWS Fitting the printed image to the paper The printer driver can adjust the size of the printed image to match the on invoice size paper. ☞See Basic printing for details on how to open the printer driver. The "Fit To Paper Size" setting is not available when "N-Up Printing" is - Sharp AR-208 | AR-208S | AR-208D Operation Manual Suite - Page 277
and then select the "Rotate 180 degrees" checkbox. ☞See Basic printing for details on how to open the printer driver. Printing result Rotate 180 degrees Rotate 180 degrees ABCD ABCD Note The procedure for loading paper is explained in the operation manual for the machine. CONTENTS INDEX 14 - Sharp AR-208 | AR-208S | AR-208D Operation Manual Suite - Page 278
1 PRINTING FROM WINDOWS Printing a watermark You can print a watermark such as "CONFIDENTIAL" on your document. To print a watermark, open the printer driver, click the "Watermarks" tab, and follow the steps below. ☞See Basic printing for details on how to open the printer driver. How to Print a - Sharp AR-208 | AR-208S | AR-208D Operation Manual Suite - Page 279
data Printing result Text To Black Text To Black ABCD EFGH ABCD EFGH ABCD EFGH Lines and vector graphics that are any color other than white are printed in black. To use this function, open the printer driver setup screen and select the "Vector To Black" checkbox in the "Advanced" tab. Print - Sharp AR-208 | AR-208S | AR-208D Operation Manual Suite - Page 280
2 Printer utilities PRINTER UTILITIES (WINDOWS) Printer Status Monitor (for general users) "Printer Status Monitor" is on the "Software CD-ROM" (Disc 1). This allows the user to check on the computer screen whether or not the machine is able to print. It provides information on error states such as - Sharp AR-208 | AR-208S | AR-208D Operation Manual Suite - Page 281
the "Start" button, point to "All Programs" ("Programs" in operating systems other than Windows XP/Server 2003/Vista) and then "SHARP Printer Status Monitor". Select "Printer Status Monitor". Printer Administration Utility Click the "Start" button, point to "All Programs" ("Programs" in operating - Sharp AR-208 | AR-208S | AR-208D Operation Manual Suite - Page 282
2 PRINTER UTILITIES (WINDOWS) Using the printer utilities (part 2) Changing the Printer Status Monitor settings Once installed, the Printer Status Monitor normally runs in the background in Windows. If you need to change the Printer Status Monitor settings, follow the steps below. 1 Right-click - Sharp AR-208 | AR-208S | AR-208D Operation Manual Suite - Page 283
1 Right-click the Printer Status Monitor icon ( ) on the task bar, and select "SHARP XX-XXXX Status" from the pop-up menu. (part 3) The icon turns red when printing is not possible due to a Note machine error or other problem. 2 Click the "Detail" button. The window expands to show machine status - Sharp AR-208 | AR-208S | AR-208D Operation Manual Suite - Page 284
PRINTING FROM MACINTOSH (part 1) To use the machine as a printer for the Macintosh, the PS3 expansion kit (AR-PK1N) must be installed and the machine must be connected to a network. To install the PPD file and configure the printer driver settings, see the software setup guide. Before printing - Sharp AR-208 | AR-208S | AR-208D Operation Manual Suite - Page 285
in the Print window and the correct size of paper for a print job is not loaded in the machine, the printing procedure will vary depending on the "FORCED OUTPUT" setting in the user programs (see "USER PROGRAMS" in the Operation Manual). When "FORCED OUTPUT" is set to "OFF" Select printer mode with - Sharp AR-208 | AR-208S | AR-208D Operation Manual Suite - Page 286
. In the user Web pages, users can monitor the machine, directly print a file specified on a computer, and select printer configuration settings. In the administrator Web pages, the administrator can configure the machine's e-mail settings, settings for print by e-mail, and passwords. Only the - Sharp AR-208 | AR-208S | AR-208D Operation Manual Suite - Page 287
status of the machine, paper trays, output trays, toner and other supplies, and page counts. Out of paper printer settings. ☞Configuring the printer condition settings (6)Admin Mode To open the Web pages for the administrator, click here and then enter the administrator's user name and password - Sharp AR-208 | AR-208S | AR-208D Operation Manual Suite - Page 288
by your computer can be directly printed without using the printer driver by specifying the file's address. Any file that can be Advanced job settings Item Description Factory default setting Copies Set the number of copies from 1 to 999. 1 support the two-sided printing.) CONTENTS INDEX 25 - Sharp AR-208 | AR-208S | AR-208D Operation Manual Suite - Page 289
. The following items can be set: ● Default Settings: Basic settings that are mainly used when the printer driver is not used. ● PCL Settings: PCL symbol set, font, line feed code, and other settings. ● PostScript Settings*: Sets whether or not a PostScript error page is printed when a PostScript - Sharp AR-208 | AR-208S | AR-208D Operation Manual Suite - Page 290
detailed explanations of the procedures for establishing settings, click [Help] in the menu frame. (part 2) (2) (1) (1)Condition Settings This displays the page for configuring the printer condition settings. (2)Default / PCL / PS Select the type of condition settings that you wish to configure - Sharp AR-208 | AR-208S | AR-208D Operation Manual Suite - Page 291
, Print Many) Enable Condition Settings PCL Settings Symbol Set Font Line Feed Code Wide A4 Factory default settings PC-8 0: Courier (internal font) CR=CR; LF=LF; FF=FF Disable PostScript Settings* Factory default settings Print PS Errors Disable * This setting is only appears when the PS3 - Sharp AR-208 | AR-208S | AR-208D Operation Manual Suite - Page 292
printer condition settings (part 4) Printer condition settings Factory default settings are indicated in bold. Default Settings Item Copies Orientation Selections 1 - 999 Portrait, Landscape Default image is formed in accordance with this setting. Set the default models that support two-sided - Sharp AR-208 | AR-208S | AR-208D Operation Manual Suite - Page 293
FUNCTIONS IN THE MACHINE Configuring the printer condition settings (part 5) PCL Settings Item Symbol Set Font Line Feed Code Wide A4 Selections Select one are assigned to certain of the symbols in the character code list. The factory default setting is [PC-8]. This specifies which PCL font to - Sharp AR-208 | AR-208S | AR-208D Operation Manual Suite - Page 294
MACHINE Configuring the printer condition settings (part 6) PostScript Settings The "PostScript Settings" are only effective when the PS3 expansion kit is installed. Item Print PS Errors Selections Enable, Disable Description When this setting is enabled, an error description is printed each - Sharp AR-208 | AR-208S | AR-208D Operation Manual Suite - Page 295
password can be established for users. ☞Protecting information programmed in the web page ([Passwords]) (3)Key Operator Programs Setting changes can be prohibited and interface settings can be configured. ☞Key operator programs (4)Status Message Configure parameters required (7) Services Configure - Sharp AR-208 | AR-208S | AR-208D Operation Manual Suite - Page 296
can be set for the administrator and a password can be set for users. 1 Click [Passwords] in the menu frame. 2 Enter the current password in "Admin Password". When establishing a password for the first time, enter "Sharp" in "Admin Password". Be sure to enter "S" in upper case and "harp" in - Sharp AR-208 | AR-208S | AR-208D Operation Manual Suite - Page 297
means for printing a file from a computer that does not have the printer driver installed, as the user can simply send the file to the machine as an e-mail attachment Help] in the upper right-hand corner of the window. 4 Click [Submit] to store the entered information. 2 Click [E-mail print]. - Sharp AR-208 | AR-208S | AR-208D Operation Manual Suite - Page 298
Copies COPIES 1-999 COPIES=2 Two-sided print DUPLEX OFF, TOP, LEFT DUPLEX=LEFT File type LANGUAGE AUTO, PCL, PCLXL, POSTSCRIPT, PDF settings menu in the Web page "Default Settings". ● To print PS and PDF files, the PS3 expansion kit is required. ● An encrypted PDF file cannot be printed. ● - Sharp AR-208 | AR-208S | AR-208D Operation Manual Suite - Page 299
(part 1) The key operator programs are used to prohibit changes to the [Condition Settings] and to configure interface settings. • Default Settings operator programs] will appear. If you wish to select a setting in the "Default Settings" screen, go to step 3. 3 Make a selection for the setting - Sharp AR-208 | AR-208S | AR-208D Operation Manual Suite - Page 300
Disabling of YES, NO Clock Adjustment Interface settings Description This setting is used to prohibit printing of a printer test page. This setting is used to prohibit changes to the default condition settings. This setting is used to prohibit changes to the date and time settings. This item - Sharp AR-208 | AR-208S | AR-208D Operation Manual Suite - Page 301
part 1) These functions send information on machine use (print count, copy count, etc.) and error conditions (paper misfeed, out of paper, out of toner Click [Services] in the menu frame. The "Services Setup" window. 3 Click [Submit] to store the entered information. 3 Enter the information required - Sharp AR-208 | AR-208S | AR-208D Operation Manual Suite - Page 302
part 2) Status message setup Use the status message function to send the current counter information, including the copy appear. 2 Enter the required information, including the window. 3 Click [Submit] to store the entered information. When the E-mail Status settings are completed, printer - Sharp AR-208 | AR-208S | AR-208D Operation Manual Suite - Page 303
part 3) Alerts message setup Use the alert message function to send alert information, such as empty toner and paper and trouble including paper misfeeds, to specified destinations when such problems parameters are set, event information for the printer will be transmitted to the specified addresses - Sharp AR-208 | AR-208S | AR-208D Operation Manual Suite - Page 304
5 TROUBLESHOOTING Troubleshooting This chapter explains how to solve network connection problems. For information on paper, removing misfeeds, and replacing the toner cartridge, see the operation manual for the machine. Check the connections ■ Is the LAN cable disconnected? Make sure that the LAN - Sharp AR-208 | AR-208S | AR-208D Operation Manual Suite - Page 305
5 TROUBLESHOOTING Removing the software In the event that you need to remove the printer driver or utilities, follow these steps: Windows Macintosh (Mac OS 9.0 to 9.2.2) 1 Click the "start" button, and then click "Control Panel". On Windows 98/Me/2000, click the "Start" button, select "Settings - Sharp AR-208 | AR-208S | AR-208D Operation Manual Suite - Page 306
the PCL6 or PCL5e printer driver. *2 For information on machine memory, see the manual for the machine. *3 Available only if the PS3 expansion kit (AR-PK1N) is installed. As a part of our policy of continuous improvement, SHARP reserves the right to make design and specification changes for product - Sharp AR-208 | AR-208S | AR-208D Operation Manual Suite - Page 307
SPECIFICATIONS Printer driver specifications (part 1) Function Frequently used functions Number of copies 1 size Yes Yes *1 Pamphlet style printing is available in Windows 2000/XP/Server 2003/Vista. *2 Cannot be used in Mac OS X v10.1.5. Windows PPD 1 to 999 Yes Yes Long Side / Short Side - Sharp AR-208 | AR-208S | AR-208D Operation Manual Suite - Page 308
SPECIFICATIONS Printer driver specifications Graphics Fonts Function Resolution Halftone Graphics Mode Zoom Mirror Image Negative Image Fit to Page Resident fonts Selectable download Yes Yes Yes Yes 136 fonts bitmap, Type 1, TrueType (part 2) Windows PPD 600dpi No No Yes Yes Yes No 136 fonts - Sharp AR-208 | AR-208S | AR-208D Operation Manual Suite - Page 309
Printer driver specifications Function PCL6 PCL5e PS Other functions Auto configuration Yes Yes Yes Settings ROPM Overlay Watermark Yes Yes Yes Yes Yes Yes Yes Yes Yes Job Compression No Bitmap Compression No No Yes No Yes *3 Cannot be used in Mac OS X. (part 3) Windows - Sharp AR-208 | AR-208S | AR-208D Operation Manual Suite - Page 310
condition settings 29 Printer driver settings 9 Printer driver specifications 44 Printer specifications 43 Printer Status Monitor 17 PRINTER UTILITIES 17 Printing a watermark 15 PRINTING FROM MACINTOSH ........ 21 PRINTING FROM WINDOWS 6 R Removing the software 42 "Rotate 180 degrees - Sharp AR-208 | AR-208S | AR-208D Operation Manual Suite - Page 311
-
 1
1 -
 2
2 -
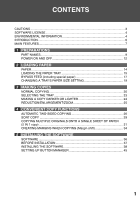 3
3 -
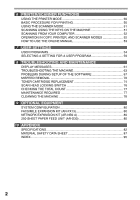 4
4 -
 5
5 -
 6
6 -
 7
7 -
8
-
9
-
10
-
11
-
12
-
13
-
14
-
15
-
16
-
17
-
18
-
19
-
20
-
21
-
22
-
23
-
24
-
25
-
26
-
27
-
28
-
29
-
30
-
31
-
32
-
33
-
34
-
35
-
36
-
37
-
38
-
39
-
40
-
41
-
42
-
43
-
44
-
45
-
46
-
47
-
48
-
49
-
50
-
51
-
52
-
53
-
54
-
55
-
56
-
57
-
58
-
59
-
60
-
61
-
62
-
63
-
64
-
65
-
66
-
67
-
68
-
69
-
70
-
71
-
72
-
73
-
74
-
75
-
76
-
77
-
78
-
79
-
80
-
81
-
82
-
83
-
84
-
85
-
86
-
87
-
88
-
89
-
90
-
91
-
92
-
93
-
94
-
95
-
96
-
97
-
98
-
99
-
100
-
101
-
102
-
103
-
104
-
105
-
106
-
107
-
108
-
109
-
110
-
111
-
112
-
113
-
114
-
115
-
116
-
117
-
118
-
119
-
120
-
121
-
122
-
123
-
124
-
125
-
126
-
127
-
128
-
129
-
130
-
131
-
132
-
133
-
134
-
135
-
136
-
137
-
138
-
139
-
140
-
141
-
142
-
143
-
144
-
145
-
146
-
147
-
148
-
149
-
150
-
151
-
152
-
153
-
154
-
155
-
156
-
157
-
158
-
159
-
160
-
161
-
162
-
163
-
164
-
165
-
166
-
167
-
168
-
169
-
170
-
171
-
172
-
173
-
174
-
175
-
176
-
177
-
178
-
179
-
180
-
181
-
182
-
183
-
184
-
185
-
186
-
187
-
188
-
189
-
190
-
191
-
192
-
193
-
194
-
195
-
196
-
197
-
198
-
199
-
200
-
201
-
202
-
203
-
204
-
205
-
206
-
207
-
208
-
209
-
210
-
211
-
212
-
213
-
214
-
215
-
216
-
217
-
218
-
219
-
220
-
221
-
222
-
223
-
224
-
225
-
226
-
227
-
228
-
229
-
230
-
231
-
232
-
233
-
234
-
235
-
236
-
237
-
238
-
239
-
240
-
241
-
242
-
243
-
244
-
245
-
246
-
247
-
248
-
249
-
250
-
251
-
252
-
253
-
254
-
255
-
256
-
257
-
258
-
259
-
260
-
261
-
262
-
263
-
264
-
265
-
266
-
267
-
268
-
269
-
270
-
271
-
272
-
273
-
274
-
275
-
276
-
277
-
278
-
279
-
280
-
281
-
282
-
283
-
284
-
285
-
286
-
287
-
288
-
289
-
290
-
291
-
292
-
293
-
294
-
295
-
296
-
297
-
298
-
299
-
300
-
301
-
302
-
303
-
304
-
305
-
306
-
307
-
308
-
309
-
310
-
311
 |
 |
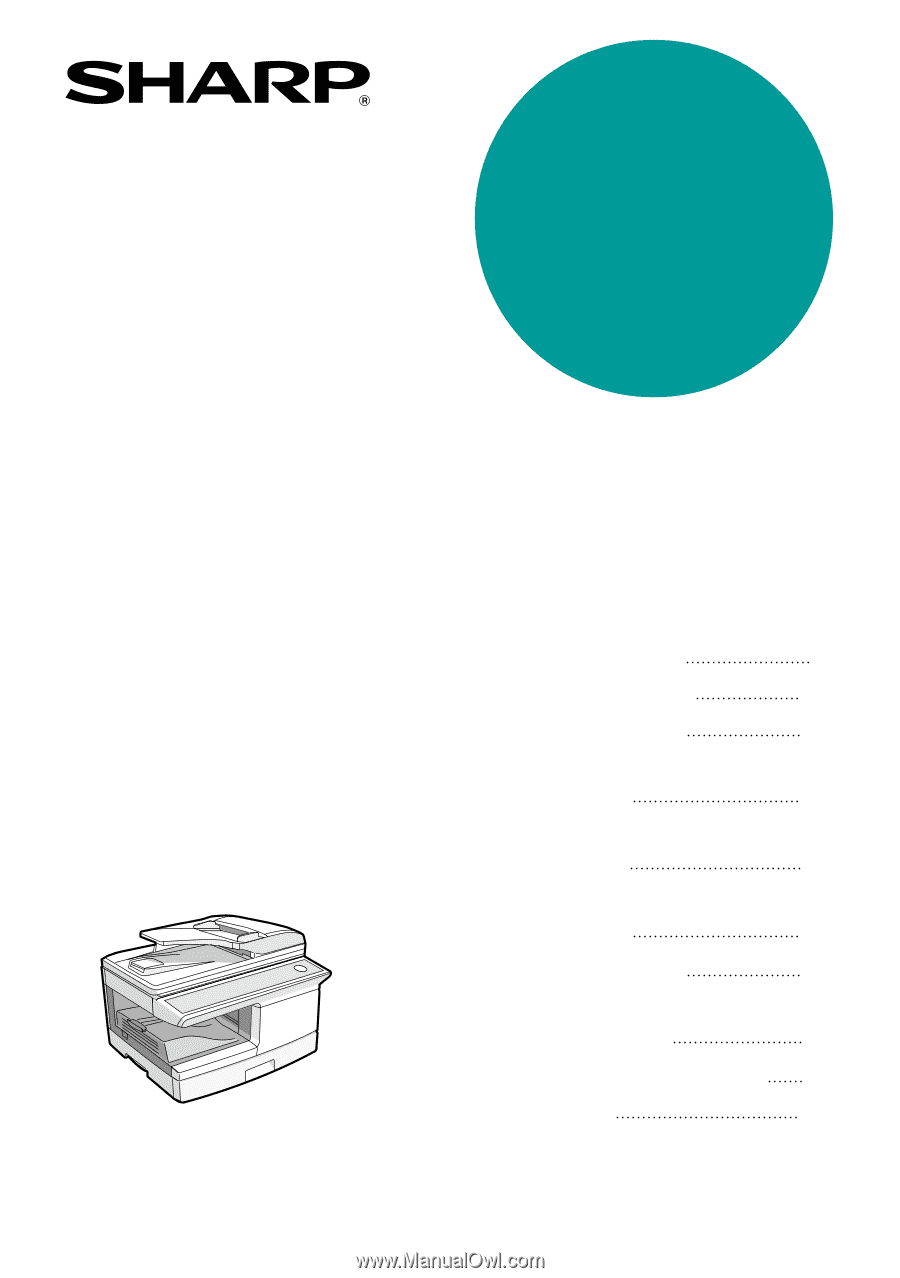
DIGITAL MULTIFUNCTIONAL
SYSTEM
OPERATION MANUAL
(for general information)
Page
PREPARATIONS
LOADING PAPER
MAKING COPIES
INSTALLING THE
SOFTWARE
PRINTER/SCANNER
FUNCTIONS
USER SETTINGS
TROUBLESHOOTING AND
MAINTENANCE
9
14
20
36
49
54
61
80
82
CONVENIENT COPY
FUNCTIONS
26
OPTIONAL EQUIPMENT
APPENDIX
AR-208S
AR-208D
MODEL
AR-208S/AR-208D