Sharp AR-F14 AR-F14 Saddle-Stitch Finisher Operation Manual - Page 10
Replacing The Staple Cartridge And Removing Staple Jams
 |
View all Sharp AR-F14 manuals
Add to My Manuals
Save this manual to your list of manuals |
Page 10 highlights
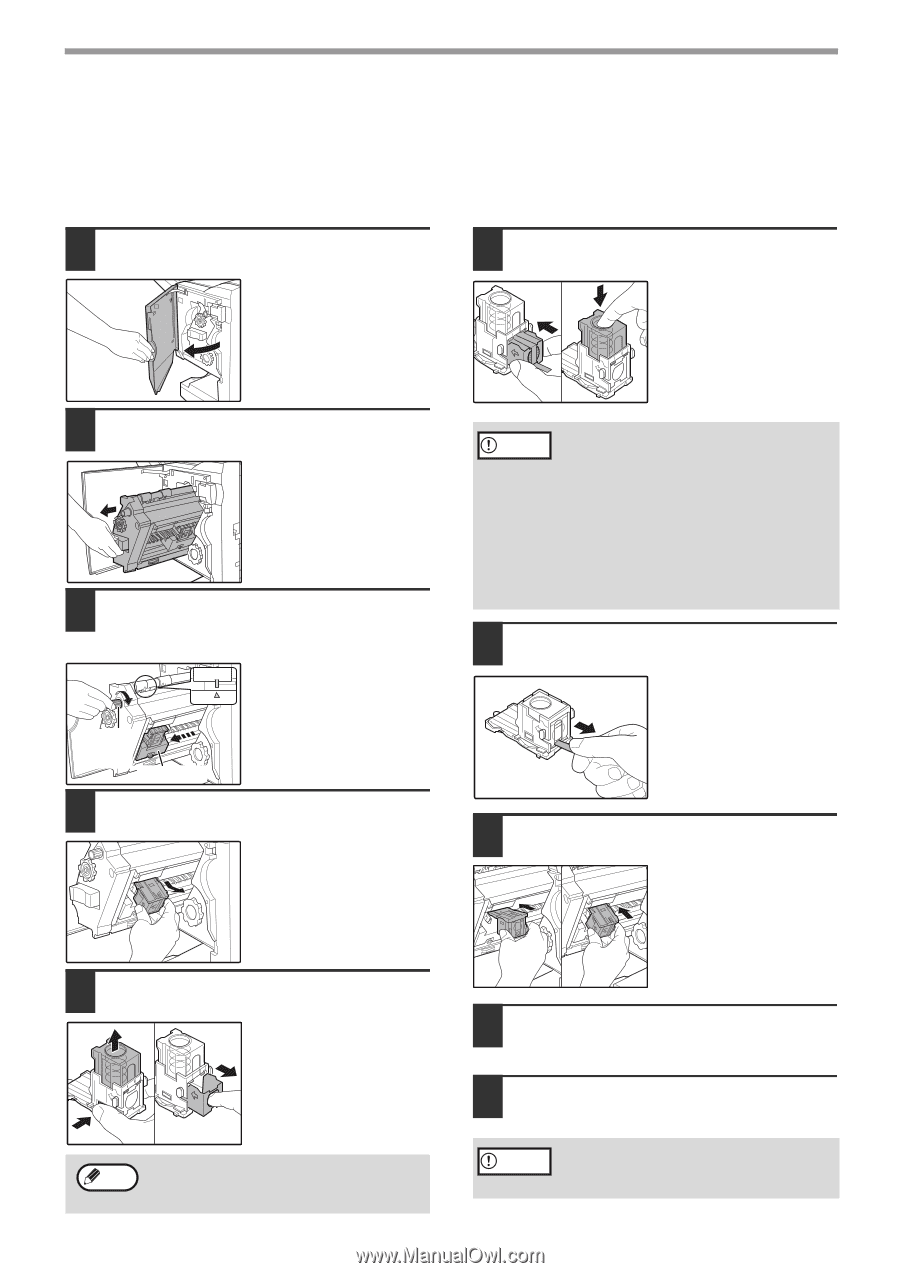
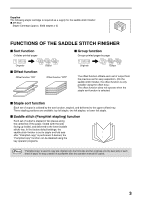
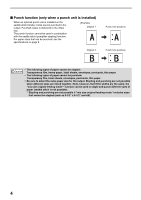
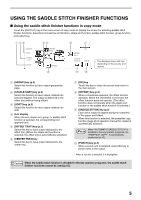
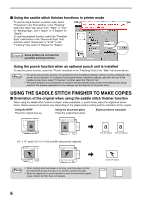
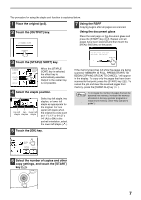
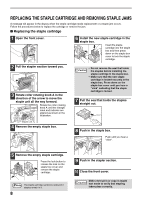
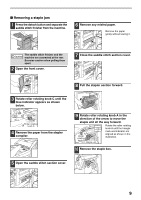
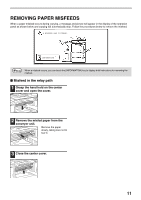
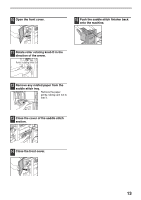
REPLACING THE STAPLE CARTRIDGE AND REMOVING STAPLE JAMS A message will appear in the display when the staple cartridge needs replacement or a staple jam occurs. Follow the procedures below to replace the cartridge or remove the jam. I Replacing the staple cartridge 1 Open the front cover. 6 Install the new staple cartridge in the staple box. Insert the staple cartridge into the staple box and then press down on the staple box cover to lock the staple cartridge. 2 Pull the stapler section toward you. 3 Rotate roller rotating knob A in the direction of the arrow to move the staple unit all the way forward. Roller rotating knob A Staple unit Rotate the roller rotating knob A until the triangle mark and indicator are aligned as shown in the illustration. 4 Remove the empty staple box. Caution • Do not remove the seal that holds the staples before installing the staple cartridge in the staple box. • Make sure that the new staple cartridge is locked securely in the staple box. Press down on the staple box cover until you hear a "click" indicating that the staple cartridge is locked. 7 Pull the seal that holds the staples straight out. 8 Push in the staple box. Push until you hear a "click". 5 Remove the empty staple cartridge. Press the lock button to release the lock on the staple box cover and remove the staple cartridge. Note The staple cartridge cannot be removed if staples remain in it. 8 9 Push in the stapler section. 10 Close the front cover. Make a test print or copy in staple Caution sort mode to verify that stapling takes place correctly.
-
 1
1 -
2
-
3
-
4
-
 5
5 -
 6
6 -
 7
7 -
 8
8 -
 9
9 -
 10
10 -
 11
11 -
 12
12 -
 13
13 -
 14
14 -
 15
15 -
16
-
17
-
18
 |
 |