Sharp AR-F14 AR-F14 Saddle-Stitch Finisher Operation Manual - Page 9
Touch the [STAPLE SORT] key.
 |
View all Sharp AR-F14 manuals
Add to My Manuals
Save this manual to your list of manuals |
Page 9 highlights
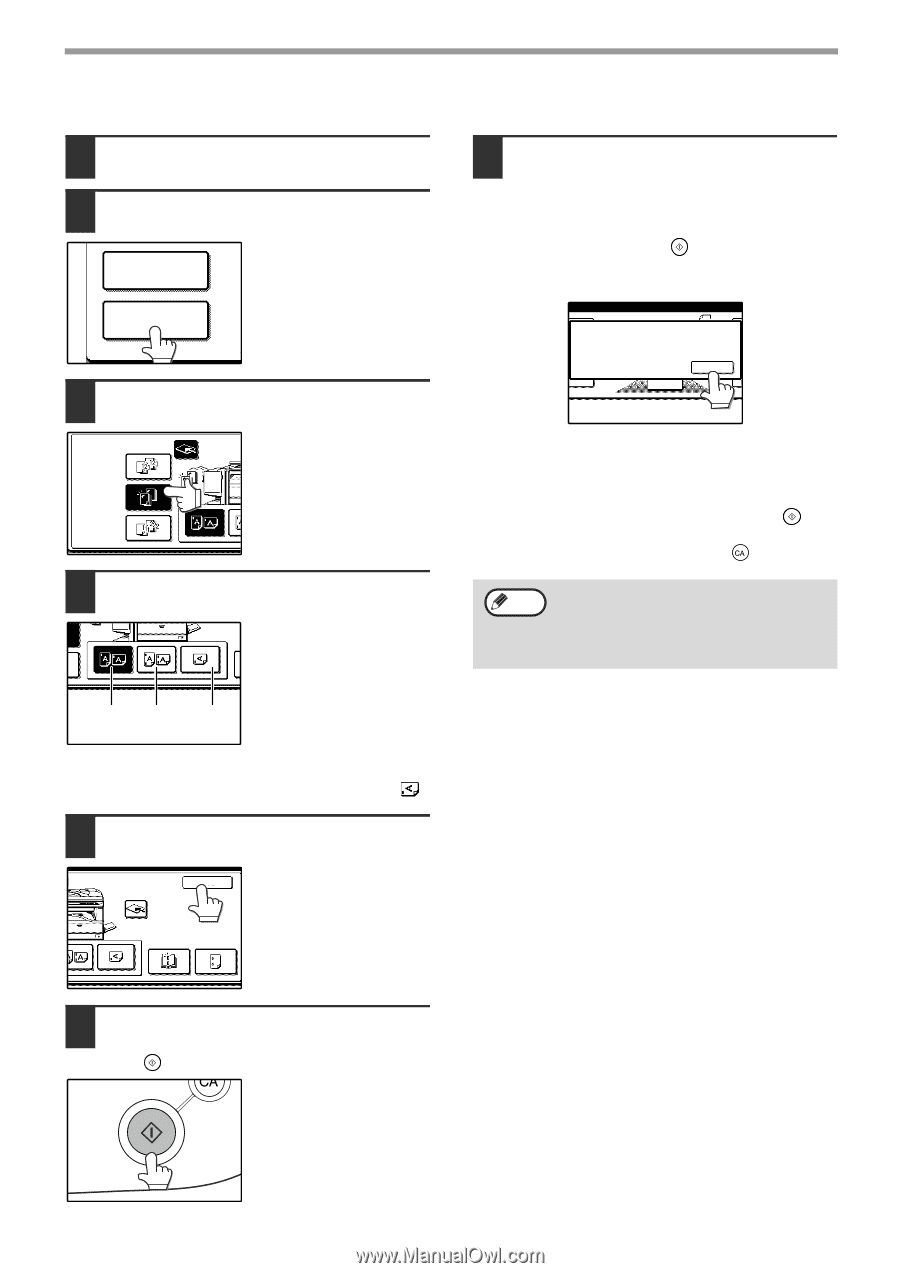
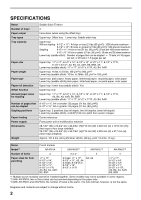
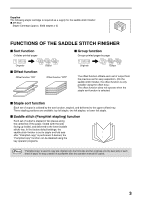
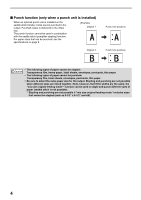
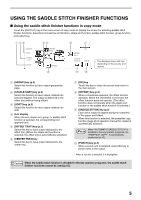
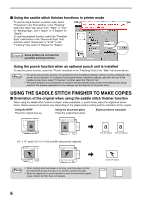
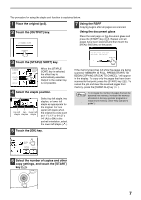
The procedure for using the staple sort function is explained below. 1 Place the original (p.6). 2 Touch the [OUTPUT] key. 2-SIDED COPY 7 Using the RSPF Copying begins after all pages are scanned. 8 Using the document glass Place the next page on the document glass and press the [START] key ( ). Repeat until all pages have been scanned and then touch the [READ END] key on the panel. OUTPUT 3 Touch the [STAPLE SORT] key. PLACE NEXT ORIGINAL. PRESS [START]. WHEN FINISHED, PRESS [READ-END]. READ-END OUTPUT SORT STAPLE SORT GROUP OFFSET TRAY When the [STAPLE SORT] key is selected, the offset tray is automatically selected. Output to the center tray is not possible. 4 Select the staple position. top left two lower left staple staples staple Select top left staple, two staples, or lower left staple as appropriate for the original. For one upper left staple when the original is a size such as 11" x 17" or 8-1/2" x 14" (A3 or B4) in the portrait orientation, select the lower left staple ( ). 5 Touch the [OK] key. If the memory becomes full while the pages are being scanned, "MEMORY IS FULL. PRESS [START] TO BEGIN COPYING OR [CA] TO CANCEL." will appear in the display. To copy only the pages that have been scanned to that point, press the [START] key ( ). To cancel the job and clear the scanned pages from memory, press the [CLEAR ALL] key ( ). Note To increase the number of pages that can be scanned into memory, increase the memory allocation in the key operator programs or install more memory. (See "Key operator's guide".) CENTER TRAY SADDLE STITCH OK PUNCH 6 Select the number of copies and other copy settings, and touch the [START] key ( ). 7
-
 1
1 -
2
-
3
-
 4
4 -
 5
5 -
 6
6 -
 7
7 -
 8
8 -
 9
9 -
 10
10 -
 11
11 -
 12
12 -
 13
13 -
 14
14 -
15
-
16
-
17
-
18
 |
 |