Sharp AR-F14 AR-F14 Saddle-Stitch Finisher Operation Manual - Page 8
Using The Saddle Stitch Finisher To Make Copies
 |
View all Sharp AR-F14 manuals
Add to My Manuals
Save this manual to your list of manuals |
Page 8 highlights
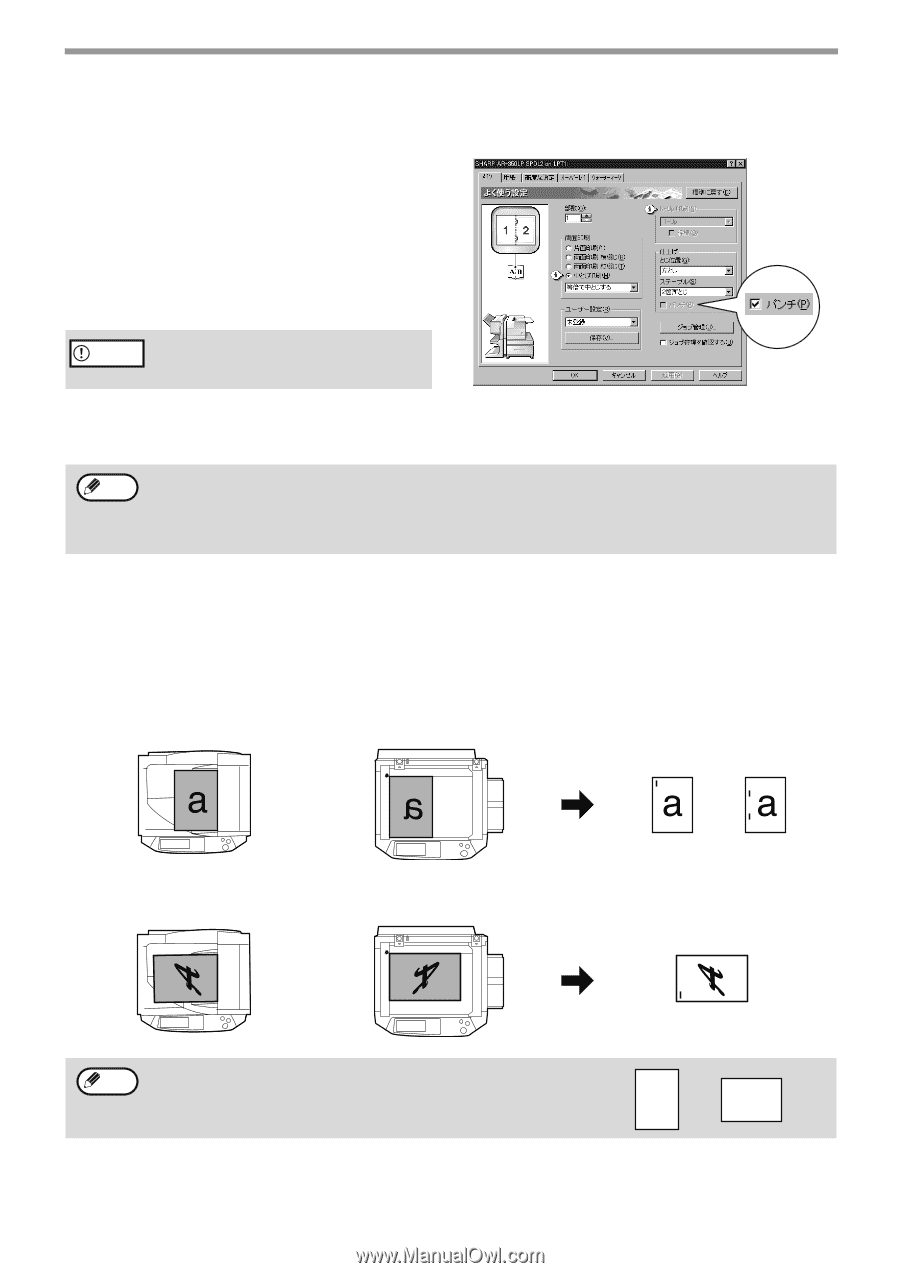
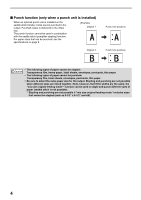
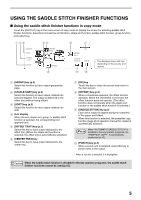
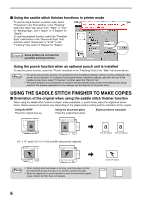
I Using the saddle stitch finisher functions in printer mode To use the staple function in printer mode, select "Properties" in the Print window. In the "Finishing" field of the "Main" tab, select "Left", "Right", or "Top " for "Binding Edge", and "1 Staple" or "2 Staples" for "Staple". To use the pamphlet function, select the "Pamphlet Style" radio button in the "Document Style" field and then select "Actual size" or "2-UP". In the "Finishing" field, select "2 Staples" for "Staple". PCL printer driver on the Windows XP as an example I will change this screen to the correct English screen in the final proof. Caution Some printers do not have the pamphlet printing function. Using the punch function when an optional punch unit is installed To use the punch function, select the "Punch" checkbox in the "Finishing" field of the "Main" tab shown above. Note • To use the above printer function, the peripheral device installation settings must be correctly configured in the printer driver properties. To configure the peripheral device installation settings, right-click the icon of the installed printer driver, select "Properties", and then select the "Options" tab. • The paper selection and combination of functions already selected may prevent some settings from being selected. For detailed explanations of the settings, see the Help file for the printer driver. USING THE SADDLE STITCH FINISHER TO MAKE COPIES I Orientation of the original when using the saddle stitch finisher function When using the saddle stitch finisher to staple, make pamphlets, or punch holes, place the original as shown below. Staple and punch positions vary depending on the staple position setting and the orientation of the original. Using the RSPF Place the original face up. Using the document glass Place the original face down. Staple positions (example) (11" x 17" and 8-1/2" x 14" (A3 and B4) size portrait originals) Top left staple Two left staples Note • When loading letterhead paper in the tray, orient the paper so that the letterhead is away from you or to the left, as shown at right. • When the staple sort or punch function is used, the automatic original image rotation function does not operate. lower left staple SHARP SHARP 6
-
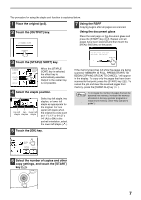
 1
1 -
2
-
 3
3 -
 4
4 -
 5
5 -
 6
6 -
 7
7 -
 8
8 -
 9
9 -
 10
10 -
 11
11 -
 12
12 -
 13
13 -
14
-
15
-
16
-
17
-
18
 |
 |