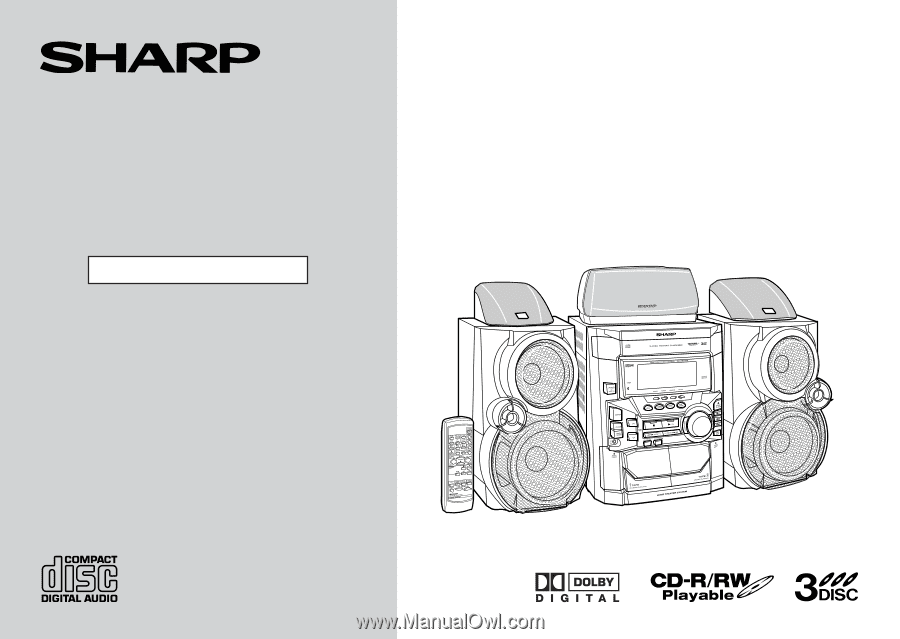
Sharp CD-DD4500 CDDD4500 Operation Manual
Sharp CD-DD4500 Manual
 |
View all Sharp CD-DD4500 manuals
Add to My Manuals
Save this manual to your list of manuals |
Sharp CD-DD4500 manual content summary:
- Sharp CD-DD4500 | CDDD4500 Operation Manual - Page 1
MINI COMPONENT SYSTEM MODEL CD-DD4500 Thank you for purchasing this SHARP product. To obtain the best performance from this product, please read this manual carefully. It will guide you in operating your SHARP product. CD-DD4500 Mini Component System consisting of CD-DD4500 (main unit), CP-DD4500 ( - Sharp CD-DD4500 | CDDD4500 Operation Manual - Page 2
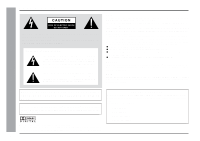
Instruction - Special Notes - CAUTION: TO REDUCE THE RISK OF ELECTRIC SHOCK, DO NOT REMOVE COVER (OR BACK). NO USER-SERVICEABLE PARTS INSIDE. REFER SERVICING TO QUALIFIED SERVICE turning the equipment off and on, the user user's authority to operate this equipment. NOTE It is the intent of Sharp Model - Sharp CD-DD4500 | CDDD4500 Operation Manual - Page 3
NATIONAL ELECTRICAL CODE ANTENNA LEAD IN WIRE G R O U N D CLAMP ELECTRIC SERVICE EQUIPMENT NEC - NATIONAL ELECTRICAL CODE S2898A ANTENNA DISCHARGE UNIT (NEC SECTION 810-20) GROUNDING CONDUCTORS (NEC SECTION 810-21) GROUND CLAMPS POWER SERVICE GROUNDING ELECTRODE SYSTEM (NEC ART 250, PART H) 13 - Sharp CD-DD4500 | CDDD4500 Operation Manual - Page 4
35 Advanced Features Timer and Sleep Operation 36, 37 Enhancing Your System 38, 39 References Troubleshooting Chart 40 - 42 Maintenance 43 Specifications 44, 45 CONSUMER LIMITED WARRANTY Back cover Accessories Please confirm that the following accessories are included. Remote control - Sharp CD-DD4500 | CDDD4500 Operation Manual - Page 5
CD-DD4500 dust, humidity and electronic/electrical equipment (home computers, facsimiles, etc.) which generates the AC power cord back in, and then turn on your system. In case of an electrical storm, unplug . Refer internal service to your local SHARP service facility. This unit should only be used within the - Sharp CD-DD4500 | CDDD4500 Operation Manual - Page 6
Description of remote control (See page 8.) Front panel Reference page 01. Disc Tray 18 02. Surround Effect Buttons 29, 30 03. Timer Set Indicator 37 Tuning and Time Up Button 17, 22, 36 14. CD or Tape Stop Button (with Indicator 19, 24 15. CD Button 18, 26 16. Tuner (Band) Button 22 - Sharp CD-DD4500 | CDDD4500 Operation Manual - Page 7
7 8 CD-DD4500 General Information Stereo Mode Indicator 15. Sleep Indicator 16. Dolby Pro Logic Indicator 17. Memory Indicator 18. CD Random Play Indicator 19. CD Play Indicator 20. CD Pause Indicator 21. Tape Play Indicator 22. CD Music Schedule Indicators 23. Timer Recording Indicator 24. Timer - Sharp CD-DD4500 | CDDD4500 Operation Manual - Page 8
D8 18 9 19 10 20 11 21 12 22 23 24 25 13 26 14 27 8 Battery installation for remote control (See page 14.) Remote control Reference page 01. Remote Control Transmitter 02. CD Memory Button 03. Set Up Menu Select Buttons 31 - 34 04. Menu Button 31 - 34 05. Item Button 31 - Sharp CD-DD4500 | CDDD4500 Operation Manual - Page 9
Speaker system Front speaker (left) 1 4 2 5 6 3 Front speaker (right) 1 2 3 01. Woofer 02. Tweeter 03. Subwoofer 04. Full-Range Speaker 02. Speaker Wire Surround speaker 4 1 5 6 2 1 01. Full-Range Speaker 02. Speaker Wire CD-DD4500 2 2 9 General Information - Controls and Indicators - - Sharp CD-DD4500 | CDDD4500 Operation Manual - Page 10
System Connections Surround speaker (right) FM antenna Center speaker AM loop antenna Surround speaker (left) Preparation for Use - System Connections - Front speaker (left) Front speaker (right) AC outlet (AC 120 V, 60 Hz) 10 - Sharp CD-DD4500 | CDDD4500 Operation Manual - Page 11
continued) CD-DD4500 Speaker /AM loop antenna connection Connect the FM/AM loop antenna to the ANTENNA jack. Preparation for Use - System Connections - connect the attached FM antenna to an external FM antenna. Otherwise, trouble may occur. Installing the AM loop antenna: < Assembling > Center - Sharp CD-DD4500 | CDDD4500 Operation Manual - Page 12
are installed vertically, the speaker badge will be upside down. In this case, you can adjust the badge to face the proper direction. Just turn it by hand. Front left Center Front right Badge Note: The front speakers and center speaker are magnetically shielded. Therefore, they may be placed - Sharp CD-DD4500 | CDDD4500 Operation Manual - Page 13
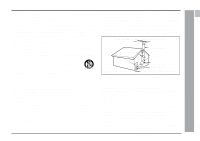
CD-DD4500 Preparation for Use - Speakers - To install the surround speakers on the wall Sharp illustration. Make sure that both the screw and the wall can support a load of 45 lbs. (20 kg). Drive the screws surface Min. 11/16" (17 mm) Bi-amp system: Each speaker unit has a built-in subwoofer (low - Sharp CD-DD4500 | CDDD4500 Operation Manual - Page 14
power turn on? Now, you can enjoy the music. Remote sensor Preparation for Use - Remote Control remote control and the sensor on the unit with a soft cloth. Exposing the sensor on the unit to strong light may interfere with operation. Change the lighting or the direction of the unit. Keep the remote - Sharp CD-DD4500 | CDDD4500 Operation Manual - Page 15
General Control CD-DD4500 Demonstration mode The first time the unit is plugged, the unit will enter the on, the X-BASS/DEMO button can be used to select the extra bass mode. To turn the power on Press the POWER button to turn the power on. To set the unit to stand-by mode: Press the POWER button - Sharp CD-DD4500 | CDDD4500 Operation Manual - Page 16
Sound Control - Sound Control 16 Volume control Main unit operation: When the VOLUME control is turned clockwise, the volume will increase. When it is turned counterclockwise, the volume will decrease. Remote control operation: Press the VOLUME UP button to increase the volume and the VOLUME DOWN - Sharp CD-DD4500 | CDDD4500 Operation Manual - Page 17
Setting the Clock CD-DD4500 4 Press the TUNING/TIME (X or W) button to adjust the hour and this example, the clock is set for the 12-hour (AM 12:00) display. 1 Press the POWER button to turn the power on. 2 Press the CLOCK button and within 5 seconds, press the MEMORY/SET button. 3 Press the TUNING - Sharp CD-DD4500 | CDDD4500 Operation Manual - Page 18
Listening to a CD (CDs) This system can play audio CD-R and CD-RW discs just as CD discs, but cannot perform recording. 1 Press the POWER button to turn the power on. 2 Press the CD button. 3 Press the 7 OPEN/CLOSE button to open the disc tray. 4 Place the CD(s) on the disc tray, label side up. - Sharp CD-DD4500 | CDDD4500 Operation Manual - Page 19
CD playback (continued) CD-DD4500 CD Playback - Listening to a CD (CDs The 5/3 PRESET X or W PRESET 2/4 button on the remote control allows you to locate the beginning of a track. To -by mode and then turn the power on again. If TV or radio interference occurs during CD operation, move the unit - Sharp CD-DD4500 | CDDD4500 Operation Manual - Page 20
Play The tracks on the disc(s) can be played in random order automatically. Press the RANDOM button on the remote control to begin random play. To stop playback: Press the s (CD s) button. Notes: When the DISC SKIP button is pressed during playback, playback will begin automatically from the next - Sharp CD-DD4500 | CDDD4500 Operation Manual - Page 21
Programmed Play CD-DD4500 By specifying discs from 1 to 3, and tracks from 1 to 99, you disc number To clear the programmed selections: While in the stop mode, press the CLEAR button on the remote control. Each time the button is pressed, one track will be cleared, beginning with the last track - Sharp CD-DD4500 | CDDD4500 Operation Manual - Page 22
Press the POWER button to turn the power on. 2 Press tune in to the desired station. Manual tuning: Press the TUNING/TIME stereo transmission: Press the TUNER (BAND) button so that the "ST" indicator lights up. "j" will appear when an FM broadcast is in stereo. FM stereo mode indicator FM stereo - Sharp CD-DD4500 | CDDD4500 Operation Manual - Page 23
Radio - Listening to the Memorized Station - Listening to the Memorized Station CD-DD4500 Memorizing a station You can store 40 AM and FM stations in memory and recall them at the push of a button. (Preset tuning) 1 Perform the steps 1 - 3 - Sharp CD-DD4500 | CDDD4500 Operation Manual - Page 24
compartment, tighten the slack with a pen or pencil. Playback is possible in TAPE 1 compartment as well as in TAPE 2. 1 Press the POWER button to turn the power on. 2 Open the cassette door by pushing the area marked "7 PUSH EJECT". Tape Playback - Listening to a Cassette Tape (TAPE 1 or TAPE - Sharp CD-DD4500 | CDDD4500 Operation Manual - Page 25
CD-DD4500 Before recording: q When recording important selections, make a preliminary test to ensure that the desired material is properly recorded. q SHARP a whistling noise while recording an AM station, move the AM loop antenna. Erase-prevention tab of cassette tapes: q When recording on a - Sharp CD-DD4500 | CDDD4500 Operation Manual - Page 26
Tape Recording - Recording from a CD (CDs) - Recording from a CD (CDs) 26 Programmed Play (See page 21.) You can record 3 CDs continuously. 1 Press the POWER button to turn the power on. 2 Load a cassette into the TAPE 2 cassette compartment with the side to be recorded on facing you. Wind past - Sharp CD-DD4500 | CDDD4500 Operation Manual - Page 27
Dubbing from Tape to Tape CD-DD4500 You can record from TAPE 1 to TAPE 2. For recording, use only normal tapes. Do not use metal and CrO2 tapes. 1 Press the POWER button to turn the power on. 2 Load a prerecorded cassette into the TAPE 1 cassette compart- ment. Insert a blank tape into the TAPE 2 - Sharp CD-DD4500 | CDDD4500 Operation Manual - Page 28
+ center Front (L, R) + center + surround (monaural) Front (L, R) + center + surround (L, R) If a low frequency sound effect (Low Frequency Effect) contains a Dolby digital signal, "LFE" will light in the display. When this "LFE" is lit, low frequency signals will be output from the subwoofer. 28 - Sharp CD-DD4500 | CDDD4500 Operation Manual - Page 29
Enjoy the Surround Sound CD-DD4500 Surround Operation - Enjoy the Surround Sound - Normal/Phantom/Bypass 3 Press the NORMAL, PHANTOM or BYPASS button to select the sur- round mode. NORMAL: For a stereo 2 channel input or a Dolby digital 2/0 input, sound will be output from the front left, front - Sharp CD-DD4500 | CDDD4500 Operation Manual - Page 30
seem as if surround speakers were being sent signals, even though they are not actually used. You can enjoy a three-dimensional surround stereo image using just the 2 front speakers. Virtual Dolby Surround : Indicates a virtual speaker. Front speaker (Left) Front speaker (Right) To listen to - Sharp CD-DD4500 | CDDD4500 Operation Manual - Page 31
Changing the Speaker Setting CD-DD4500 You can change the setting as you like. The Within 8 seconds, press the ITEM button to select "FRONT". Subwoofer: disappear disappear The front speaker indicators will light up. 3 Within 8 seconds, use the SET UP (W or X) button on the re- mote control to - Sharp CD-DD4500 | CDDD4500 Operation Manual - Page 32
on the re- mote control to select a value. Adjustable range CENTER: 0 ms - 5 ms SURROUND: 0 ms - 15 ms (Can be changed in 1 ms steps.) Notes: As a guide for setting the correct delay time, 1 ms is equal to approximately 12" (30 cm) from where the selected speakers are placed further away from the - Sharp CD-DD4500 | CDDD4500 Operation Manual - Page 33
of each speaker can be adjusted. 1 Press the MENU button repeatedly to select "SP LEVEL". CD-DD4500 Front speaker balance setting You can adjust the balance between the left and right channels of the front : In step 3, use the SET UP (W or X) button on the remote control to select "F-SP CEN". 33 - Sharp CD-DD4500 | CDDD4500 Operation Manual - Page 34
position in the room. The speaker level can be adjusted using the remote control. 1 Press the MENU button repeatedly to select "TEST". 2 range (sound volume range) than existing VHS videotapes or CD discs. If they are played in home systems, there may be too much difference between the loud and - Sharp CD-DD4500 | CDDD4500 Operation Manual - Page 35
Description of Terminology CD-DD4500 S Surround Operation - Description maker at home. Dolby Surround: This is the encoding/decoding system for general-purpose in the display. PCM (Pulse Code Modulation) This is a recording/transmission system used for digital audio signals. stereo recordings. 35 - Sharp CD-DD4500 | CDDD4500 Operation Manual - Page 36
2 cassette compartment. 1 Press the POWER button to turn the power on. 2 Press the CD, TUNER (BAND) or TAPE (1 V 2) button to select the desired function. To select the timer playback source: CD, TUNER (BAND) or TAPE (1 V 2). To select the timer recording source: TUNER (BAND). When you selected - Sharp CD-DD4500 | CDDD4500 Operation Manual - Page 37
the POWER button to turn the power on. 8 When the preset time is reached, playback or recording will start. The volume will increase gradually until it reaches the volume you were listening at before your system enters the timer stand-by mode. 9 In timer playback: If you select CD or TAPE, the unit - Sharp CD-DD4500 | CDDD4500 Operation Manual - Page 38
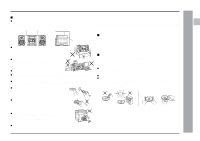
Enhancing Your System Cords required to connect an external unit When external units are connected, commercially available cords are needed. DVD player To the line output jack RCA cord (not supplied) TV VCR etc. Advanced Features - Enhancing Your System - Speaker with a built-in amplifier 38 - Sharp CD-DD4500 | CDDD4500 Operation Manual - Page 39
Enhancing Your System (Continued) CD-DD4500 To record on a tape from DVD or VCR etc. 1 Load a cassette be sure to set the unit in the "DOLBY DIGITAL" mode. For more details, see the operation manual for your DVD player. Note: No sound is heard from the external subwoofer when in the Bypass/Virtual - Sharp CD-DD4500 | CDDD4500 Operation Manual - Page 40
Troubleshooting Chart - Troubleshooting Chart Many potential "problems" can be resolved by the owner without calling a service technician. If something is wrong with this product, check the following before calling your authorized SHARP dealer or service The TIMER and then turn it back CD player - Sharp CD-DD4500 | CDDD4500 Operation Manual - Page 41
Troubleshooting Chart (continued) CD-DD4500 s Remote control Symptom q The remote control does not operate. Possible cause q Is the AC power cord of the unit plugged in? q Is the battery polarity respected? q Are the batteries dead? q Is the distance or angle incorrect? q Does the remote control - Sharp CD-DD4500 | CDDD4500 Operation Manual - Page 42
operation will erase all data stored in memory including clock, timer settings, tuner preset, CD program, and other set-up details. When TIMER indicator is flashing The unit will be overheated when TIMER indicator is flashing. Due to a problem in the speaker circuit, the unit will enter the stand - Sharp CD-DD4500 | CDDD4500 Operation Manual - Page 43
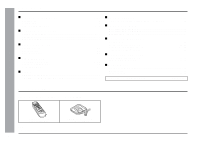
Maintenance CD-DD4500 Cleaning the tape-handling parts Dirty heads, capstans or pinch rollers can cause poor sound and tape jams. Clean these parts with . Read the demagnetizer's instructions carefully before use. In order to ensure proper operation of the CD player, preventative maintenance ( - Sharp CD-DD4500 | CDDD4500 Operation Manual - Page 44
- Specifications - Specifications As part of our policy of continuous improvement, SHARP reserves the right to make ; 32 ohms) DVD (Digital) : Optical VCR/Auxiliary : 500 mV/47 kohms CD player Type Signal readout D/A converter Frequency response Dynamic range 3-disc multi-play compact disc - Sharp CD-DD4500 | CDDD4500 Operation Manual - Page 45
input power Impedance Dimensions Weight Full range, 4" (100 mm) 40 W 8 ohms Width: 7- 7/8" (200 mm) Height: 6- 3/4" (172 mm) Depth: 3- 3/4" (95 mm) 1.3 lbs. (0.6 kg)/each References - Specifications - CD-DD4500 45 - Sharp CD-DD4500 | CDDD4500 Operation Manual - Page 46
MEMO - Sharp CD-DD4500 | CDDD4500 Operation Manual - Page 47
MEMO - Sharp CD-DD4500 | CDDD4500 Operation Manual - Page 48
or otherwise. In no event shall Sharp be liable, or in any way Model Specific Section Your Product Model Number & Description: CD-DD4500 Mini Component System (Be sure to have this information available when you need service for your Product.) Warranty Period for this Product: One (1) year parts
-
 1
1 -
 2
2 -
 3
3 -
 4
4 -
 5
5 -
 6
6 -
 7
7 -
8
-
9
-
10
-
11
-
12
-
13
-
14
-
15
-
16
-
17
-
18
-
19
-
20
-
21
-
22
-
23
-
24
-
25
-
26
-
27
-
28
-
29
-
30
-
31
-
32
-
33
-
34
-
35
-
36
-
37
-
38
-
39
-
40
-
41
-
42
-
43
-
44
-
45
-
46
-
47
-
48
 |
 |
Thank you for purchasing this SHARP product.
To obtain the best performance from this product, please read this
manual carefully. It will guide you in operating your SHARP product.
CD-DD4500 Mini Component System consisting of CD-DD4500 (main unit),
CP-DD4500 (Front), center (GBOXS0064AWM1), surround (R)
(GBOXS2008AWM1) and surround (L) (GBOXS4008AWM1) speaker sys-
tem.
MINI COMPONENT SYSTEM
MODEL
CD-DD4500
OPERATION MANUAL