Sharp DV-RW350U Operation Manual
Sharp DV-RW350U Manual
 |
View all Sharp DV-RW350U manuals
Add to My Manuals
Save this manual to your list of manuals |
Sharp DV-RW350U manual content summary:
- Sharp DV-RW350U | Operation Manual - Page 1
Getting started Recording VCR/DVD RECORDER COMBINATION DV-RW340U DV-RW350U OPERATION MANUAL Please read this Operation Manual carefully before using your VCR/DVD RECORDER COMBINATION. INSTRUCCIONES EN ESPAÑOL INCLUIDAS. 1 The region number for this unit is 1. Playing discs Editing Changing - Sharp DV-RW350U | Operation Manual - Page 2
reference, record the SERVICEABLE PARTS INSIDE. REFER SERVICING TO QUALIFIED SERVICE PERSONNEL. This symbol warns the user of uninsulated voltage within the unit that can cause dangerous electric shocks. This symbol alerts the user that there are important operating and maintenance instructions - Sharp DV-RW350U | Operation Manual - Page 3
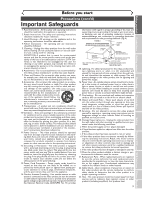
Recording Precautions (cont'd) Important Safeguards Playing discs 1. Read Instructions - All the safety and operating instructions should be read before the appliance is operated. 2. Retain Instructions- The safety and operating instructions supporting Servicing - Do not attempt to service - Sharp DV-RW350U | Operation Manual - Page 4
a qualified dealer or service centre approved by SHARP. Nonuse Periods Location supports Macrovision copy protection. On DVD discs that include a copy protection code, if the contents of the DVD disc scan picture problems, it is inside this unit, it may not operate properly or damage the videotape. In - Sharp DV-RW350U | Operation Manual - Page 5
you refer to the relevant sections and to Troubleshooting on pages 97-100, the laser optical pickup unit may be dirty. Consult a Sharp Authorized Service Center for inspection and cleaning of the laser optical pickup unit. DISC HANDLING ¡Handle the discs so that fingerprints and dust do not adhere - Sharp DV-RW350U | Operation Manual - Page 6
Before you start 2 Precautions 2 Table of contents 6 Features 7 Functional overview 8 Installing batteries in the remote control 10 Using a remote control 10 The VCR/DVD recorder Switching 10 SETUP/DISC/CD menu 11 DISPLAY menu 12 Connections 14 Connection to a TV 14 Connection to a cable - Sharp DV-RW350U | Operation Manual - Page 7
in this operation manual Many functions of this unit are depending on the disc type or the recording mode. To specify for what disc type or recording mode each function is, we put the following symbols at the beginning of each item to operate. Symbol DVD-V Video DVD-RW VR DVD-RW DVD-R Video DVD+RW - Sharp DV-RW350U | Operation Manual - Page 8
to stop the proceeding timer recording in DVD. 13. OUTPUT SELECT button (DVD/VCR) Press to select the component you wish to operate. 14. DUBBING button (DVD/VCR) Press to start VCR to DVD (DVD to VCR) duplication which you set in the SETUP menu. 15. CHANNEL L / K button (DVD/VCR) Press to change the - Sharp DV-RW350U | Operation Manual - Page 9
Connections Getting started Recording Playing discs Functional overview (cont'd) Remote Control 1 2 3 4 5 6 7 8 10 9 11 12 13 POWER REC MODE REC SPEED AUDIO OPEN/CLOSE .@/: 1 GHI 4 PQRS 7 DISPLAY ABC 2 JKL 5 TUV 8 SPACE 0 VCR DEF 3 MNO CH 6 WXYZ VIDEO/TV 9 SLOW DVD PAUSE PLAY STOP - Sharp DV-RW350U | Operation Manual - Page 10
VCR/DVD recorder Switching Because this product is a combination of a VCR and a DVD recorder, you must select first which component you wish to operate with the OUTPUT SELECT button. VCR MODE Press the VCR button on the remote control. (Verify that the VCR indicator is lit.) DVD MODE Press the DVD - Sharp DV-RW350U | Operation Manual - Page 11
Before you start Connections Getting started Recording Before you start Functional overview (cont'd) Guide to Displays on screen menu This unit uses the following on screen menu for most operations: SETUP/DISC/CD menu, Title list, and DISPLAY menu.They allow you to change the playing status of - Sharp DV-RW350U | Operation Manual - Page 12
on the playing disc. Some operations are available while disc is playing. Details are on page 43. 4 1 1 5 1 00:00:00 DVD-RW Video mode 2 SP 1:25 Rem. CH 1 3 STEREO 1. Indicates a disc type and a format mode. Note: In some descriptions on this manual, only one disc type is indicated - Sharp DV-RW350U | Operation Manual - Page 13
when the timer recording is proceeding in DVD. Appears when DVD is in the timer recording standby mode. : Appears when a DVD-R disc is inserted in the disc tray. : Appears when a DVDRW disc is inserted in the disc tray. : Appears when the timer recording is proceeding in VCR. Appears when VCR is in - Sharp DV-RW350U | Operation Manual - Page 14
DVD/VCR AUDIO IN AUDIO OUT ANTENNA IN L L R R VIDEO IN VIDEO OUT OUT DVD/VCR AUDIO OUT L R DVD DIGITAL AUDIO AUDIO OUT OUT S-VIDEO COMPONENT VIDEO OUT Y L COAXIAL R PB/CB IN PR/CR OUT DVD/VCR the SETUP button on the remote control for more than 3 seconds during DVD playback, so that "P. - Sharp DV-RW350U | Operation Manual - Page 15
box Before you start Connections Getting started Recording Playing discs Connection A (Cable box or DVD/VCR Satellite box) ANTENNA IN IN OUT OUT ). • If noise appears on the TV screen, press VIDEO/TV button on the remote control. • If you use the channel 4, you will need to change this unit - Sharp DV-RW350U | Operation Manual - Page 16
to the operation manual accompanying external devices for more information. AUDIO Method 1 Stereo system Analog audio input jacks Method 2 Dolby Digital decoder, DTS decoder, MD deck or DAT deck COAXIAL Digital audio input jack This unit Audio cable (supplied) AUDIO OUT 16 DVD/VCR AUDIO OUT - Sharp DV-RW350U | Operation Manual - Page 17
GHI JKL MNO CH 3 Close the disc tray Loading This operation may take a while to be recognized. Playing discs Editing Changing the SETUP menu VCR functions Others Español DVD disc types . : Most suitable. : Can be used. You want to Record TV programs Reuse by deleting unwanted contents - Sharp DV-RW350U | Operation Manual - Page 18
is on that disc. • If you have recorded in VR mode on DVD-RW disc then editing is still permitted after finalizing. 18 Step 6: Stop the Record PQRS 7 DISPLAY TUV 8 SPACE 0 VCR WXYZ VIDEO/TV 9 SLOW DVD PAUSE PLAY STOP REC/OTR SETUP TIMER PROG. Writing to Disc 58% This operation may take - Sharp DV-RW350U | Operation Manual - Page 19
appear. Setup > Channel Preset VCR DVD Auto Preset Manual Preset TV Audio Select Stereo 3 Press SETUP button to display SETUP/DISC menu. SETUP/DISC menu will appear. Screen: SETUP menu VCR functions Others Español Editing Playing discs Before you start Connections Getting started Recording - Sharp DV-RW350U | Operation Manual - Page 20
3 GHI JKL MNO CH 4 5 6 1 Press SETUP button to display SETUP/DISC menu. SETUP/DISC menu will appear. Setup > Channel Preset > Manual Preset CH2 Add Delete PQRS 7 DISPLAY TUV 8 SPACE 0 VCR WXYZ VIDEO/TV 9 SLOW DVD PAUSE PLAY Screen: 1 STOP REC/OTR SETUP TIMER PROG. 5 7 REC MONITOR - Sharp DV-RW350U | Operation Manual - Page 21
. Channel Preset menu will appear. Setup > Channel Preset VCR DVD Auto Preset Manual Preset TV Audio Select Stereo 6 Press SETUP button to exit. Notes on TV channel audio • When you record a TV program available in second audio or stereo on a DVD-RW/R or videotape, you have to select either - Sharp DV-RW350U | Operation Manual - Page 22
recording. If a Public Broadcasting Station (PBS) is available in your area, follow Auto Clock Select "Auto Clock Setting" Setting below. If not, follow Manual "Manual" using K / L buttons, then press ENTER button. Setup > Clock Clock Setting Auto Clock Setting Daylight Saving Time VCR DVD Set - Sharp DV-RW350U | Operation Manual - Page 23
Recording Getting started Setting the clock (cont'd) Manual Clock Setting 1 Press SETUP button to display SETUP/DISC menu. SETUP/DISC menu will appear. Screen: 4 Select "Clock Setting" using K / L buttons, then press ENTER button. A clock setting window will appear. Setup > Clock VCR DVD - Sharp DV-RW350U | Operation Manual - Page 24
" as following steps. Repeat steps (1) to (3) in "Manual Clock Setting". 4 Select "Auto Clock Setting" using K / L buttons, then press ENTER button. Option window will appear. Setup > Clock Clock Setting Auto Clock Setting Daylight Saving Time VCR DVD OFF AAuuttoo OMfaf nual 5 Select "OFF" using - Sharp DV-RW350U | Operation Manual - Page 25
Before you start Connections Getting started Recording Getting started Setting the clock ( Setup > Clock VCR DVD 0 1 Clock Setting Auto Clock Setting Auto DISPLAY VCR DVD PAUSE Press SETUP button to dis- Daylight Saving Time ON OFF PLAY play SETUP/DISC menu. SETUP/DISC menu will appear - Sharp DV-RW350U | Operation Manual - Page 26
to dis- Setup > Playback TV Aspect Parental Lock Disc Menu Language DVD 4:3 L1e6tt:e9r BWoxide 4:3 P8an & Scan 16:9 EWnigdelish PQRS 7 DISPLAY TUV 8 SPACE 0 VCR WXYZ VIDEO/TV 9 SLOW DVD PAUSE play SETUP/DISC menu. SETUP/DISC menu will appear. Screen: Audio Language Subtitle Language Digital - Sharp DV-RW350U | Operation Manual - Page 27
, the unit will pause or stop automatically and an error message will be displayed on-screen. Video that is "copy-once only" can only be recorded using a DVD-RW disc in VR mode with CPRM (see below). When recording a TV broadcast or through an external input, you can display copy control information - Sharp DV-RW350U | Operation Manual - Page 28
for more detailed information.) • Discs recorded in video mode on this DVD recorder cannot record additionally using other DVD recorders. • A DVD-RW disc formatted with this unit cannot be used in other DVD recorders without any recording using this unit. • Since the recording is made by the - Sharp DV-RW350U | Operation Manual - Page 29
Recording DVD DVD-RW Recording Format Auto Chapter Timer Programming Dubbing Mode VVidRemo omdoede V1R0 mmionduetes VCR DVD Video mode DVD inserting a blank DVD+RW or DVD+R disc, the error message ("Disc Error") will appear.You cannot record on a DVD+RW/R. On this unit, DVD+RW and DVD+R are for - Sharp DV-RW350U | Operation Manual - Page 30
MNO CH 4 5 6 1 Press SETUP button to dis- Option window will appear. Disc PQRS 7 DISPLAY TUV 8 SPACE 0 VCR WXYZ VIDEO/TV 9 SLOW DVD PAUSE play SETUP/DISC menu. Edit Format SETUP/DISC menu will appear. Finalize PLAY Screen: Disc Protect OFF ON Yes No STOP REC/OTR SETUP TIMER PROG - Sharp DV-RW350U | Operation Manual - Page 31
STOP C button to stop the recording. This operation may take a while to be completed. When a DVD-R disc is loaded: DVD-R discs will always be in Video mode. 2 4 POWER REC MODE REC SPEED AUDIO OPEN/CLOSE .@/: 1 GHI 4 PQRS 7 DISPLAY ABC 2 JKL 5 TUV 8 SPACE 0 VCR DEF 3 MNO CH 6 WXYZ VIDEO - Sharp DV-RW350U | Operation Manual - Page 32
REC with a DVD disc to record inserted, press REC 1 MONITOR button. The TV program will be on the 2 screen in the recording picture quality with the recording speed you have selected. POWER REC MODE REC SPEED AUDIO OPEN/CLOSE .@/: 1 GHI 4 PQRS 7 DISPLAY ABC 2 JKL 5 TUV 8 SPACE 0 VCR DEF - Sharp DV-RW350U | Operation Manual - Page 33
CM SKIP This operation may take a while to be recognized. 2 Select a recording speed using REC MODE/REC SPEED button. Refer to "Recording speed" on page 27. 3 Make sure that the recording format is set to the desired mode. Refer to "Formatting a disc" on pages 29-30. When a DVD-RW disc is loaded - Sharp DV-RW350U | Operation Manual - Page 34
Video DVD-RW VR DVD-RW DVD-R VCR You can program the unit to record up to 8 programs, up to a year in advance. Daily or weekly program recordings are also available. • Be sure to set the clock before making a timer programming. • Insert a recordable disc or a videotape with a record tab. 1 Press - Sharp DV-RW350U | Operation Manual - Page 35
Programming Date JAN/12 - - - Start 10:00PM End CH DVD VCR Speed 10:30PM CH8 DVD • To record on to a videotape, select VCR. • To record on to a disc, select DVD. 10 Select a recording speed using K / L buttons. Setup > Recording > Timer Programming Date JAN/12 - - - Start 10:00PM End - Sharp DV-RW350U | Operation Manual - Page 36
and time both in DVD and VCR, the programming that has priority will be recorded. • During timer recording or timer standby ( indicator is on the front display), any operations on the unit will not be available.To make these operations available, cancel the timer recording or timer standby first - Sharp DV-RW350U | Operation Manual - Page 37
DVD-RW VR DVD-RW DVD-R VCR Connect the external source properly to the unit by using input jacks either LINE2 (Front) or LINE1 (Rear). When you record on a videotape, use either the DVD/VCR Rear of this unit 1. Press SETUP button to display SETUP/DISC menu. 2. Select "SETUP" using { / B buttons, - Sharp DV-RW350U | Operation Manual - Page 38
DVD-RW VR DVD-RW DVD-R VCR Before recording from an external source, see the instructions for the connection on page 37. 1. Turn the TV and the unit on, and be sure to select the input of the TV to which the unit is connected. DVD 2. When you want to record to the disc the remote control or the - Sharp DV-RW350U | Operation Manual - Page 39
a malfunction. Be advised to playback the videotape until the picture is stabilized, then set the starting point which you wish to start recording, and start VCR to DVD duplication. Playing discs Editing Changing the SETUP menu VCR functions Others Español Instructions continue on page 40. 39 - Sharp DV-RW350U | Operation Manual - Page 40
Press STOP C button on the unit or STOP C button on the remote control to stop the recording. 40 DVD to VCR 5-b Select "VCR ⇐ DVD" using K / L buttons, then press ENTER button. Setup > Recording VCR DVD DVD-RW Recording Format Auto Chapter Timer Programming Dubbing Mode Video mode OFF VVCCRR - Sharp DV-RW350U | Operation Manual - Page 41
you start Connections Getting started Recording Playing discs Video DVD-RW VR DVD-RW DVD-R You will need to finalize the discs recorded in Video mode to play in other DVD players. 1 Press SETUP button to display SETUP/DISC menu. SETUP/DISC menu will appear. Screen: Setup Menu 2 Select - Sharp DV-RW350U | Operation Manual - Page 42
then press ENTER button. Option window will appear. .@/: 1 GHI 4 PQRS 7 ABC 2 JKL 5 TUV 8 DEF 3 MNO 6 WXYZ 9 CH VIDEO/TV Disc Edit DISPLAY SPACE 0 VCR DVD SLOW PAUSE Format Finalize Disc Protect OFF ON Yes No PLAY STOP REC/OTR SETUP TIMER PROG. 1 REC MONITOR ENTER MENU/LIST TOP MENU - Sharp DV-RW350U | Operation Manual - Page 43
information on the playing disc. Some operations are available while disc is playing. 4 1 1 1 5 00:00:00 DVD-RW Video mode 2 SP 1:25 Rem. CH 1 3 STEREO 1. Indicates a disc type and a format mode. 2. Indicates a recording speed and possible recording time. 3. Indicates a current channel - Sharp DV-RW350U | Operation Manual - Page 44
ABC 2 JKL 5 TUV 8 SPACE 0 VCR DEF 3 MNO CH 6 WXYZ VIDEO/TV 9 SLOW DVD PAUSE 7 5 5 PLAY STOP REC/OTR SETUP TIMER PROG. REC MONITOR ENTER MENU/LIST TOP MENU RETURN CLEAR/C.RESET ZOOM SKIP SEARCH MODE CM SKIP SKIP 2 4 7 6 disc tray guide This operation may take a while to be - Sharp DV-RW350U | Operation Manual - Page 45
DVD-Video 4 5 6 PQRS TUV WXYZ VIDEO/TV disc, a menu may appear. Refer to pages 46-47 for details about a disc menu. 7 DISPLAY 8 SPACE 0 VCR 9 DVD SLOW "No Files" will be displayed. This unit recommends the files recorded under the following circumstances: • Sampling frequency: 44.1kHz or - Sharp DV-RW350U | Operation Manual - Page 46
option. Number buttons: Selects a numbered menu option (some discs only). Press ENTER button after. 2 POWER REC MODE REC SPEED AUDIO OPEN/CLOSE .@/: 1 GHI 4 PQRS 7 DISPLAY ABC 2 JKL 5 TUV 8 SPACE 0 VCR DEF 3 MNO CH 6 WXYZ VIDEO/TV 9 SLOW DVD PAUSE 1 2 3 PLAY STOP REC/OTR SETUP TIMER - Sharp DV-RW350U | Operation Manual - Page 47
Before you start Connections Getting started Recording Playing discs Basic playback (cont'd) Playing discs using the title menu DVD-V Some DVDs have a title menu, which lists the titles available on them. It helps you to start playback at a specific title. First: DVD 1 Press TOP MENU button. The - Sharp DV-RW350U | Operation Manual - Page 48
DISPLAY ABC 2 JKL 5 TUV 8 SPACE 0 VCR DEF 3 MNO CH 6 WXYZ VIDEO/TV 9 SLOW DVD PAUSE PLAY STOP REC/OTR SETUP TIMER PROG. REC " setting in the SETUP menu. Fast forward or fast reverse playback across titles (for DVD discs) or tracks (for MP3) is not possible. x40 g x20 g x5 g Normal - Sharp DV-RW350U | Operation Manual - Page 49
Recording Playing discs Special playback (cont'd) Skipping TV commercials during play Video DVD-RW VR DVD-RW DVD-R Video DVD+RW DVD+R You can skip TV commercials by pressing CM SKIP button, so that you can enjoy the recorded automatically. DISPLAY SPACE 0 VCR DVD SLOW PAUSE 1 PLAY STOP - Sharp DV-RW350U | Operation Manual - Page 50
Playing discs Special playback (cont'd) Step by step playback DVD-V Video DVD-RW VR DVD-RW DVD-R Video DVD+RW DVD+R 1 During playback, press frame. 3 Press PLAY B button to resume play. DISPLAY SPACE 0 VCR DVD SLOW PAUSE PLAY STOP REC/OTR SETUP TIMER PROG. REC MONITOR ENTER MENU - Sharp DV-RW350U | Operation Manual - Page 51
PQRS 7 DISPLAY ABC 2 JKL 5 TUV 8 SPACE 0 VCR DEF 3 MNO CH 6 WXYZ VIDEO/TV 9 SLOW DVD PAUSE PLAY STOP REC/OTR SETUP TIMER PROG. REC MONITOR ENTER when you operate these operations listed below. - Opening the disc tray. - Turning off the power. - Recording to a recordable disc. - Changing - Sharp DV-RW350U | Operation Manual - Page 52
Playing discs Title/Chapter search Search DVD-V Video DVD-RW VR DVD-RW DVD-R Video DVD+RW DVD+R Using SKIP H / G buttons GHI 4 PQRS 7 DISPLAY ABC 2 JKL 5 TUV 8 SPACE 0 VCR DEF 3 MNO CH 6 WXYZ VIDEO/TV 9 SLOW DVD PAUSE PLAY STOP REC/OTR SETUP TIMER PROG. REC MONITOR ENTER MENU/ - Sharp DV-RW350U | Operation Manual - Page 53
Before you start Connections Getting started Recording Track search Playing discs Search (cont'd) Playing discs CD MP3 Using SKIP H / G CLEAR/C.RESET ZOOM SKIP SEARCH MODE CM SKIP SKIP 1 1 DISPLAY SPACE 0 VCR DVD SLOW PAUSE PLAY STOP REC/OTR SETUP TIMER PROG. REC MONITOR ENTER MENU/ - Sharp DV-RW350U | Operation Manual - Page 54
CD MP3 With this function, you can play a disc randomly instead of playing it in the original order. First: DVD 1 Press SETUP button to display SETUP/CD menu playback of MP3 files. PQRS 7 DISPLAY TUV 8 SPACE 0 VCR WXYZ VIDEO/TV 9 SLOW DVD PAUSE 1 PLAY STOP REC/OTR SETUP TIMER PROG. REC MONITOR - Sharp DV-RW350U | Operation Manual - Page 55
Recording Program play Playing discs Repeat/Random/Program play (cont'd) CD You can program the disc to play in your desired order. 3 Select "Program Play" using POWER REC MODE REC SPEED AUDIO OPEN/CLOSE First: DVD start. Playing discs Editing Changing the SETUP menu VCR functions Others - Sharp DV-RW350U | Operation Manual - Page 56
VR Original .@/: 1 GHI 4 PQRS 7 ABC 2 JKL 5 TUV 8 SPACE 0 DEF 3 MNO CH 6 WXYZ VIDEO/TV 9 SLOW On DVD-RW discs recorded in VR mode, you can switch to main 1 DISPLAY VCR DVD PAUSE (L), sub audio (R) or a mix of PLAY both (L/R). 1 During playback, press DISPLAY button. The display menu - Sharp DV-RW350U | Operation Manual - Page 57
Before you start Connections Getting started Recording Playing discs Selecting the format of audio and SEARCH MODE CM SKIP SKIP 3 Playing discs Editing Changing the SETUP menu VCR functions Others Español Switching subtitles DVD-V VR DVD-RW Many DVD Video discs have subti- tles in one or - Sharp DV-RW350U | Operation Manual - Page 58
4 PQRS 7 DISPLAY ABC 2 JKL 5 TUV 8 SPACE 0 VCR DEF 3 MNO CH 6 WXYZ VIDEO/TV 9 SLOW DVD PAUSE 3 Select a desired option using K / L buttons, appear. This function reduces noise in the playback picture.When playing back discs recorded in long time mode such as SLP or SEP mode, select "Type - Sharp DV-RW350U | Operation Manual - Page 59
5:00AM 12 JAN/1 6:00AM 7 Note • Once a disc is finalized, editing the disc or recording to the disc will not be available. (Except DVD-RW discs in VR mode.) • A playlist is not available with the DVD-R discs and DVD-RW discs in Video mode. Disc > Edit > Original 1 Title Delete Scene Delete Edit - Sharp DV-RW350U | Operation Manual - Page 60
Editing Information on disc editing (cont'd) Editing discs in VR mode For discs in VR mode, you can edit from "Original" (Refer to page 82) Note • Original titles once edited will not remain as recorded originally.When you want to leave the original as it is, edit the playlist as you prefer. 60 - Sharp DV-RW350U | Operation Manual - Page 61
disc. When the last title in the title list in Video mode is deleted, the disc space to record will be increased. First: DVD Disc > Edit 1 Title Delete Edit Title Name Chapter Mark Yes No JAN/ 1 1:00AM CH12 XP Writing to Disc This operation may take a while to be completed. 6 After writing to disc - Sharp DV-RW350U | Operation Manual - Page 62
> Edit Title Name 1 A B C a b c 1 2 3 @ ! ? DISPLAY VCR DVD PAUSE 1 PLAY STOP REC/OTR SETUP TIMER PROG. then press ENTER button. DISC menu will appear. Disc Edit Format Finalize JAN/ 1 1:00AM CH12 XP 0:01:25 5 To enter a title name, follow the steps of "Guide to edit REC MONITOR ENTER - Sharp DV-RW350U | Operation Manual - Page 63
started Recording Editing Editing DVD-RW discs in Video mode (cont'd) 6 Select "Yes" using { / B buttons, then press ENTER button. The name you entered will be activated for the title. Disc > Edit > Edit Title Name 1 A B C a b c 1 2 3 @ ! ? abc Writing to Disc Yes No This operation may - Sharp DV-RW350U | Operation Manual - Page 64
1 Press SETUP button. Select "DISC" using { / B buttons, then press ENTER button. DISC menu will appear. Disc Disc > Edit 1 Title DeOleFtFe Edit Title5Nmaimnuetes Chapte1r0Mmarinkutes 15 minutes 30 minutes 60 minutes JAN/ 1 1:00AM CH12 XP 0:01:25 5 DISPLAY 0 VCR DVD PAUSE 1 7 PLAY STOP REC - Sharp DV-RW350U | Operation Manual - Page 65
Recording Editing Editing DVD-RW discs in VR mode (Original) Deleting titles VR DVD-RW When a title is deleted from an 4 original list in VR mode, the disc Disc This operation may take a while to be completed. 1 12 3 JAN/1 1:00AM JAN/1 2:00AM JAN/1 3:00AM 7 4 5 After writing to disc - Sharp DV-RW350U | Operation Manual - Page 66
Deleting parts of titles VR DVD-RW You can delete part of a title, the 4 disc space to record will be Select a desired WXYZ CH VIDEO/TV to the disc. 7 8 9 Disc > Edit > Original SPACE SLOW First: DVD 1 Title Delete Scene Delete DISPLAY 0 VCR DVD PAUSE Edit Title Name 1 Chapter - Sharp DV-RW350U | Operation Manual - Page 67
6 WXYZ VIDEO/TV 9 SLOW DVD PAUSE 1 PLAY STOP REC/OTR SETUP TIMER PROG. REC MONITOR ENTER MENU/LIST TOP MENU RETURN CLEAR/C.RESET ZOOM SKIP SEARCH MODE CM SKIP SKIP 1 2 Playing discs Editing Changing the SETUP menu VCR functions Others Español Instructions continue on page 68. 67 - Sharp DV-RW350U | Operation Manual - Page 68
Yes No This operation may take a while to be completed. 8 After writing to disc is completed, press SETUP button to exit DISC menu. JAN/ 1 1:00AM CH12 XP 0:01:25 6 POWER REC MODE REC SPEED AUDIO OPEN/CLOSE .@/: 1 GHI 4 PQRS 7 DISPLAY ABC 2 JKL 5 TUV 8 SPACE 0 VCR DEF 3 MNO CH 6 WXYZ - Sharp DV-RW350U | Operation Manual - Page 69
00AM JAN/1 5:00AM Disc > Edit > Original 1 Chapter 1/1 F Title Delete Scene Delete Edit Title Name ChapterAMdadrk Index PiDcteulreete Protect OFF ON Yes No JAN/ 1 1:00AM CH12 XP 0:01:25 Playing discs Editing Changing the SETUP menu VCR functions Others Español Instructions continue on page - Sharp DV-RW350U | Operation Manual - Page 70
Disc This operation may take a while to be completed. 8 After writing to disc is completed, press SETUP button to exit DISC menu. Setting pictures for thumbnails VR DVD ABC 2 JKL 5 TUV 8 SPACE 0 VCR DEF 3 MNO CH 6 WXYZ VIDEO/TV 9 SLOW DVD PAUSE 1 PLAY STOP REC/OTR SETUP TIMER PROG - Sharp DV-RW350U | Operation Manual - Page 71
Recording Editing Editing DVD-RW discs in VR mode (Original) (cont'd) 3 Select "Original" using { / B buttons, then press ENTER button. Original list will appear. Disc . Original menu will appear. This operation may take a while to be completed. 7 After writing to disc is com- 7 5 PLAY STOP - Sharp DV-RW350U | Operation Manual - Page 72
then press ENTER button. DISPLAY SPACE 0 VCR DVD SLOW PAUSE 1 7 PLAY STOP REC/OTR SETUP TIMER PROG. REC MONITOR ENTER MENU/LIST TOP MENU RETURN CLEAR/C.RESET ZOOM SKIP SEARCH MODE CM SKIP SKIP 1 2 3 4 Option window will appear. 5 Disc > Edit > Original 2 1 Title Delete 6 Scene - Sharp DV-RW350U | Operation Manual - Page 73
TV 1 Disc Edit > Original DISPLAY SPACE 0 VCR DVD SLOW PAUSE Press SETUP button. Select "DISC" using { / B buttons, then press ENTER button. DISC menu will Yes No JAN/ 1 2:00AM CH12 XP Writing to Disc Disc > Edit > Original 1 12 3 This operation may take a while to be completed. JAN/1 - Sharp DV-RW350U | Operation Manual - Page 74
space to record will not be increased. First: DVD 4 Select a desired title using K / L / { / B buttons, then press ENTER button. Playlist menu will appear. Disc > Edit > Playlist POWER REC MODE REC SPEED AUDIO OPEN/CLOSE .@/: 1 GHI 4 PQRS 7 DISPLAY ABC 2 JKL 5 TUV 8 SPACE 0 VCR DEF 3 MNO - Sharp DV-RW350U | Operation Manual - Page 75
Delete Edit Title Name Chapter Mark Index Picture Set DISPLAY SPACE 0 VCR DVD SLOW PAUSE PLAY 6 Press SETUP button. Select "DISC" using { / B buttons, then press ENTER button. DISC menu will appear. Disc Edit Format Finalize Disc Protect OFF ON JAN/ 1 1:00AM CH12 XP 0:01:25 5 Select "Scene - Sharp DV-RW350U | Operation Manual - Page 76
Disc This operation may take a while to be completed. 9 After writing to disc is completed, press SETUP button to exit DISC menu. Putting names on titles VR DVD 7 DISPLAY ABC 2 JKL 5 TUV 8 SPACE 0 VCR DEF 3 MNO CH 6 WXYZ VIDEO/TV 9 SLOW DVD PAUSE 1 PLAY STOP REC/OTR SETUP TIMER PROG. REC - Sharp DV-RW350U | Operation Manual - Page 77
operation may take a while to be completed. 8 After writing to disc is completed, press SETUP to exit DISC menu. JAN/ 1 1:00AM CH12 XP 0:01:25 6 To enter a title name, follow the steps of "Guide JKL 5 TUV 8 SPACE 0 VCR DEF 3 MNO CH 6 WXYZ VIDEO/TV 9 SLOW DVD PAUSE 8 PLAY STOP REC/OTR - Sharp DV-RW350U | Operation Manual - Page 78
4 PQRS 7 DISPLAY ABC 2 JKL 5 TUV 8 SPACE 0 VCR DEF 3 MNO CH 6 WXYZ VIDEO/TV 9 SLOW DVD PAUSE markers in the playlist comes to 999 in total, you buttons, then press ENTER button. Option window will appear. : Disc > Edit > Playlist 1 Chapter 1/1 Title Delete Scene Delete Edit Title - Sharp DV-RW350U | Operation Manual - Page 79
Yes No JAN/ 1 1:00AM CH12 XP Writing to Disc This operation may take a while to be completed. 8 After writing to disc is completed, press SETUP button to exit DISC menu. Yes No JAN/ 1 1:00AM CH12 XP Writing to Disc Setting pictures for thumbnails VR DVD-RW You can set a picture to each title - Sharp DV-RW350U | Operation Manual - Page 80
/CLOSE .@/: 1 GHI 4 PQRS 7 DISPLAY ABC 2 JKL 5 TUV 8 SPACE 0 VCR DEF 3 MNO CH 6 WXYZ VIDEO/TV 9 SLOW DVD PAUSE 1 12 3 JAN/1 1:00AM 4 JAN/1 4:00AM JAN/1 2:00AM 5 JAN/1 5:00AM JAN/1 3:00AM Add New Title Delete Playlist Disc > Edit > Playlist 1 Title Delete Scene Delete Edit Title Name - Sharp DV-RW350U | Operation Manual - Page 81
started Recording Editing Editing DVD-RW discs in VR mode (Playlist) (cont'd) Adding titles to a Playlist VR DVD-RW You WXYZ 9 CH VIDEO/TV 1 Disc > Edit > Playlist > Add New Title 1 12 3 DISPLAY SPACE 0 VCR DVD SLOW PAUSE Press SETUP button. Select PLAY "DISC" using { / B buttons, - Sharp DV-RW350U | Operation Manual - Page 82
VCR DEF 3 MNO CH 6 WXYZ VIDEO/TV 9 SLOW DVD PAUSE "DISC" using { / B buttons, 1 12 3 then press ENTER button. PLAY DISC menu will appear. Disc Edit Format Finalize Disc DISC menu automatically. Original/PlayList menu will appear. Screen: Disc Playlist will appear. Disc > Edit > - Sharp DV-RW350U | Operation Manual - Page 83
Title Name Chapter Mark POWER REC MODE REC SPEED AUDIO OPEN/CLOSE space to record on the disc will not be changed. Be aware to know that the titles once deleted cannot be brought back to the disc. First: DVD JAN/ 1 1:00AM CH12 XP 0:01:25 You cannot select "Chapter Mark". .@/: 1 GHI 4 PQRS - Sharp DV-RW350U | Operation Manual - Page 84
to Disc Yes No This operation may take a while to be completed. 7 After writing to disc is completed, press SETUP button to exit DISC menu. 5 POWER REC MODE REC SPEED AUDIO OPEN/CLOSE .@/: 1 GHI 4 PQRS 7 DISPLAY ABC 2 JKL 5 TUV 8 SPACE 0 VCR DEF 3 MNO CH 6 WXYZ VIDEO/TV 9 SLOW DVD - Sharp DV-RW350U | Operation Manual - Page 85
Recording Changing the SETUP menu Tour of the SETUP menu The following table is the contents which you can set and the default settings. Refer to the following table for useful operation. SETUP menu Items (highlight is the default) 1.Language setting Disc level of your DVD discs. Enter the - Sharp DV-RW350U | Operation Manual - Page 86
a desired item using K / L buttons, then press ENTER button. 86 Note • Only the languages supported by the disc can be selected. • Audio Language setting may not be available to some discs. • You can change or switch off the subtitles on a DVD disc also from the disc menu if it is available. - Sharp DV-RW350U | Operation Manual - Page 87
Range Control Fast Forward with Audio DVD 4:3 Letter Box All OEFnFglish English FOreringcinhal SOpFaFnish Other ON OFF • Select a setting using K / L buttons, then press ENTER button. Your setting will be activated. Playing discs Editing Changing the SETUP menu VCR functions Others Español If - Sharp DV-RW350U | Operation Manual - Page 88
DISC menu. SETUP/DISC menu will appear. Setup Menu 2 Select "SETUP" using { / B buttons, then press ENTER button. SETUP menu will appear. Setup POWER REC MODE REC SPEED AUDIO OPEN/CLOSE .@/: 1 GHI 4 PQRS 7 DISPLAY ABC 2 JKL 5 TUV 8 SPACE 0 VCR DEF 3 MNO CH 6 WXYZ VIDEO/TV 9 SLOW DVD DVD - Sharp DV-RW350U | Operation Manual - Page 89
Recording Changing the SETUP menu Display setting (cont'd) OSD Background Transparency (Default : 35%) Set the background transparency of OSD screen. You can choose one among 0% through 100%. Setup > Display DVD VCR DVD discs Editing Changing the SETUP menu VCR functions Others Español 89 - Sharp DV-RW350U | Operation Manual - Page 90
disc. 1 Press SETUP button to display SETUP/DISC menu. SETUP/DISC menu will appear. POWER REC MODE REC SPEED AUDIO OPEN/CLOSE .@/: 1 GHI 4 PQRS 7 DISPLAY ABC 2 JKL 5 TUV 8 SPACE 0 VCR DEF 3 MNO CH 6 WXYZ VIDEO/TV 9 SLOW DVD only on the discs which are recorded in the Dolby Digital - Sharp DV-RW350U | Operation Manual - Page 91
(Default : OFF) Note When playing a DVD-RW disc recorded in VR mode • If the audio source on a disc is Dolby Digital format, set "Dolby Digital" is NOT compatible with DTS, set to "OFF". Playing discs Editing Changing the SETUP menu VCR functions Others Español Dynamic Range Control (Default : - Sharp DV-RW350U | Operation Manual - Page 92
button. 92 Note • Parental lock function may not be available to some discs. • With some DVDs, it may be difficult to find if they are compatible with parental lock. Be sure to check if the parental lock function operates in the way that you have set. • Record the password in case you forget it. - Sharp DV-RW350U | Operation Manual - Page 93
Recording Changing the SETUP menu Settings for Parental lock level (cont'd) Parental Lock (Default : All) Set the Parental Lock level. Setup > Playback TV Aspect Parental Lock Disc DVD TV Aspect Parental Lock Chang4Ae:3llPLaeststewroBrodx? YeA8s ll No Disc Menu VCR functions Others Español - Sharp DV-RW350U | Operation Manual - Page 94
be automatically adjusted upon playback.To adjust the tracking manually, press the CHANNEL K/L buttons on the front panel of the unit or CHK/CHL buttons on the remote control. Recording and One-touch timer recording Recording VCR Before recording, make sure: • The desired channel is selected by - Sharp DV-RW350U | Operation Manual - Page 95
be in STOP mode and the DVD keeps the current mode. • Unlike a timer recording, you can perform the following operations during a one-touch timer recording. - Turning the power off - Using REC or STOP C buttons. Playing discs Editing Changing the SETUP menu VCR functions Others Español Index - Sharp DV-RW350U | Operation Manual - Page 96
recording. • Press STOP button to stop the search. • If the end of the videotape is reached during a Search, this unit will cancel the search and rewind the videotape. Other operations VCR VCR you playback a videotape recorded in Hi-Fi stereo: Press AUDIO button on the remote control to select Hi- - Sharp DV-RW350U | Operation Manual - Page 97
Getting started Recording Troubleshooting Before requesting service for this unit, check the table below for a possible cause of the problem you are experiencing. Some simple checks or a minor adjustment on your part may eliminate the problem and restore proper operation. Playing discs Symptom - Sharp DV-RW350U | Operation Manual - Page 98
, you may not be able to do some of the operations above. See the instruction manual supplied with the disc. • Multilingual tracks are not recorded on the DVD VIDEO, DVD-R or DVD-RW being played. • The DVD VIDEO prohibits the changing of the language for the sound track. • Try changing the language - Sharp DV-RW350U | Operation Manual - Page 99
record tab when you record to a videotape. If needed, cover the hole with cellophane tape. • Check if a videotape is in this unit. • The motor may rotate for the duration of approximately 5 minutes for efficient operation.This is not a malfunction. Error message Disc Error --- Please eject the disc - Sharp DV-RW350U | Operation Manual - Page 100
are trying to record onto the disc already finalized. Release the finalizing for this disc (page 41). * If you are still having trouble with this unit after checking Troubleshooting, write down the error code and the error description, and contact a Sharp Authorized Service Center for inspection - Sharp DV-RW350U | Operation Manual - Page 101
Before you start Connections Getting started Recording Language (Afan) Oromo Abkhazian Afar Afrikaans Albanian Amharic Arabic Armenian Assamese Aymara 6669 6757 6764 6772 6855 6861 4971 6961 7054 5655 7161 7267 Playing discs Editing Changing the SETUP menu VCR functions Others Español 101 - Sharp DV-RW350U | Operation Manual - Page 102
DVD discs, which have been recorded on, possible to play in DVD players.With this unit, it is possible to finalize DVD-RW/ DVD-R discs. instructions on selective Progressive Scan mode. Regions code Regions associate discs and players with particular areas of the world.This unit will only play discs - Sharp DV-RW350U | Operation Manual - Page 103
Playing discs General System VCR video heads Power requirements Power consumption Weight Dimensions (width x height x depth) Operating temperature Operating humidity TV format Recording Recording format Recordable discs Video recording format Sampling frequency Compression format DVD-Video, DVD-RW - Sharp DV-RW350U | Operation Manual - Page 104
Español Precaciones Para futura referencia, anote los números de modelo y de serie (indicados en la parte posterior esta unidad) en el espacio provisto. No. de modelo: No. de serie: AVISO: PARA REDUCIR EL RIESGO DE INCENDIO O ELECTROCHOQUE NO EXPONGA ESTE APARATO A LA HUMEDAD. PRECAUCIÓN: PARA - Sharp DV-RW350U | Operation Manual - Page 105
started Recording Precaciones (cont.) Importantes Medidas de Seguridad y Precauciones Playing discs 1) Lea producto no funcione normalmente. Ajuste solamente los controles mencionados en el manual de instrucciones; el ajuste incorrecto de otros controles podrá causar VCR functions Others Español - Sharp DV-RW350U | Operation Manual - Page 106
-RW Video Sí Sí No Sí No Sí No DVD-R No Sí No Sí No Sí No *1 El DVD-RW (modo VR) sólo puede reproducirse en equipos de DV compatibles con VR. Nota: Para más detalles sobre las funciones anteriores y las limitaciones implícitas, lea las explicaciones en este manual. Formato del disco Coloque el - Sharp DV-RW350U | Operation Manual - Page 107
DVD (cont.) Before you start Connections Getting started Recording Paso 3: Seleccione la velocidad de grabación 1 Para seleccionar el modo DVD POWER REC MODE REC SPEED AUDIO OPEN/CLOSE .@/: 1 GHI 4 PQRS 7 DISPLAY ABC 2 JKL 5 TUV 8 SPACE 0 VCR lo largo de este manual encontrará Original y - Sharp DV-RW350U | Operation Manual - Page 108
para expulsar la cinta. 1 2 4 POWER REC MODE REC SPEED AUDIO OPEN/CLOSE .@/: 1 GHI 4 PQRS 7 DISPLAY ABC 2 JKL 5 TUV 8 SPACE 0 VCR DEF 3 MNO CH 6 WXYZ VIDEO/TV 9 SLOW DVD PAUSE PLAY STOP REC/OTR SETUP TIMER PROG. REC MONITOR ENTER 3 5 Nota • Cuando se coloca una cinta sin la leng - Sharp DV-RW350U | Operation Manual - Page 109
Recording Español Grabación y grabación con temporizador de un toque (VCR) Grabación VCR 5 TUV 8 SPACE 0 VCR MNO CH 6 WXYZ VIDEO/TV 9 SLOW DVD PAUSE PLAY STOP REC/OTR discs Editing Changing the SETUP menu VCR functions Others Español Grabación con temporizador de un toque (OTR) VCR - Sharp DV-RW350U | Operation Manual - Page 110
Note 110 - Sharp DV-RW350U | Operation Manual - Page 111
Note 111 - Sharp DV-RW350U | Operation Manual - Page 112
WHICH VARY FROM STATE TO STATE. Model Specific Section Your Product Model Number & Description: DV-RW340U, DV-RW350U VCR/DVD Recorder Combination (Be sure to have this information available when you need service for your Product.) Warranty Period for this Product: One (1) year parts and ninety
-
 1
1 -
 2
2 -
 3
3 -
 4
4 -
 5
5 -
 6
6 -
 7
7 -
8
-
9
-
10
-
11
-
12
-
13
-
14
-
15
-
16
-
17
-
18
-
19
-
20
-
21
-
22
-
23
-
24
-
25
-
26
-
27
-
28
-
29
-
30
-
31
-
32
-
33
-
34
-
35
-
36
-
37
-
38
-
39
-
40
-
41
-
42
-
43
-
44
-
45
-
46
-
47
-
48
-
49
-
50
-
51
-
52
-
53
-
54
-
55
-
56
-
57
-
58
-
59
-
60
-
61
-
62
-
63
-
64
-
65
-
66
-
67
-
68
-
69
-
70
-
71
-
72
-
73
-
74
-
75
-
76
-
77
-
78
-
79
-
80
-
81
-
82
-
83
-
84
-
85
-
86
-
87
-
88
-
89
-
90
-
91
-
92
-
93
-
94
-
95
-
96
-
97
-
98
-
99
-
100
-
101
-
102
-
103
-
104
-
105
-
106
-
107
-
108
-
109
-
110
-
111
-
112
 |
 |
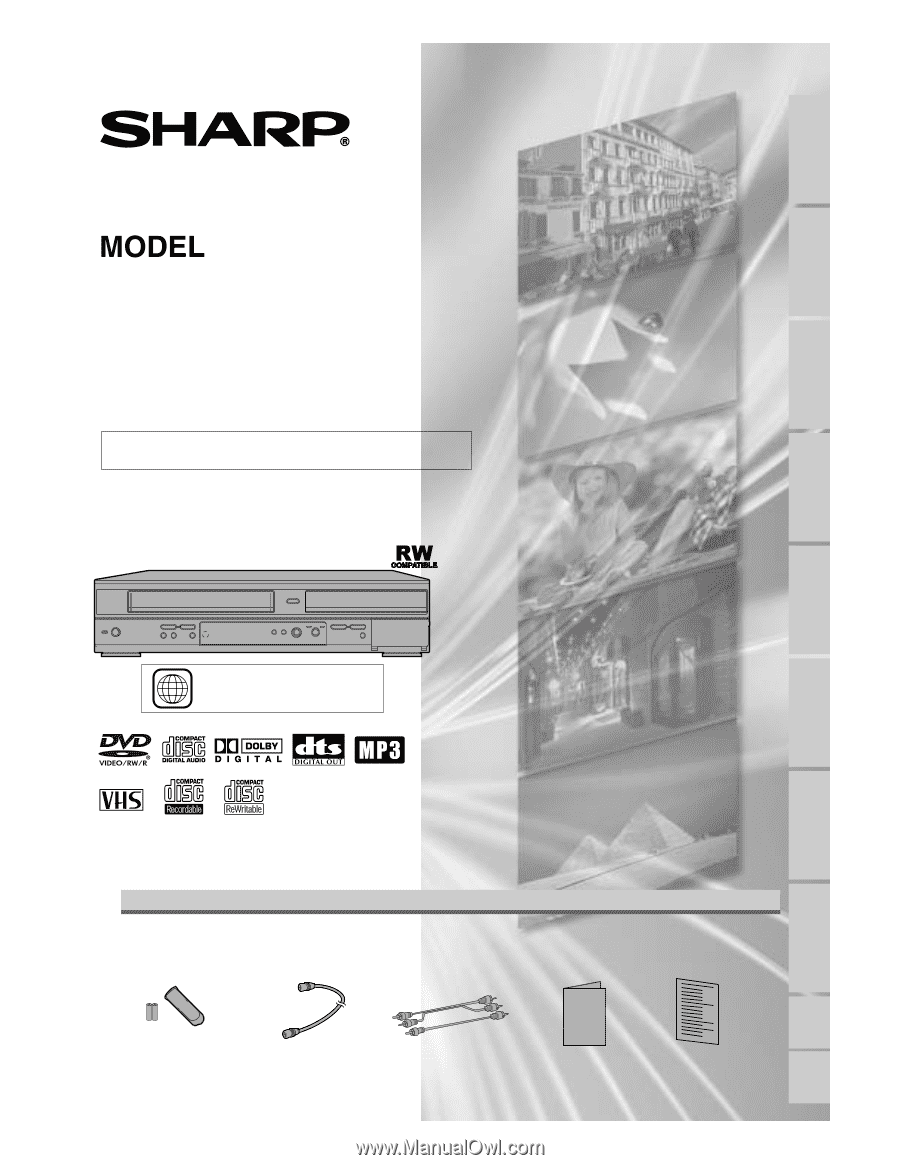
VCR/DVD RECORDER
COMBINATION
OPERATION MANUAL
Please read this Operation Manual carefully before using
your VCR/DVD RECORDER COMBINATION.
1
The region number for
this unit is 1.
INSTRUCCIONES EN ESPAÑOL INCLUIDAS.
DV-RW340U
DV-RW350U
Before you start
Español
Recording
Playing discs
Editing
Connections
Getting started
Changing the SETUP menu
VCR functions
Others
Operation Manual
Supplied Accessory
• Remote control
(9HSNB
11
4UD)
with two “AA” size
batteries
• Round Coaxial cable
(9HSWPZ090
1
TM003)
• Audio/Video cables
(9HSWX
1
E56B5-00
1
)
• Operation Manual
(9HS
1
VMN20224)
• QUICK USE GUIDE
(9HS
1
VMN20237)