Sharp LC-70LE732U LC-70LE732U Operation Manual - Page 64
Displaying Updated Information and, Support Service
 |
View all Sharp LC-70LE732U manuals
Add to My Manuals
Save this manual to your list of manuals |
Page 64 highlights
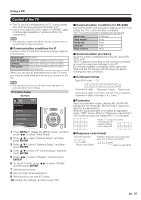
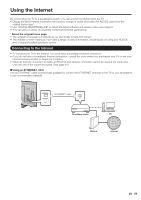
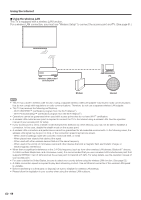
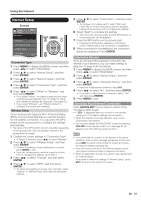
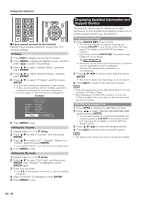
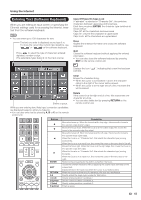
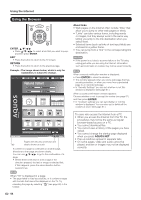
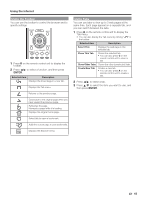
Using the Internet H If you cannot connect to the Internet Perform the procedures below to check your TV's network settings. IP Setup 1 Press EXIT to display the normal TV screen. 2 Press MENU to display the MENU screen, and then press c/d to select "Initial Setup". 3 Press a/b to select "Internet Setup", and then press ENTER. 4 Press a/b to select "Network Setup", and then press ENTER. 5 Press a/b to select "IP Setup", and then press ENTER. • Check that numbers are displayed for each setting. • If there are any settings without numbers, specify the numbers by following the on-screen instructions. • For information on how to enter text, see page 63. Example Setting IP information [Current Setup] IP Address : Auto Setup Netmask : Auto Setup Gateway : Auto Setup DNS : Auto Setup Proxy : No Use MAC Address : XX:XX:XX:XX:XX:XX Change Initialize 6 Press MENU to exit. Setting the Country 1 Repeat steps 1 to 4 in IP Setup. 2 Press a/b to select "Country", and then press ENTER. 3 Press a/b to select "US", "Canada", "Mexico" or "Others", and then press ENTER. • If you select "Others", you need to set the desired area. 4 Press MENU to exit. Setting the Zip Code 1 Repeat steps 1 to 4 in IP Setup. 2 Press a/b to select "Zip Code", and then press ENTER. After "Change" is highlighted, press ENTER again. 3 Enter your zip code. • Use 0-9 on the remote control unit, or use the software keyboard. 4 After "Complete" is highlighted, press ENTER. 5 Press MENU to exit. Displaying Updated Information and Support Service This function can be used to display up-to-date information on the original home page and allow you to receive support service over the network. Original Home Page 1 Press AQUOS NET once or twice. • You can also display the original home page by pressing FAV APP on the remote control unit. See page 34 for details on the FAV APP key Assign function. • Each time you press AQUOS NET, the screen image toggles as shown below: TV+Web Web TV • When you are not connected to the Internet, a network function explanation screen is displayed. The services displayed vary depending on circumstances. 2 Press a/b/c/d to select a title, and then press ENTER. • The service details vary depending on circumstances. 3 Press EXIT to return to the normal TV screen. • Web page appearances may differ depending on the type of screen (TV+Web or Web). • When displaying TV+Web with a channel in which the V-Chip is enabled, the cursor keys on the remote control unit do not function. AQUOS Advantage Live 1 Press APPS to display the application window. 2 Press c/dto select "AQUOS ADVANTAGE LIVE", and then press ENTER. • You can also display the AQUOS ADVANTAGE LIVE screen by pressing FAV APP on the remote control unit. See page 34 for details on the FAV APP Key Assign function. 3 Press a/b/c/d to select the desired service. 4 Press EXIT to return to the normal TV screen. • The display may change as a result of a software update. 62
-
 1
1 -
2
-
3
-
4
-
5
-
6
-
7
-
8
-
9
-
10
-
11
-
12
-
13
-
14
-
15
-
16
-
17
-
18
-
19
-
20
-
21
-
22
-
23
-
24
-
25
-
26
-
27
-
28
-
29
-
30
-
31
-
32
-
33
-
34
-
35
-
36
-
37
-
38
-
39
-
40
-
41
-
42
-
43
-
44
-
45
-
46
-
47
-
48
-
49
-
50
-
51
-
52
-
53
-
54
-
55
-
56
-
57
-
58
-
 59
59 -
 60
60 -
 61
61 -
 62
62 -
 63
63 -
 64
64 -
 65
65 -
 66
66 -
 67
67 -
 68
68 -
 69
69 -
70
-
71
-
72
-
73
-
74
-
75
-
76
-
77
-
78
-
79
-
80
-
81
-
82
-
83
 |
 |
